
Join Hack Club Horizons! Ship your projects and fly to your first hackathon →
In this workshop we'll be learning how to push your website on GitHub (a website that provides hosting for software development and version control using Git), and host it on Netlify with a custom domain from Namecheap.
Some terms you should know:
Deploying: The process of packaging and installing the code to production environment (the final environment/work that is ready to be publicly available) is called “deployment”, and in the context of a web application that would be “web deployment”.
Hosting: Hosting is essentially the process of uploading your code on a remote server (like GitHub, GitLab etc.)
Continuous Deployment: Continuous deployment is a strategy for software releases wherein any code commit is automatically released (or deployed) into the production environment. It aims at building, testing, and releasing software with greater speed and frequency.
Custom Domains: A custom domain is a unique branded label that's connected to the IP address of a website. Like 172.217.160.238 is one of the IP addresses of Google search and the custom domain that's connected to it is : google.com
Part 1: The Prerequisites
-
A GitHub Account (it's just as easy as signing up for any other website!)
-
Next, we need GitHub's student developer pack for this workshop so that we can take advantage of Namecheap's free 1 year custom domain name. You can use Hack Club's Hack Pack to instantly get approved for GitHub's student developer pack!
-
A little knowledge about Git, a Version Control System.
That's all we need for this workshop!
Part 2: Create a React Website
In this workshop we'll be using a boilerplate React app, but if you already have a website ready, you can skip to Part 3!
Begin by visiting repl.it/languages/html.
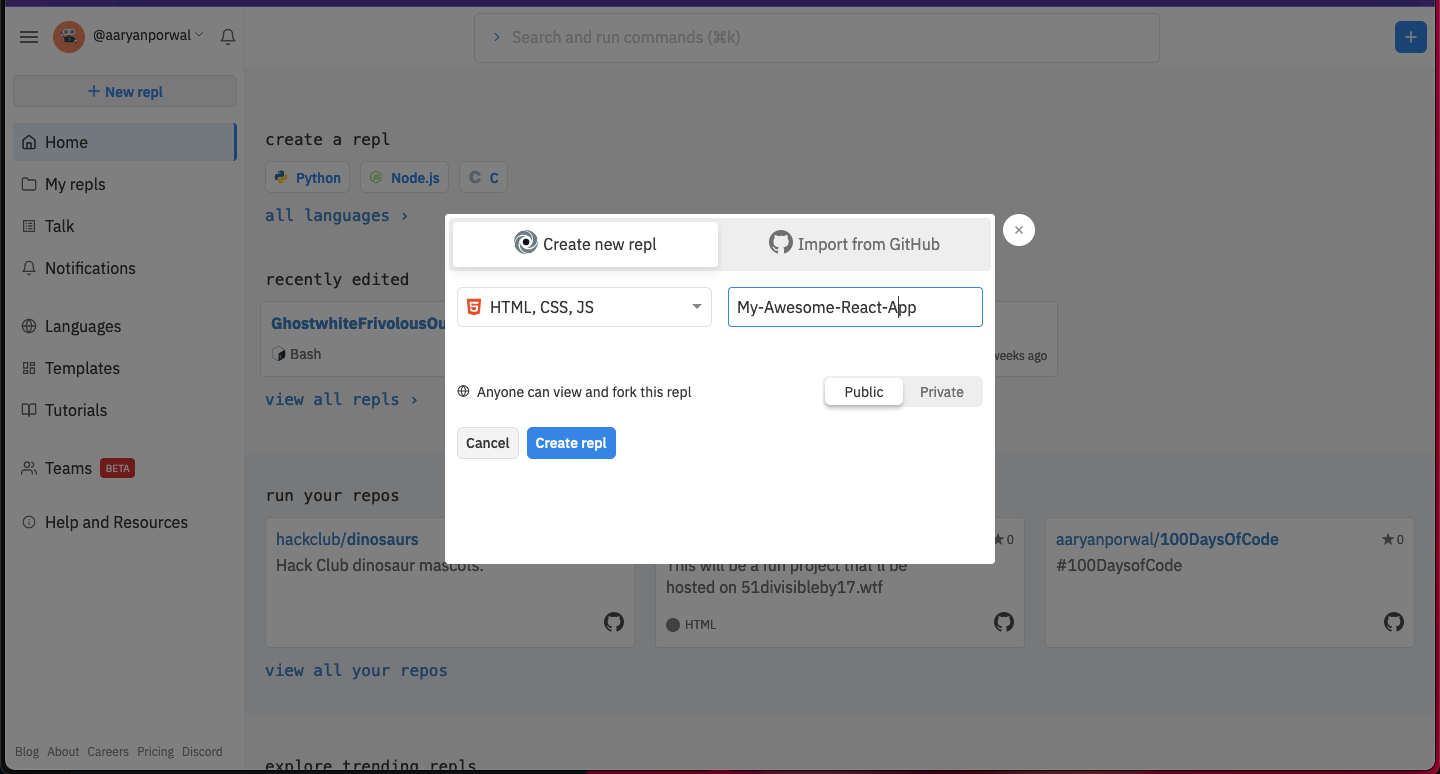
You should see something like this:
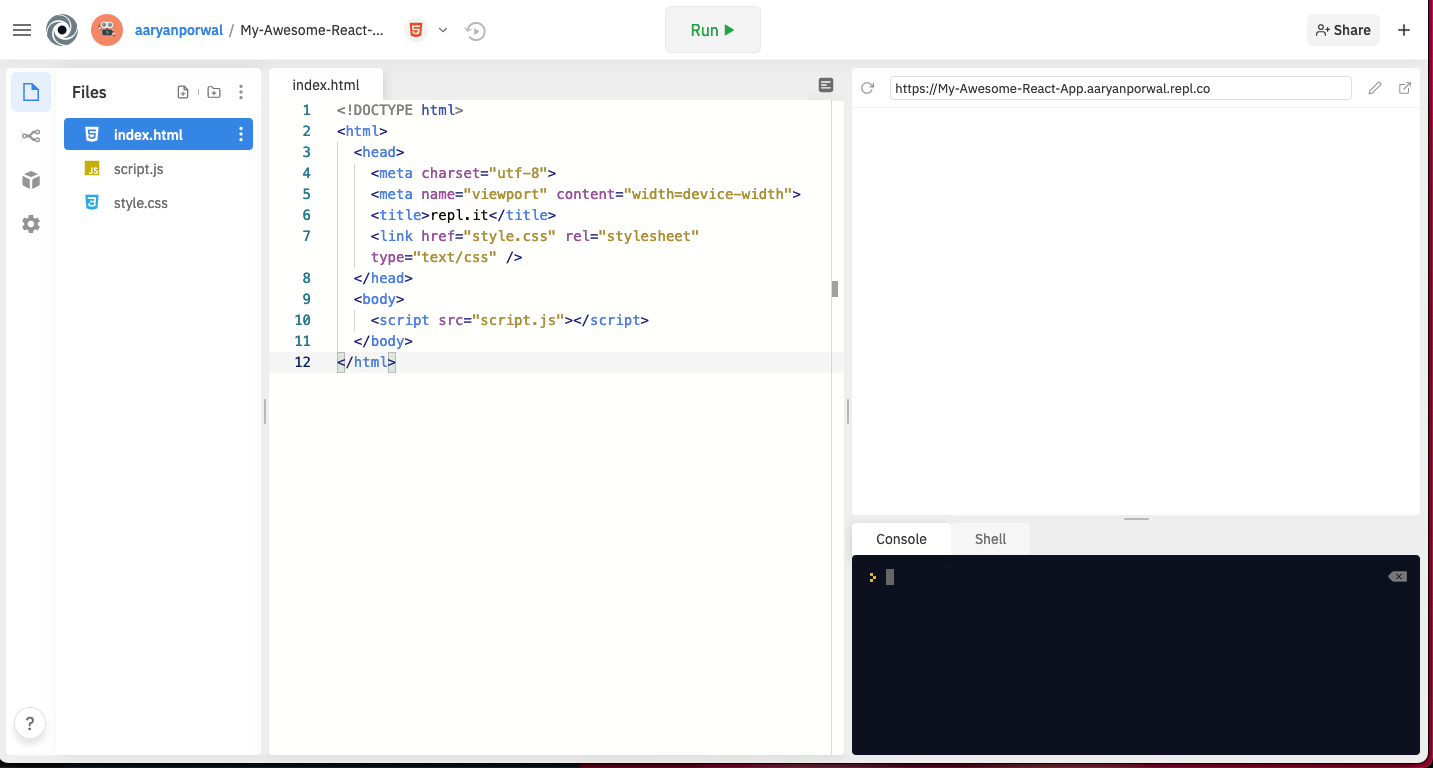
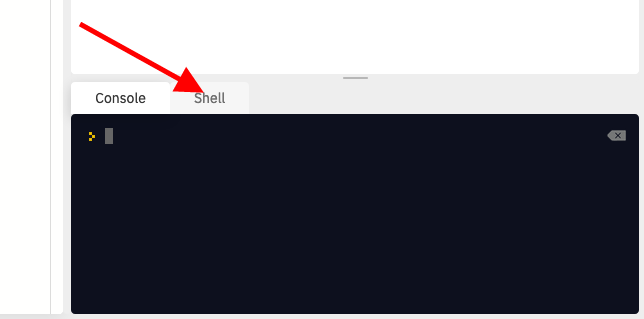
Now in the bottom right black section above, click on "Shell":
This is our repl.it instance's shell (or terminal), it should look like this:
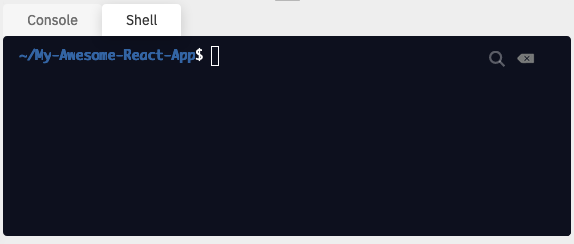
In the shell, type:
npx create-react-app my-awesome-app
cd my-awesome-app
It'll take 2-3 minutes for it to complete. This will essentially pull up boilerplate React code. After the completion, you'll see a folder in your repl.it instance inside, which will be our React app!
Now let's initialize a git repo in our app and make a commit. Head over to your repl.it's shell and type:
git init
git add .
git commit -m "Initial Commit"
This will throw an error, asking for your name and email address. To remove this error and make a commit, type:
git config --global user.email "<your email>"
git config --global user.name "your name>"
git commit -m "Initial Commit"
Note that the
npx create-react-appcommand automatically makes a git repo and makes a commit for you, but this doesn't happen if you run it on repl.it
Part 3: Pushing to GitHub
Now, create a new GitHub repo and upload your project to GitHub.
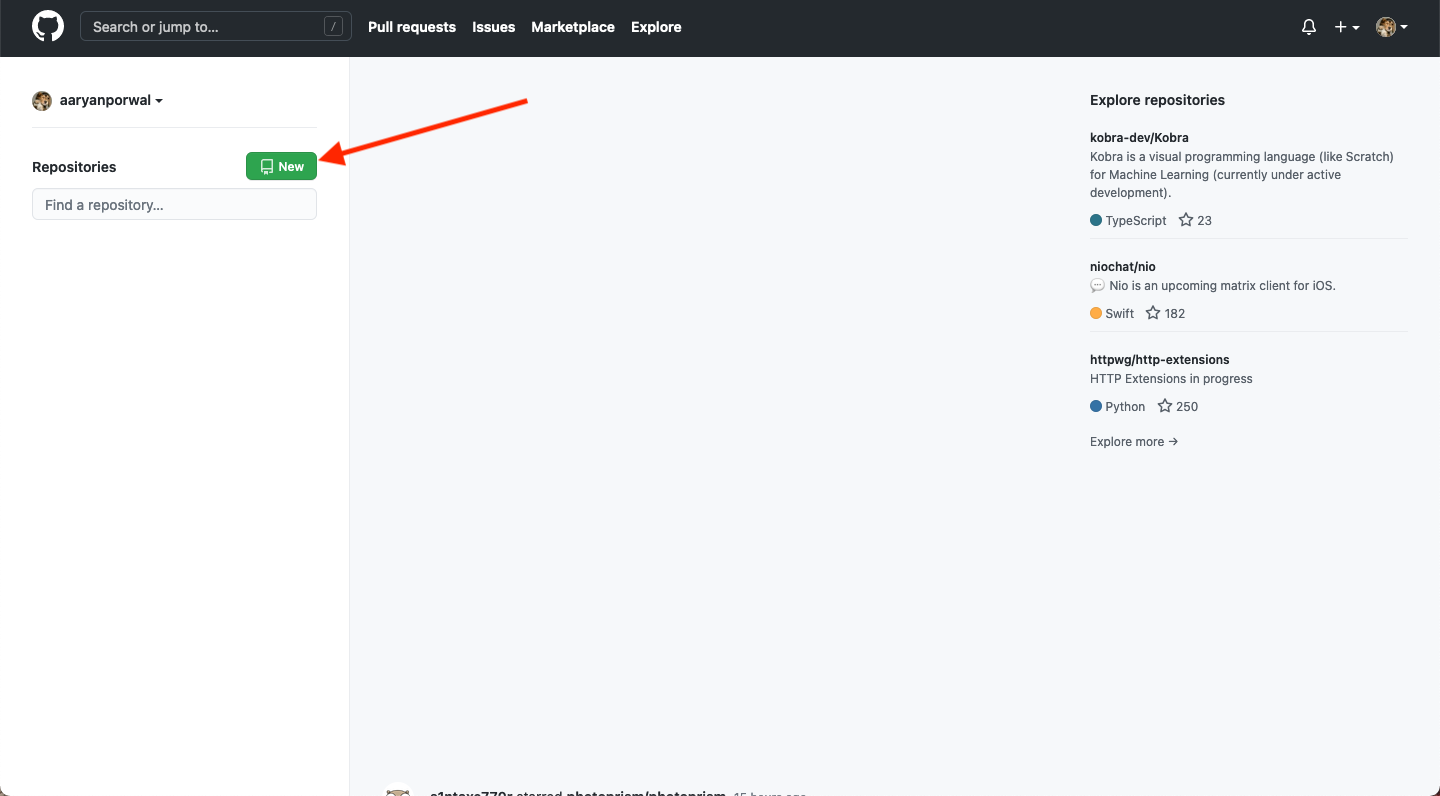
- Open GitHub, sign-in, and then click on the "New" button in the top left:
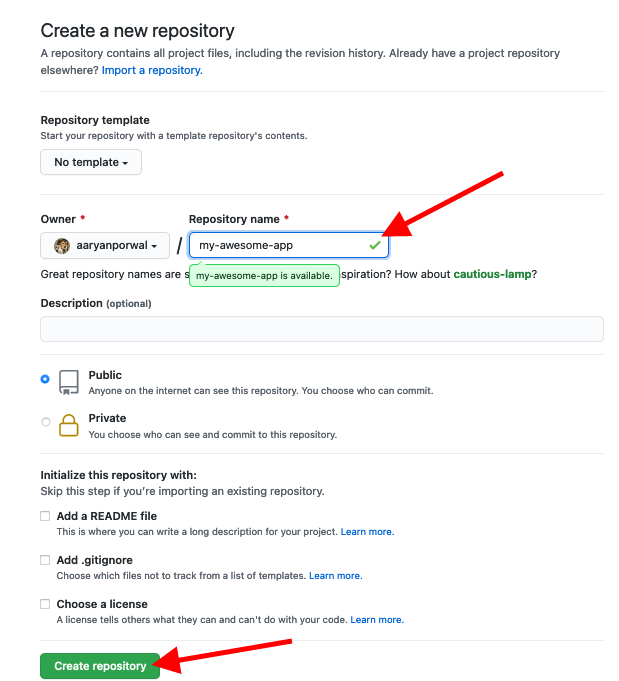
- Type a unique name (there shouldn't be an existing repository with the same name) for the repository, and click the "create repository" button at the bottom of the screen:
- After creating the repository, you should see the following screen:
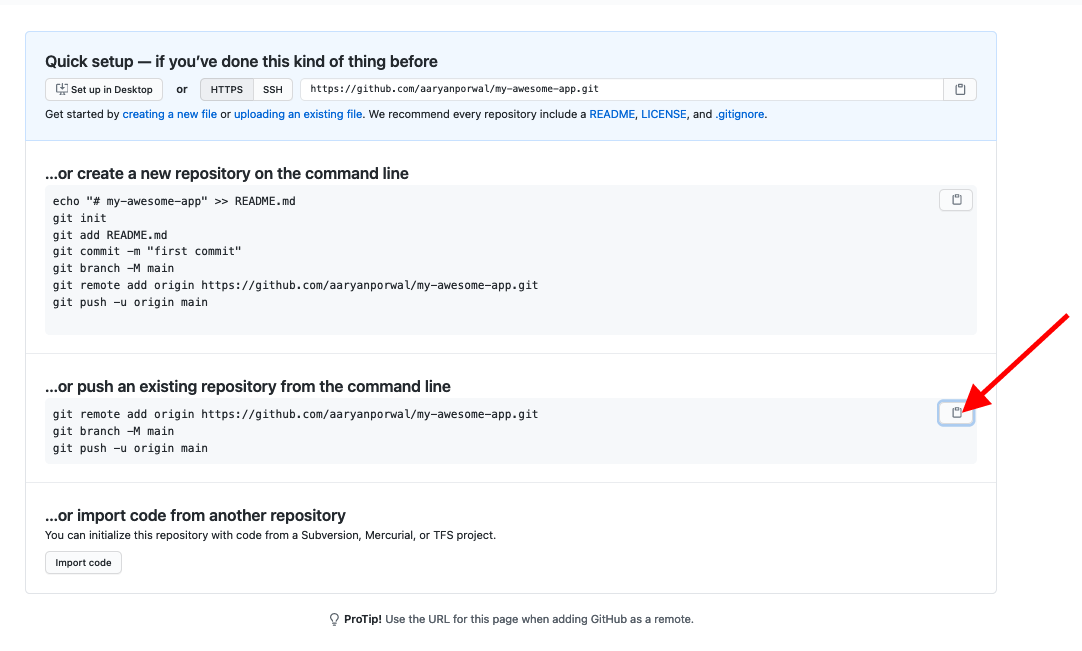
Click on the clipboard sign on the right side of the "..or push an existing ..." to copy the code.
The code we copied tells our repl.it's git where our "remote" is or in other words, where and on which branch should the git repository be "pushed".
- Next, head over to your repl.it instance's shell and type
cd my-awesome-appto change directory and paste in the code that we copied earlier from GitHub
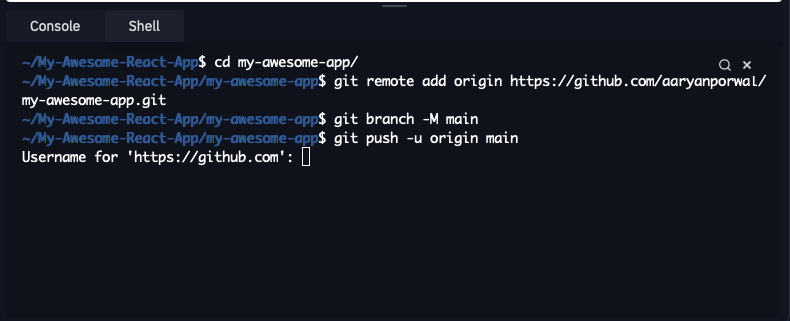
After executing the code, git will ask for your GitHub's username and password, so type that and press enter.
If you see the following screen, you've successfully uploaded your project on GitHub!
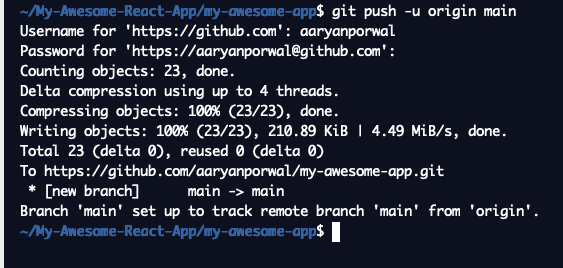
Refresh your repository's page on GitHub and make sure the changes are reflected there as well!
Part 4: Set Up Netlify for Hosting
Netlify is a web hosting service that makes it super easy to deploy a website on the Internet and do awesome things like adding a custom domain.
Netlify and other similar services (like Vercel, Firebase, AWS Lambda and Azure Serverless) are also known as "Serverless Webhosts". "Serverless" essentially abstracts away the complications of working with backend architecture. In simple words it's like pawning off the complicated work to a third party so that the you the user can focus on shipping more.
Log into Netlify (create an account if you haven’t already).
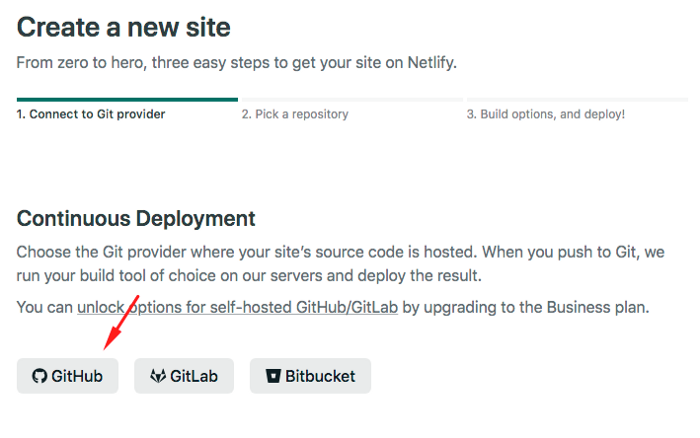
- Click on “New site from Git”:

- On the next screen, we'll be telling Netlify where our project is located at, so select “GitHub”
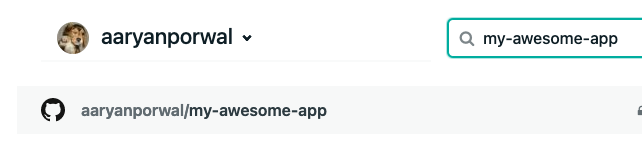
- Now, scroll down to find the GitHub repo for your app:
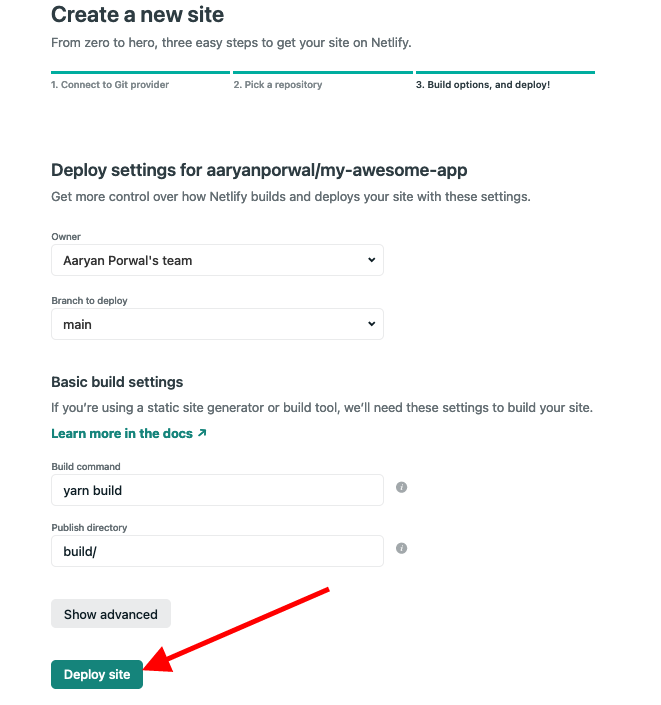
- Then, click on "Deploy Site"
- Next, click on "Domain Settings" to add a custom domain to your deployment
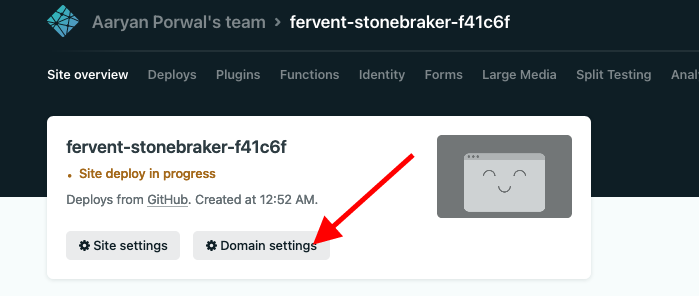
- In the Domain Settings, you can see a strange domain provided by Netlify. You can click on that to see how your project looks like!
In the next part we'll add a custom domain to our application!
Part 5: Custom Domain
Netlify provides a default web address for sites on Netlify, but it...kinda sucks. If I asked you to close your eyes and repeat back your site's domain, you probably couldn't. But don't worry—Netlify makes it super easy to add a custom domain!
First, get a free one year custom domain from Namecheap Education using your GitHub account (psst. you don't even need a credit card for this!).
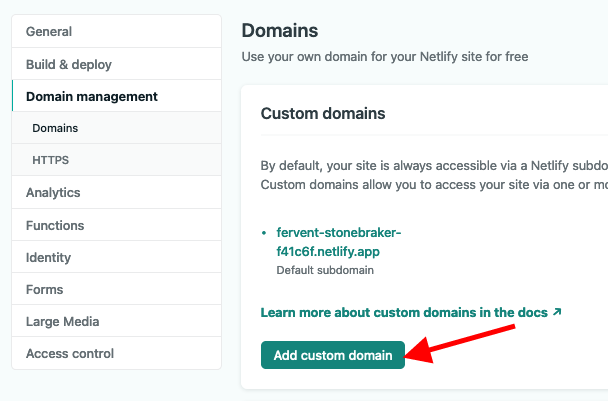
Next, In Netlify's Domain Setting screen:
- Click on "Add custom domain"
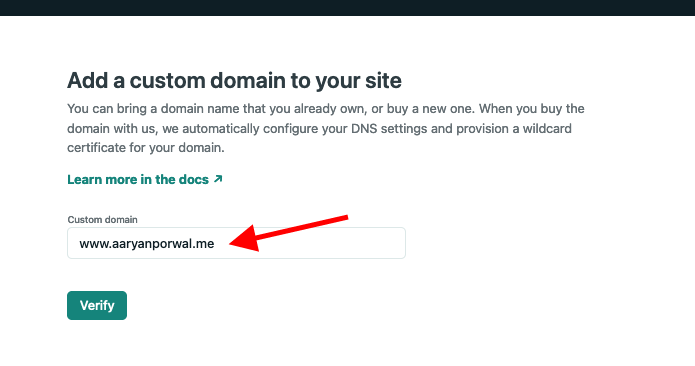
- Type in the domain that you got from Namecheap and click "Verify"
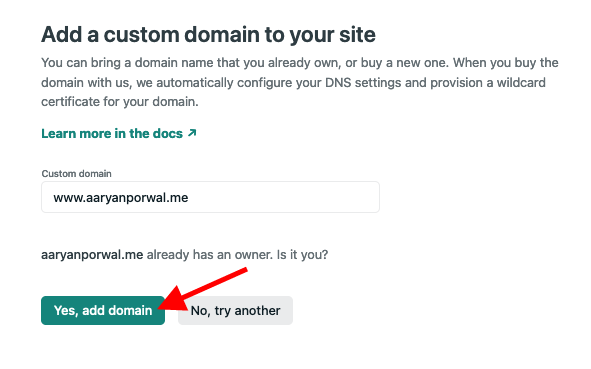
- You'll see a prompt saying your domain already has an owner. Click on "Yes, add domain"
- Back on the Domain Settings screen, copy the
.applink—we'll register this link with our domain on Namecheap.
Now, sign in to namecheap.com with the account you got your custom domain from so that we can add the DNS Records, think of records as the postage information you use to make sure your email is directed to the right place:
Now, we need to manage the DNS records of our domain to point to our Netlify site. Think of DNS records as the "postage information" you use to make sure your domain is redirected to the right place.
Sign into namecheap.com with the account you used to get your custom domain.
- On the Dashboard, click on the
Managebutton
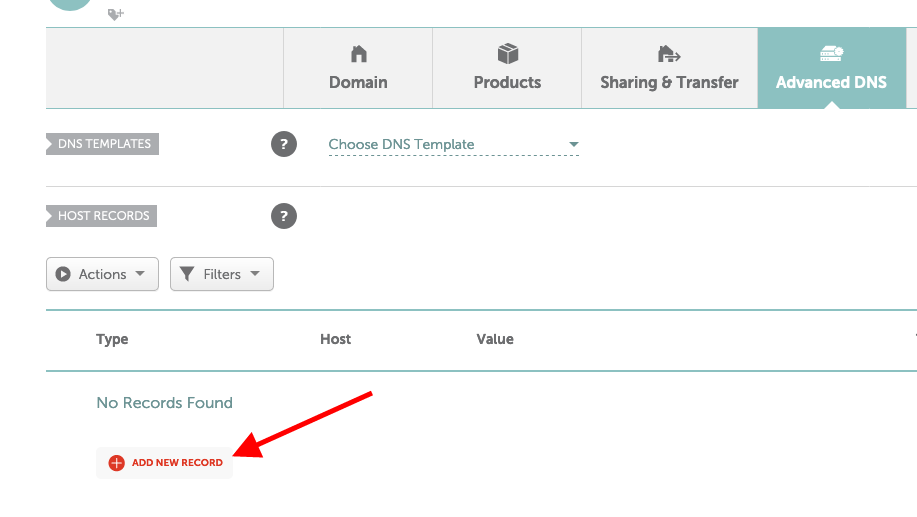
- Next, click on "Advanced DNS"

- Click on "Add New Record"
- Choose
CNAMEfrom the dropdown. Typewwwin the Host field. In the Value field, paste the.applink that Netlify gave you. Leave the TTL field to default "Automatic" and hit the green check mark.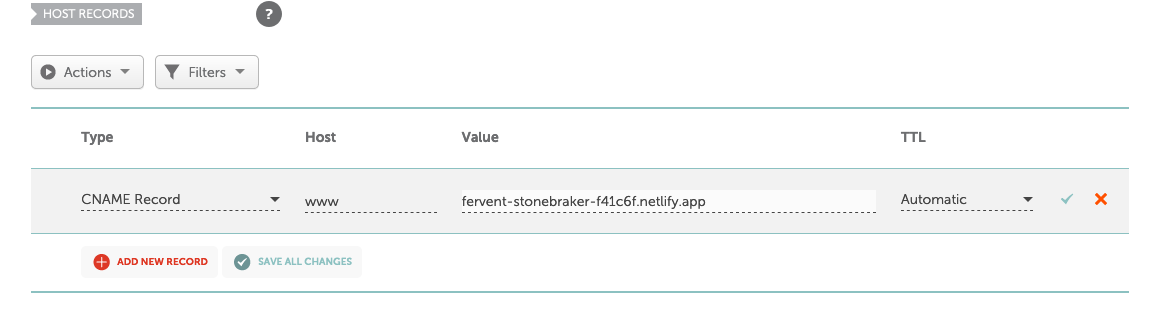
Canonical Name record (CNAME Record)—can be used to alias a hostname to another hostname (in our case we aliased our Netlify's hostname). When a DNS client requests a record that contains a CNAME, which points to another hostname, the DNS resolution process is repeated with the new hostname.
- After some time, your Netlify's Domain Setting screen will show your domain in green, indicating everything is setup correctly!
Now head over to your browser's address bar and type in your new domain and flex it off! 🕺
Where Can You Go From Here
-
Add a Subdomain: (for example,
workshops.hackclub.com). Most websites are set up so that if you typeexample.cominto a browser, you'll be redirected towww.example.com. It's actually a technical process to connect your root domain to thewwwdomain. Subdomains will improve your search ranking and website traffic significantly. Search engines recognize subdomains as completely separate web addresses from your root domain. -
Custom Email Address Forwading: Having your own domain on email address is really cool, and can be useful if you want to start a business. There are email services that let you do this for a monthly fee (G-Suite for example). But for a personal website, paying $6-10 every month just to have a custom domain email seems not worth it. So a lot of domain providers (like Namecheap) provide "Free Email Forwarding". Basically it’s the same as using your custom domain email address as an alias for your personal email account. For example, when someone send an email to
johndoe@yourdomain.comit will be forwarded tojohndoe@gmail.com. Pretty cool, right?
The End :)
In this workshop we skimmed through a lot of topics, so take your own time, and understand stuff better. There are a few points I'd like to mention though:
In this workshop we put our website's code in a repository on GitHub which was public. That means anyone can essentially copy our code, so there are two ways to go from here:
One path is to make your website Open Source (which is if you want the source code to be publicly accessible). And if you choose this path, you can use one of the Open Source Licenses. To help with choosing a license, GitHub along with the community have made an amazing website that you can check out here.
The other way to go is to make your website Closed Source (that is don't want the source code to be open to public). To do this, you can simply make your GitHub repository private.
Important Links
Happy Hacking!