

Join Hack Club Horizons! Ship your projects and fly to your first hackathon →
In this workshop, you'll build a secure web login page using Firebase.
Firebase is a platform developed by Google for creating mobile and web applications.
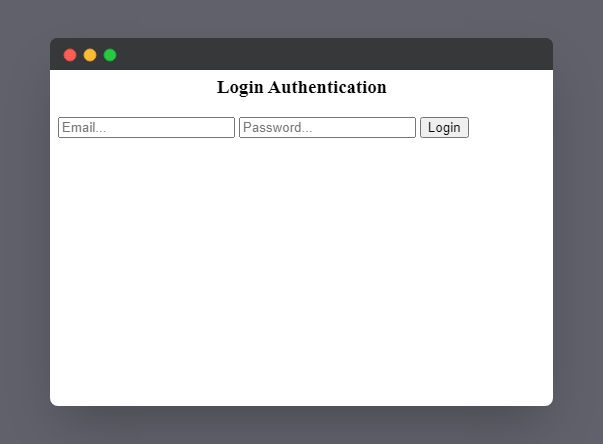
You will make something like this 👇
Check out this demo of the final product!
You can test out the demo site using the following credentials:
- Email:
login@authentication.com - Password:
password
Getting Started 🚀
To get started, you should have a basic knowledge of:
- HTML
- CSS
- JavaScript
So let's begin 💨
Creating a Firebase project 💻
First, you will need to sign in to Firebase using a Google account. If you don't have one, you can create one here.
After signing in, you will see a page similar to this:
In the image above, you'll see the Go to console button at the top right corner. Click on that, and you will be redirected to the console section.
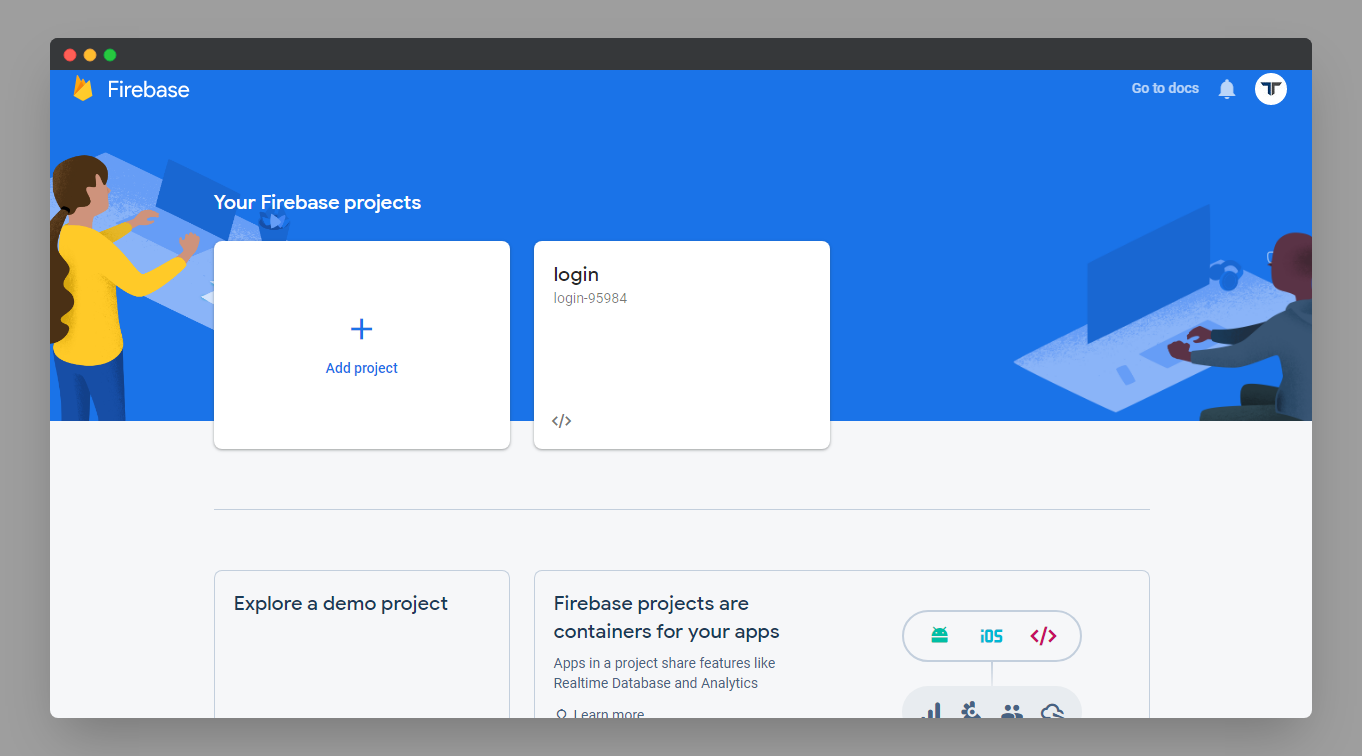
In the console section, you'll see all your Firebase projects and the Add Project button. Click on the Add Project button to create a new project.
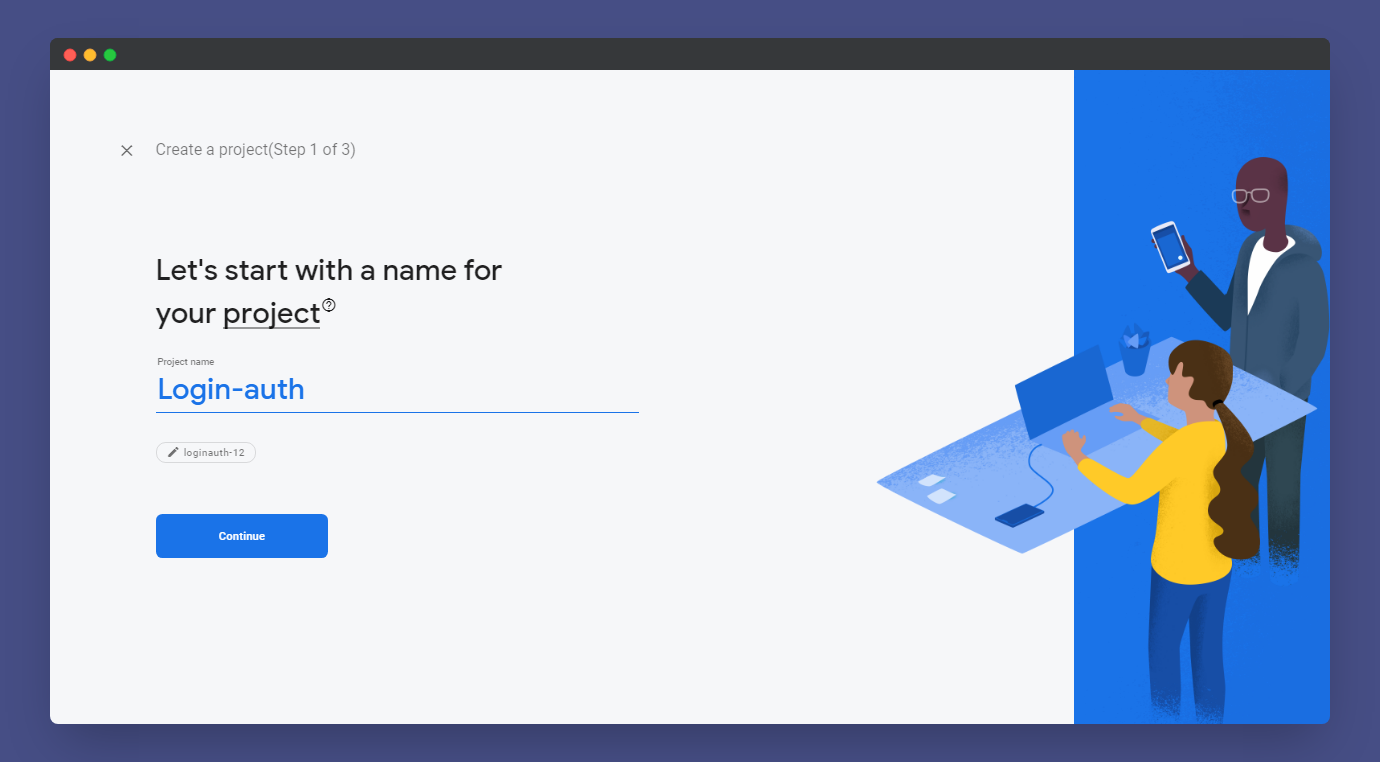
Here you have to give a name to your Firebase project such as Login-auth.
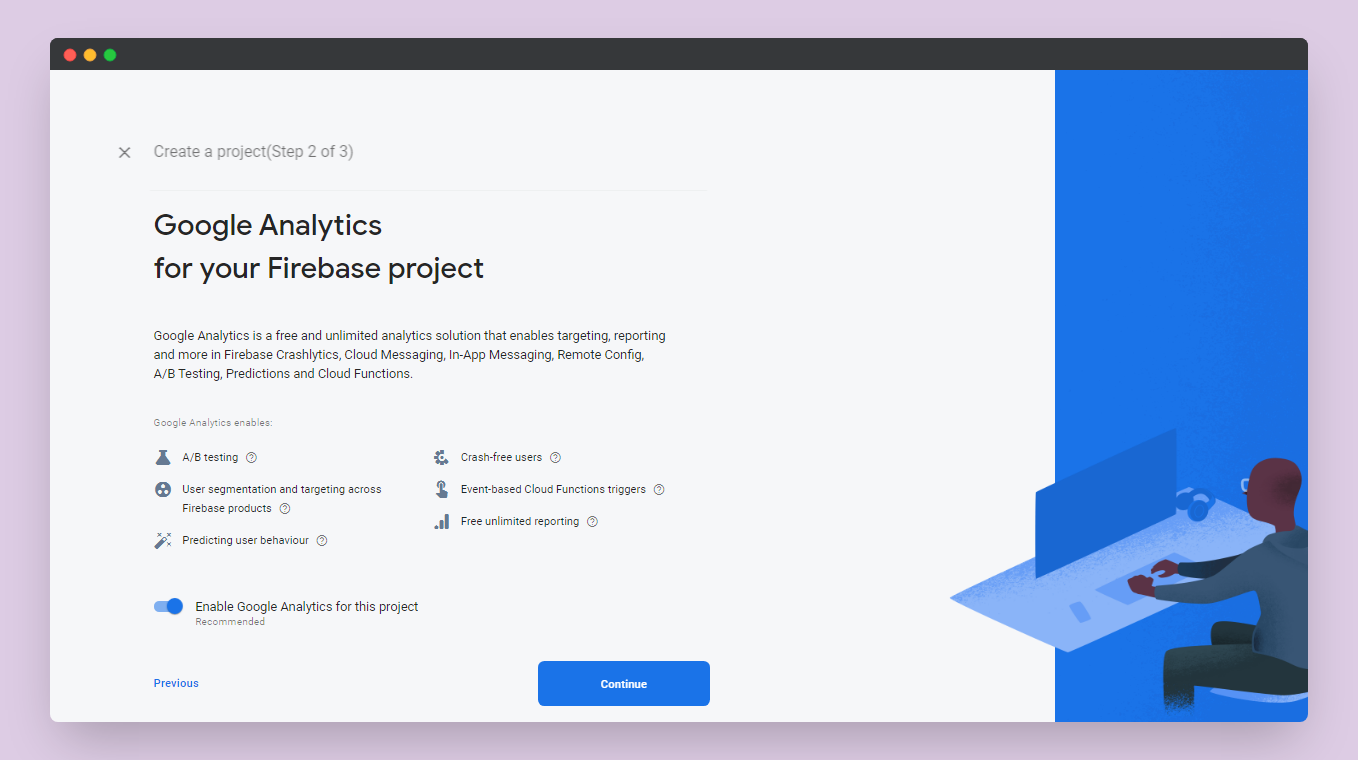
Here is an optional step where you can use Google Analytics for your project, but in this workshop, you won't need it. After giving a name to your project click the continue button to proceed further.
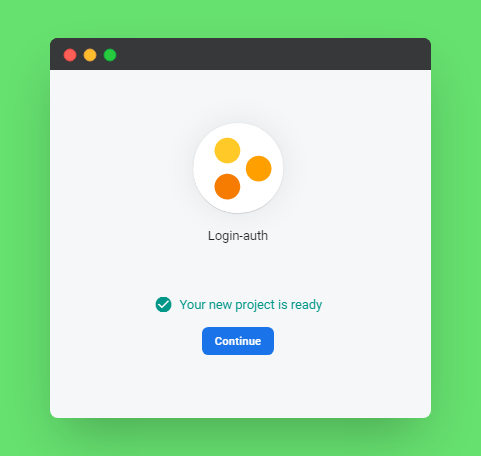
Now you should see Your new project is ready.
Hooray! 🎉 You just created a new Firebase project.
Connecting Firebase to your webpage 🔗
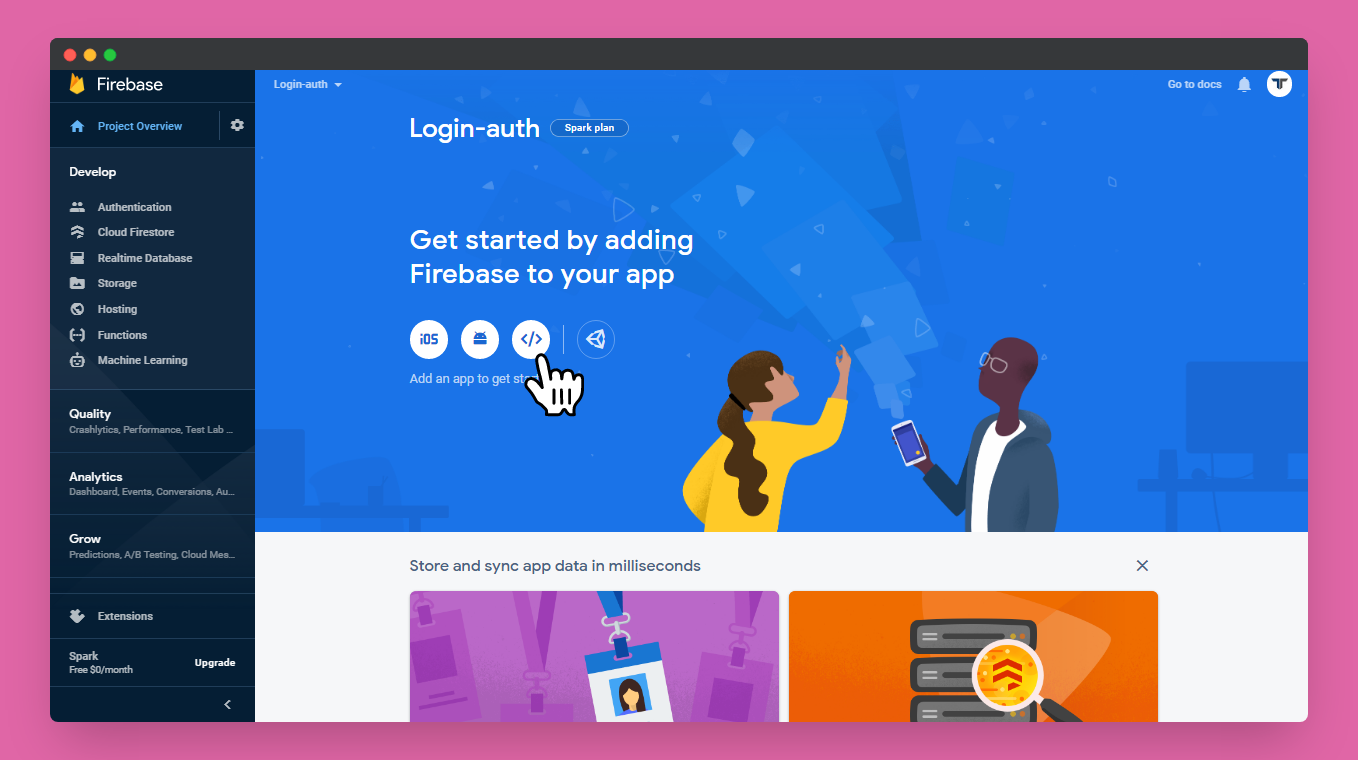
After successfully creating the Firebase project you will see your project console.
At the project's console landing page you will see Get started by adding Firebase to your app. Below that you will see three options of integrations:
- iOS
- Android
</>(this option is for web which we are using so click on that)
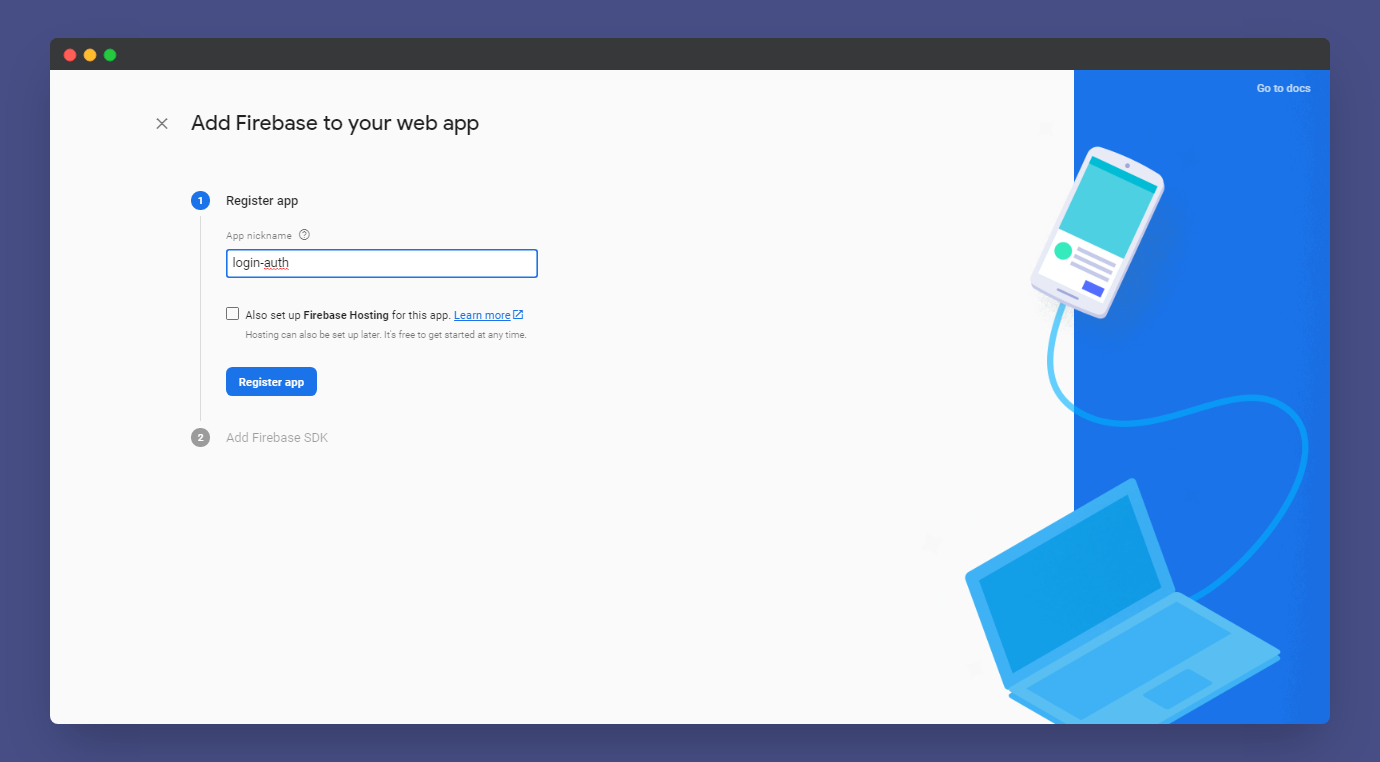
After clicking </> a new page will pop up and ask you for a name for your app. For this workshop we will use login-auth as the app name.
Here is an important part!
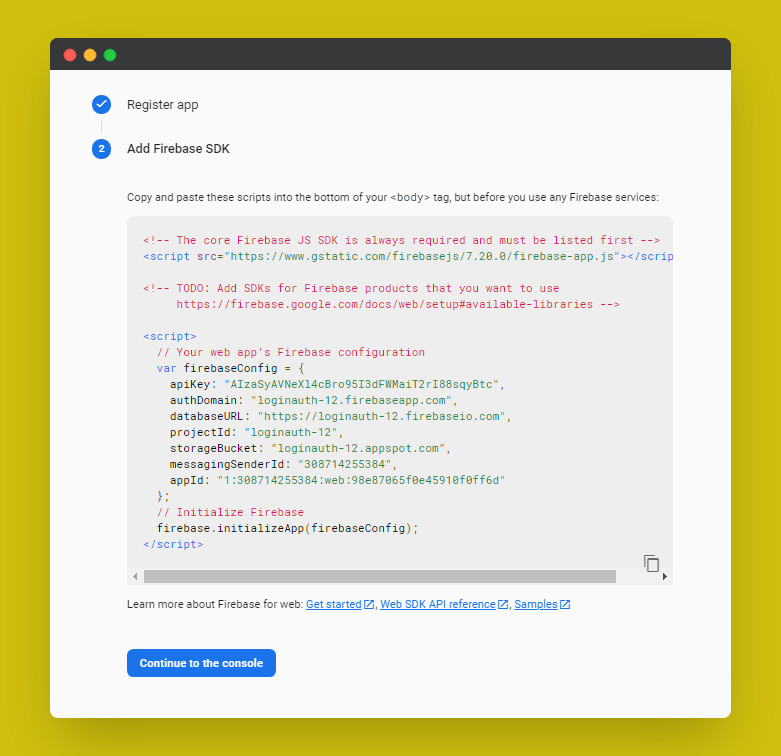
You will now see some JavaScript code. This code helps your website connect to your Firebase project. Make sure you copy and paste this somewhere as it is required later.
After saving the code click on continue to console.
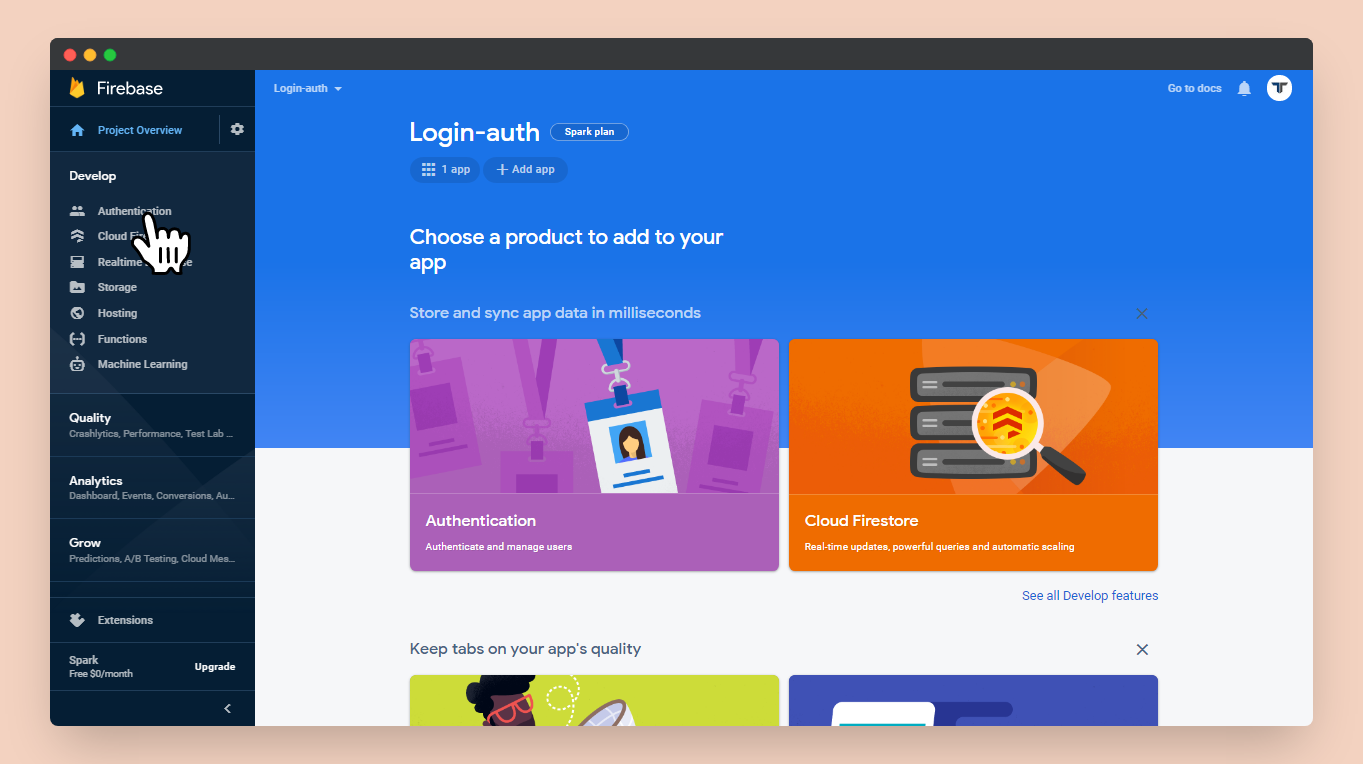
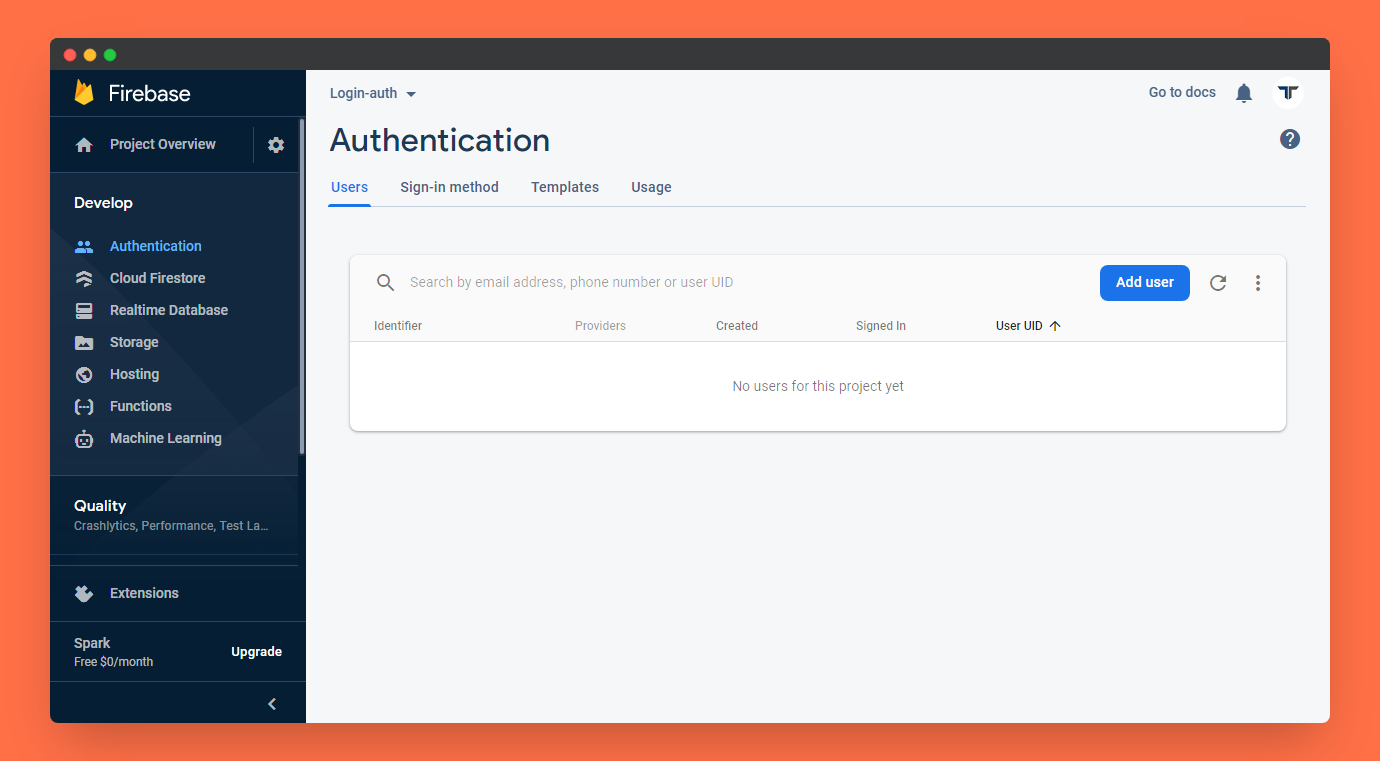
After that you need to add the existing users so that they can login. For that you need to enable Email/Password authentication in your project's Authentication section. To do that you need to click on the tab Authentication on the top left Develop section.
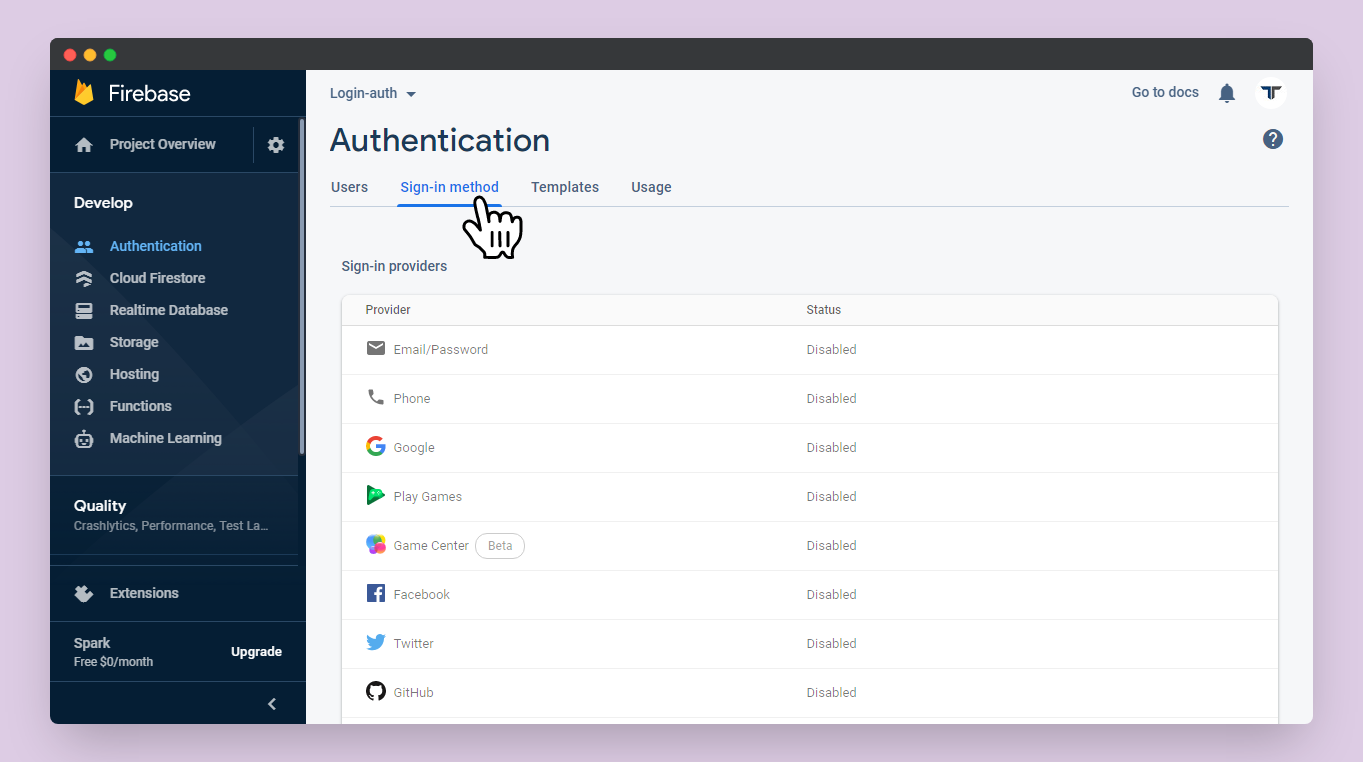
Here in the Authentication page, you'll see different tabs:
- Users
- Sign-in method
- Templates
- Usage
Click on the Sign-in method.
Here you need to enable Email/Password in the sign-in providers section. Click on Email/Password, enable it, then save it.
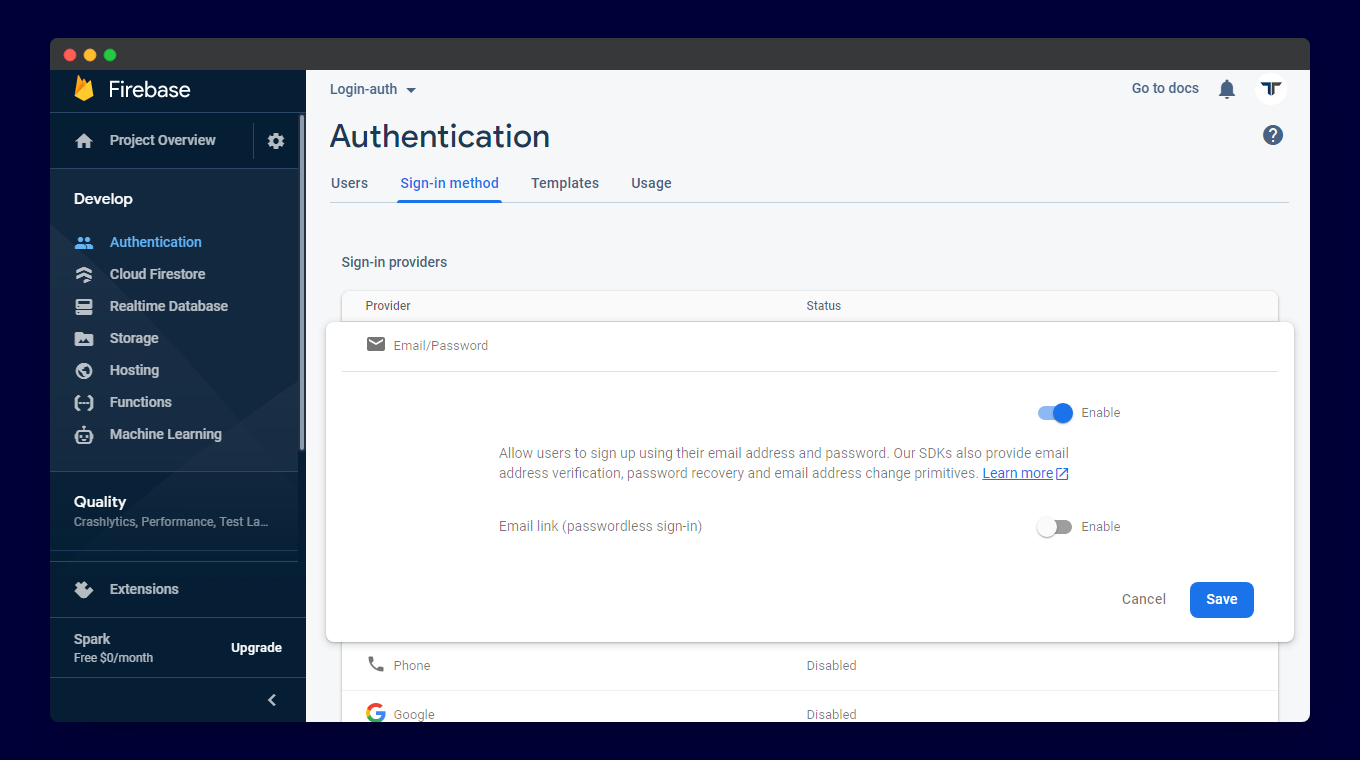
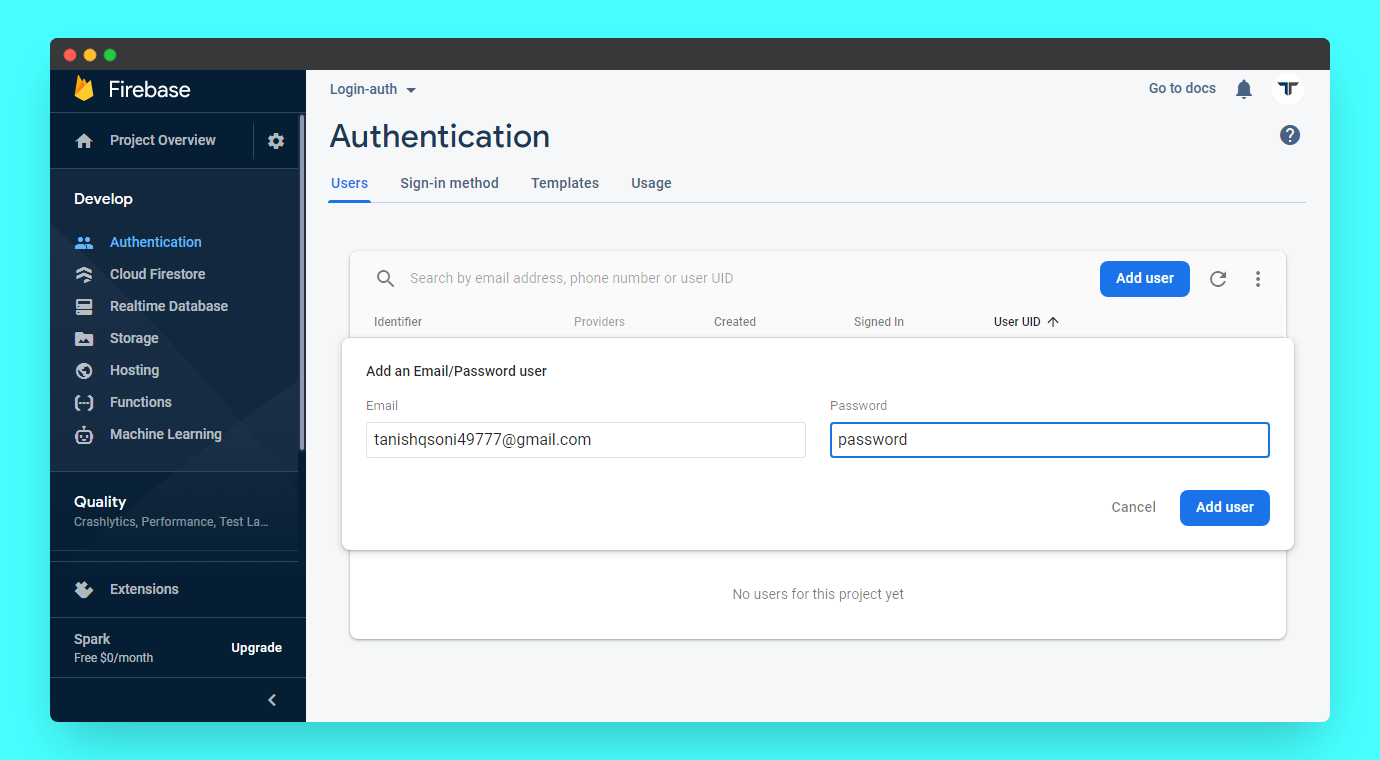
After enabling, you need to add users, so click on the Users tab.
Then click on Add User and add an Email and Password for that user. Once done click Add User.
Designing a webpage 🖊️
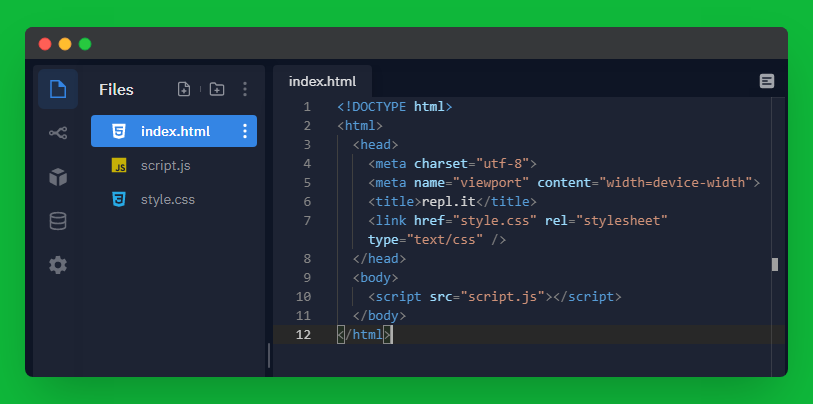
First, you need to set up a coding environment. I suggest you use Repl.it as it sets everything for you with just one click.
To get started, go to https://repl.it/languages/html.
It looks like this 👇
Coding Part </>
HTML
When you take a look at the index.html file in your repl you'll see the <html> tag which is the root of the HTML file. Inside the <html> tag you'll see the <body> tag. This is the main body of the HTML file and contains all the content for our webpage.
You will also find lines like:
<link href="style.css" rel="stylesheet" type="text/css">, which links your CSS file (style.css) with the HTML.<script src="script.js"></script>, which links your JavaScript file (script.js) with the HTML. It should be placed just above closing body tag</body>.
In the <body> tag, you need to create two divisions. The first division is for the login page and the second is for the logout page.
Division 1:
Create your first division (<div>) with a class main_div and assign ID login_div.
You can also give a heading to your page using heading tags (<h1>,<h2>,<h3>.....).
In this division, you will create two input fields for an email and password using the <input> tag with type set as email and password respectively. Assign IDs to both input fields as email_field and password_field respectively.
You can also add the placeholder attribute which specifies a short hint that describes the expected value of an input field / textarea.
Here you will also create a login button using the <button> tag and assign an onclick function called login (remember parenthesis to call the function) to it. Finally, close your first division using </div>.
So here's how your first division should look:
<div class="main_div" id="login_div">
    <h3>Login Authentication</h3>
    <input type="email" placeholder="Email..." id="email_field">
    <input type="password" placeholder="Password..." id="password_field">
    <button onclick="login()">Login</button>
</div>
Division 2:
Create your second division below the first with a class of loggedin_div and assign an ID of user_div.
In this division, you will create a logout button and assign an onclick function called logout (remember parenthesis to call the function) to it.
So here's how your second division looks like:
<div class="loggedin_div" id="user_div">
    <h3>YAYYY! You successfully logged-in using Firebase.....</h3>
    <button onclick="logout()">Logout</button>
</div>
Add this division just after the first division.
So here is what your HTML code should look like so far:
<!DOCTYPE html>
<html>
<head>
  <meta charset="utf-8">
  <meta name="viewport" content="width=device-width">
  <title>Login Authentication</title>
  <link href="style.css" rel="stylesheet" type="text/css">
</head>
<body>
<div class="main_div" id="login_div">
  <h3>Login Authentication</h3>
  <input type="email" placeholder="Email..." id="email_field">
  <input type="password" placeholder="Password..." id="password_field">
  <button onclick="login()">Login</button>
</div>
<div class="loggedin_div" id="user_div">
  <h3>YAYYY! You successfully logged-in using Firebase.....</h3>
  <button onclick="logout()">Logout</button>
</div>
<script src="script.js"></script>
</body>
</html>
As you can see, both divisions are being displayed on the same page. You need to display the second division after the user successfully logged-in as it contains the logout button.
For that, you need to use JavaScript. But before moving on, remember you saved some lines of JavaScript code from Firebase? They should look something like this:
<script src="https://www.gstatic.com/firebasejs/7.19.1/firebase-app.js"></script>
<script>
  // Your web app's Firebase configuration
  var firebaseConfig = {
    apiKey: 'AIzaSyAVNeXl4cBro95I3dFWMaiT2rI88sqyBtc',
    authDomain: 'loginauth-12.firebaseapp.com',
    databaseURL: 'https://loginauth-12.firebaseio.com',
    projectId: 'loginauth-12',
    storageBucket: 'loginauth-12.appspot.com',
    messagingSenderId: '308714255384',
    appId: '1:308714255384:web:98e87065f0e45910f0ff6d',
  }
  // Initialize Firebase
  firebase.initializeApp(firebaseConfig)
</script>
Here is an important step, look at very first line of code:
<script src="https://www.gstatic.com/firebasejs/7.19.1/firebase-app.js"></script>
This will give you an error, as it only loads the Firebase library. So for that, add the line below under that first line.
<script src="https://www.gstatic.com/firebasejs/4.8.1/firebase.js"></script>
After adding it, your code should look like this:
<script src="https://www.gstatic.com/firebasejs/7.19.1/firebase-app.js"></script>
<script src="https://www.gstatic.com/firebasejs/4.8.1/firebase.js"></script>
<script>
  // Your web app's Firebase configuration
  var firebaseConfig = {
    apiKey: 'AIzaSyAVNeXl4cBro95I3dFWMaiT2rI88sqyBtc',
    authDomain: 'loginauth-12.firebaseapp.com',
    databaseURL: 'https://loginauth-12.firebaseio.com',
    projectId: 'loginauth-12',
    storageBucket: 'loginauth-12.appspot.com',
    messagingSenderId: '308714255384',
    appId: '1:308714255384:web:98e87065f0e45910f0ff6d',
  }
  // Initialize Firebase
  firebase.initializeApp(firebaseConfig)
</script>
So, paste the code above right after the second division.
Here is your final HTML code:
<!DOCTYPE html>
<html>
  <head>
    <meta charset="utf-8" />
    <meta name="viewport" content="width=device-width" />
    <title>Login Authentication</title>
    <link href="style.css" rel="stylesheet" type="text/css" />
  </head>
  <body>
    <div class="main_div" id="login_div">
      <h3>Login Authentication</h3>
      <input type="email" placeholder="Email..." id="email_field" />
      <input type="password" placeholder="Password..." id="password_field" />
      <button onclick="login()">Login</button>
    </div>
    <div class="loggedin_div" id="user_div">
      <h3>YAYYY! You successfully logged-in using Firebase.....</h3>
      <button onclick="logout()">Logout</button>
    </div>
    <script src="https://www.gstatic.com/firebasejs/7.19.1/firebase-app.js"></script>
    <script src="https://www.gstatic.com/firebasejs/4.8.1/firebase.js"></script>
    <script>
      // Your web app's Firebase configuration
      var firebaseConfig = {
        apiKey: 'AIzaSyAVNeXl4cBro95I3dFWMaiT2rI88sqyBtc',
        authDomain: 'loginauth-12.firebaseapp.com',
        databaseURL: 'https://loginauth-12.firebaseio.com',
        projectId: 'loginauth-12',
        storageBucket: 'loginauth-12.appspot.com',
        messagingSenderId: '308714255384',
        appId: '1:308714255384:web:98e87065f0e45910f0ff6d',
      }
      // Initialize Firebase
      firebase.initializeApp(firebaseConfig)
    </script>
    <script src="script.js"></script>
  </body>
</html>
JavaScript
The javaScript is in the script.js file present in your repl just below the index.html file. JavaScript handles the logic of your webpage.
Here you only have to write a small amount of JavaScript code because Firebase has some pre-defined methods for authentication. Checkout Firebase Documentation on web authentication for more information.
So you have to get the currently signed-in user you created on Firebase.
In the script.js file you need to call a method to Get the currently signed-in user, it is the method which specifies whether the user is signed-in or not.
firebase.auth().onAuthStateChanged(function (user) {
  if (user) {
    // User is signed in.
  } else {
    // No user is signed in.
  }
})
Now we can show the division with ID login_div at the login page and the division with ID user_div when the user is signed-in.
Add the two lines of code below in the if condition of the code above.
document.getElementById('user_div').style.display = 'block'
document.getElementById('login_div').style.display = 'none'
The code should look like this:
firebase.auth().onAuthStateChanged(function (user) {
  if (user) {
    // User is signed in.
    document.getElementById('user_div').style.display = 'block'
    document.getElementById('login_div').style.display = 'none'
  } else {
    // No user is signed in.
  }
})
In the code above block will display the division and none will hide it.
You added the part for the signed-in user so you now need the else part. This is where the user isn't signed in. The code will be the same as the code in the first if but you need to swap block and none to display only main_div with ID login_div.
Add the following code to the else condition:
document.getElementById('user_div').style.display = 'none'
document.getElementById('login_div').style.display = 'block'
The JavaScript code should look like:
firebase.auth().onAuthStateChanged(function (user) {
  if (user) {
    // User is signed in.
    document.getElementById('user_div').style.display = 'block'
    document.getElementById('login_div').style.display = 'none'
  } else {
    // No user is signed in.
    document.getElementById('user_div').style.display = 'none'
    document.getElementById('login_div').style.display = 'block'
  }
})
Now, how it looks like:
Now you need to work on both the functions you assigned to HTML buttons (login() and logout()).
Function login()
A user can sign-in only if their record is stored in Firebase. Firebase has a method called Sign-in existing user that allows existing users to sign in using their email address and password.
Now you need to create two variables in login() named userEmail and userPass. They get email and password values from the input fields with IDs email_field and password_field.
function login() {
  var userEmail = document.getElementById('email_field').value
  var userPass = document.getElementById('password_field').value
}
So you need to add the method Sign-in existing user inside the login().
firebase
  .auth()
  .signInWithEmailAndPassword(email, password)
  .catch(function (error) {
    // Handle Errors here.
    var errorCode = error.code
    var errorMessage = error.message
    // ...
  })
In the code above replace email with userEmail and password with userPass.
You also need to display an error message when an error occurs like wrong email or password, so add the code below inside Sign-in existing user method.
window.alert('Error : ' + errorMessage)
So your code should look like this:
function login() {
  var userEmail = document.getElementById('email_field').value
  var userPass = document.getElementById('password_field').value

  firebase
    .auth()
    .signInWithEmailAndPassword(userEmail, userPass)
    .catch(function (error) {
      // Handle Errors here.
      var errorCode = error.code
      var errorMessage = error.message

      window.alert('Error : ' + errorMessage)

      // ...
    })
}
Function logout()
For logout add the following code below the login function:
function logout() {
  firebase.auth().signOut()
}
Here is your final JavaScript code:
firebase.auth().onAuthStateChanged(function (user) {
  if (user) {
    // User is signed in.

    document.getElementById('user_div').style.display = 'block'
    document.getElementById('login_div').style.display = 'none'
  } else {
    // No user is signed in.

    document.getElementById('user_div').style.display = 'none'
    document.getElementById('login_div').style.display = 'block'
  }
})

function login() {
  var userEmail = document.getElementById('email_field').value
  var userPass = document.getElementById('password_field').value

  firebase
    .auth()
    .signInWithEmailAndPassword(userEmail, userPass)
    .catch(function (error) {
      // Handle Errors here.
      var errorCode = error.code
      var errorMessage = error.message

      window.alert('Error : ' + errorMessage)

      // ...
    })
}

function logout() {
  firebase.auth().signOut()
}
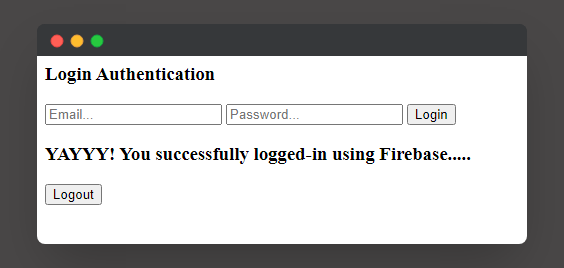
Your website should look like this 👇
Try logging in with the email and password you stored in Firebase. If it worked you should be all set!
As you can see, the main goal of this workshop is completed here. To make your webpage look cool you need to add some custom CSS.
CSS
The style.css file present in your repl just below script.js gives styles and designs to your webpage.
You just need to:
- Mention element/ class name/ ID.
- Open curly brackets
{. - Add styles.
- Close curly brackets
}.
Here how you can add styles to your <body> tag:
body {
  background: #000000;
  color: #fff;
  padding: 0px;
  margin: 0px;
  font-family: 'Nunito', sans-serif;
  font-size: 16px;
}
This way you can add styles to divisions, ids, and the whole webpage. Inspect my CSS file.
You can select different colors from a color picker to give your webpage a cool colorful look.
If you need help regarding the various keywords used in CSS you can go through the CSS documentation.
Yayyy 🎊! You are done!!
Take a look at the final code.
Hooray!🎉
You finished the Web Login Authentication Workshop by completing all tasks:
- Creating a Firebase project.
- Connecting Firebase to your webpage.
- Designing a webpage.
⚡ What's Next?
Now, how you can expand it? Try adding some other features to it with the help of the Firebase Guide
Here are some examples 👇
create accountfeature so a user can create a new account.Email verificationfeature.Anonymous Loginfeature so a user can visit the page without login.
⭐ Live examples with code
Create Account
In this feature, you can type an email and password of your choice and click on create an account.
Email verification
In this feature, you can send a verification email to verify your account after login.
Anonymous Login
In this feature, you can log in anonymously without entering an email or password.