

Join Hack Club Flavortown! Ship your projects and earn free prizes →
This workshop has been retired and is no longer maintained or recommended.
Demo: here
This workshop is designed with Google Chrome in mind. Problems may occur if you use a different browser.
This is a way to keep personal notes in your browser storage. Since the notes are saved to localStorage, these are truly notes-to-self (unless you share your computer).
Part I: Set-up
Creating Our Files
- Open up Cloud9 workspace.
- Create new folder in your
projectsdirectory, and name itnotes_to_self. - Create a new file in
notes_to_selfnamedindex.html - Create a new file in
notes_to_selfnamedmain.js - Create a new file in
notes_to_selfnamedstyles.css
In index.html, add the base template, and a title "Notes to Self"
<!DOCTYPE html>
<html>
  <head>
    <title>Notes to Self</title>
  </head>
  <body></body>
</html>
Adding Our Dependencies
We'll be using jQuery in main.js later, and we'll need to add it to our index.html by including this line in the body:
<script src="https://cdnjs.cloudflare.com/ajax/libs/jquery/3.0.0-beta1/jquery.min.js"></script>
Connecting Our Files
Add styles.css to index.html by including the following line in the head, after the title:
<link href="styles.css" rel="stylesheet" />
Add main.js to index.html by including the following line in the body, beneath the inclusion of jQuery:
<script src="main.js"></script>
Part II: The HTML File
On this page, we'll be displaying a form to create a new note, as well as the previously created notes.
Thus, we can subdivide the page into two sections -- new note form, and old notes.
Creating Form to Post New Note
The first section will house the input fields. We'll start by creating a div for this, in our body, above the script tags.
<div></div>
Let's go ahead and give it a class, so that we can remember what this div is for:
<div class="new-note"></div>
And within that div we'll add several things:
- an
inputelement for the title of the note - a
textareaelement for the content of the note - a button to submit the note when we are done
Adding Field for Title
Adding an input element inside our div is easy:
<div class="new-note">
  <input type="text" />
</div>
type="text" just specifies that this input will accept text.
If we save and look at live preview, our input looks a little bare. We can give it placeholder text by adding:
<div class="new-note">
  <input type="text" placeholder="Note Title" />
</div>
Save and you'll see in live preview that this input has a lot more context now.
Lastly, we'll add a class to this input, so that we can reference it later in JavaScript.
<div class="new-note">
  <input type="text" placeholder="Note Title" class="new-note-title" />
</div>
Adding Field for Content
Next, we'll add a way for user to add content to their note. Instead of using <input>, which as you can see is a single-line input, we'll use a <textarea> element, which allows for multiple lines.
Adding a <textarea> inside our div is easy:
<div class="new-note">
  <input type="text" placeholder="Note Title" class="new-note-title" />
  <textarea></textarea>
</div>
We'll give our <textarea> some placeholder text:
<div class="new-note">
  <input type="text" placeholder="Note Title" class="new-note-title" />
  <textarea placeholder="Note Text"></textarea>
</div>
And lastly, a class:
<div class="new-note">
  <input type="text" placeholder="Note Title" class="new-note-title" />
  <textarea placeholder="Note Text" class="new-note-content"></textarea>
</div>
Save and refresh! Looks like this form is starting to come together. We just need one more thing.
Adding Button to Submit Note
We can add a button with the button tag, and give it some display text of "Post Note":
<div class="new-note">
  <input type="text" placeholder="Note Title" class="new-note-title" />
  <textarea placeholder="Note Text" class="new-note-content"></textarea>
  <button>Post Note</button>
</div>
Let's add a class to this button as well:
<div class="new-note">
  <input type="text" placeholder="Note Title" class="new-note-title" />
  <textarea placeholder="Note Text" class="new-note-content"></textarea>
  <button class="post-new-note">Post Note</button>
</div>
Save and refresh. There's our button!
Adding a Space to Display Old Notes
Much like how we've sectioned off part of the body for creating new notes, we can similarly section off a part of the body for displaying the old notes. Let's create a div for this, beneath our new-note div:
<div class="new-note">
  <input type="text" placeholder="Note Title" class="new-note-title" />
  <textarea placeholder="Note Text" class="new-note-content"></textarea>
  <button class="post-new-note">Post Note</button>
</div>

<div></div>
And we'll give this div a class of "old-notes":
<div class="new-note">
  <input type="text" placeholder="Note Title" class="new-note-title" />
  <textarea placeholder="Note Text" class="new-note-content"></textarea>
  <button class="post-new-note">Post Note</button>
</div>

<div class="old-notes"></div>
Great. Now that our HTML file is set up, we can move on to styling.
Part III: Styling the Form
It looks a little funny right now, with all the elements on the same line. We can change this so that they are stacked vertically instead, by styling the page with some CSS.
Open up styles.css and type in the following:
.new-note * {
  display: block;
}
It's a good thing we added a class to our new note form, because now we can reference it using the selector .new-note! The asterisk means "everything," so here we are saying this rule applies to "everything that is within .new-note."
The display property specifies how elements are laid out on the page.
Part IV: The JavaScript File
We're saving our notes in our browser's local storage, which is exactly what it sounds like -- storage space within your browser that's local, i.e., confined to your computer. We can view and change what's in our browser's local storage with JavaScript.
Open up your live preview in the external view, by clicking the icon of a box with an arrow.
Accessing Local Storage
We can access local storage by referencing the variable localStorage. There are two methods we'll be using to get and set data in this variable, .getItem() and .setItem().
Local storage is an object, and objects in JavaScript are made up of keys that correspond to values.
For example:
var orpheusFacts = {
  name: 'Prophet Orpheus',
  numberOfEyes: 2,
  likes: ['food', 'coding', 'Hack Club']
}
One key is name and the value of name is Prophet Orpheus. Another key is numberOfEyes, and its value is 2. Orpheus has two eyes.
In addition to having strings and numbers as values, we can also have a value that's a list. Orpheus' likes has a value of a list that includes several things: food, coding, and Hack Club.
Similar to this, we're going to save our list of notes in local storage by mapping a key called "notes" to the list of notes.
We can view what's in our local storage at the moment by right-clicking the external live preview and selecting Inspect, and going to the Resources tab. Once there, we can click the little arrow next to the item on the left sidebar that says "Local Storage."
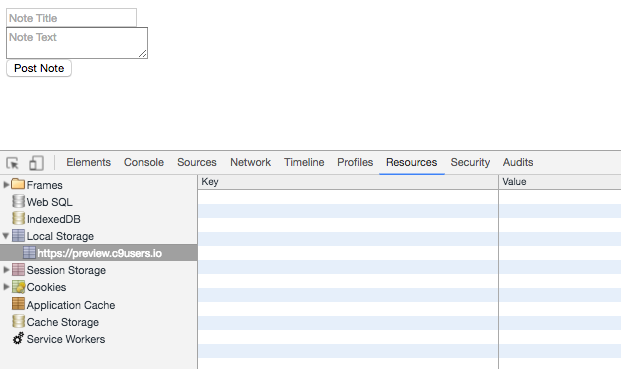
There should be an entry below that that says https://preview.c9users.io. This is where anything you store in local storage via Cloud9 will show up.
Setting up Notes in Local Storage
To display the notes saved in localStorage, we'll be using localStorage.getItem(). Since this is our first note, we currently don't have any item in local storage. For this reason, we'll be initializing a new item in local storage, using JavaScript. We'll name it notes.
Type this inside main.js:
localStorage.setItem('notes', [])
If we save and look at our local storage, we see notes paired with ... nothing?
The gotcha about local storage is that it saves everything in strings, and its methods only take string arguments. This is a little frustrating, but easily solved, using a function called JSON.stringify(). We can convert things that are not strings to properly formatted JavaScript Object Notation (JSON) strings.
Let's change the previous statement to this:
localStorage.setItem('notes', JSON.stringify([]))
Now if we look in local storage, we'll see []. This is what we want.
![]()
We'll also need to wrap the previous line in a conditional. We'd only want to set notes in local storage as an empty array ([]) if there are no existing notes (because we wouldn't want to overwrite what we currently have).
So we'll say, if getting notes from local storage doesn't return a truthy value, then we'll set notes as the string representation of an empty array.
After making sure local storage has an item called notes, we'll reach into local storage and get that item, and store that into a variable called myNotes.
if (!localStorage.getItem('notes')) {
  localStorage.setItem('notes', JSON.stringify([]))
}

var myNotes = JSON.parse(localStorage.getItem('notes'))
Although local storage stores data as strings, it's much easier for us to use the data if it's an array, so we use JSON.parse() to reverse the transformation process of JSON.stringify().
Saving a New Note
Let's start populating our local storage notes item by creating a function to save a new note, and attaching that function to the click event of the "Post Note" button.
We'll add these lines directly after all the previous code within main.js:
function postNewNote() {}

$('.post-new-note').on('click', postNewNote)
Our postNewNote() function should:
- grab the note's title and body from the HTML form
- get the current timestamp
- store these three values in an object
- store that object in
myNotes - update
notesin local storage
Grabbing Note Info from the HTML elements
We can access the elements using jQuery. Type the following lines inside postNewNote() (between the { and }):
var titleInput = $('.new-note-title')
var contentInput = $('.new-note-content')
This stores references to the input elements for title and content, respectively. Next, we'll actually get the values, and store them in variables. Type this directly after the previous two lines:
var noteTitle = titleInput.val()
var noteContent = contentInput.val()
Getting the Current Time and Date
Now, we'll store the date and time that we posted the note. JavaScript provides an easy way to get the current date and time, which we can use in our postNewNote() function. Add this after the previous lines:
var noteDate = new Date()
That was easy!
If you want to know what happened in this seemingly magical moment, just add a console.log(noteDate); after that line, save and refresh external live preview, and check out the console within Inspector.
Storing Note Data in an Object
Now that we've grabbed all relevant info about the new note, let's create a variable to store our note as an object, so that we can, in turn, save it in local storage.
We'll add this line to the bottom of postNewNote():
var note = {}
And now we'll store the title, content, and date within our newly created note object, by typing this next:
note.title = noteTitle
note.content = noteContent
note.date = noteDate
Our note object now contains three properties: title, content, and date.
Adding the Note to myNotes
We'll add the note object to myNotes, by appending it to the array, using the .push() method.
Let's add this to the bottom of the postNewNote() function.
myNotes.push(note)
Updating localStorage
The last thing we need to do is update local storage, by using the method .setItem() to save the newly modified myNotes. Type this beneath the previous line:
localStorage.setItem('notes', myNotes)
But wait, myNotes isn't a string, and we've already discussed that local storage only saves strings. Let's once again use JSON.stringify() to help. Change the previous line to include a call to JSON.stringify():
localStorage.setItem('notes', JSON.stringify(myNotes))
That's the end of postNewNote(). Save and refresh your external live preview, and open up local storage in the Inspector.
If you go ahead and submit a new note, you'll see the notes entry in local storage updated to include your new note!
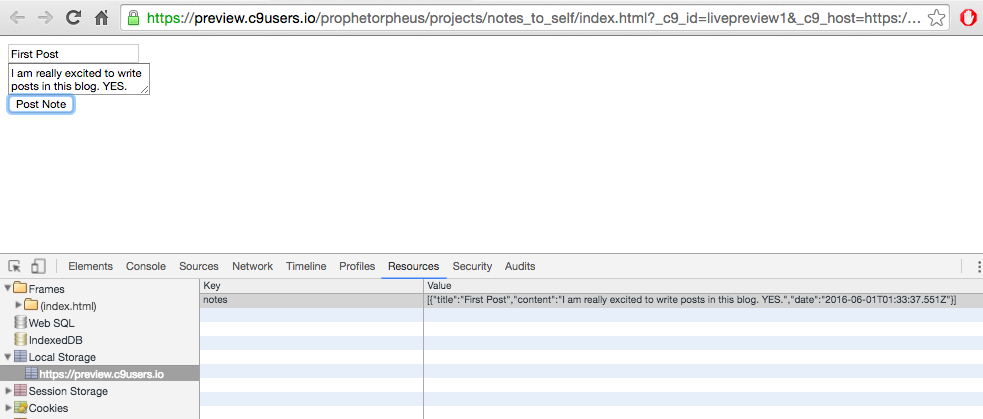
Now we just need to display it on our page.
Displaying the Existing Notes
We can display myNotes by using jQuery to create a bunch of HTML elements. Let's create a function to do this, underneath the postNewNote() function:
function displayNotes() {}
What should our function accomplish?
- First, we must extract the note's title, date, and text.
- Then, we must create HTML elements for each of these fields.
- Then, we must enclose these three fields into an HTML element of its own, to organize this note's data.
- Lastly, we must add this element to the
divthat we have reserved for old notes in the body of the HTML.
Extracting Note Info from myNotes
For each note contained in myNotes, we must grab the title, date, and content associated with it. We can do this using our old friend, the for-loop.
Within our function displayNotes(), type:
for (var i = 0; i < myNotes.length; i++) {}
Inside the for-loop, we can access each note by looking it up by the index i:
for (var i = 0; i < myNotes.length; i++) {
  var note = myNotes[i]
}
Now that we've stored the note in the variable note, we can access the title, date, and content.
for (var i = 0; i < myNotes.length; i++) {
  var note = myNotes[i]
  var noteTitle = note.title
  var noteDate = note.date
  var noteContent = note.content
}
That's it! We've extracted all the necessary note data.
Creating HTML Elements in jQuery
Now it's time to create HTML elements to house each piece of information we've retrieved.
First, we'll create an element to contain the whole note. Think of this as the box that contains smaller boxes.
for (var i = 0; i < myNotes.length; i++) {
  var note = myNotes[i]
  var noteTitle = note.title
  var noteDate = note.date
  var noteContent = note.content

  var thisNote = $('<div>')
}
We'll add a class to it, too:
for (var i = 0; i < myNotes.length; i++) {
  var note = myNotes[i]
  var noteTitle = note.title
  var noteDate = note.date
  var noteContent = note.content

  var thisNote = $('<div>').addClass('note')
}
Next, we'll create a h2 element for the note title, a p element for the note date, and a p element for the note content. We'll also give them some appropriately named classes:
for (var i = 0; i < myNotes.length; i++) {
  var note = myNotes[i]
  var noteTitle = note.title
  var noteDate = note.date
  var noteContent = note.content

  var thisNote = $('<div>').addClass('note')
  var noteTitleDisplay = $('<h2>').addClass('note-title')
  var noteDateDisplay = $('<p>').addClass('note-date')
  var noteContentDisplay = $('<p>').addClass('note-content')
}
Lastly, we'll fill the elements with the corresponding information. jQuery has a nice method to access and set the text within an element, namely .text(). We'll add a call to .text() to each element, passing it the appropriate value:
var noteTitleDisplay = $('<h2>').addClass('note-title').text(noteTitle)
var noteDateDisplay = $('<p>').addClass('note-date').text(noteDate)
var noteContentDisplay = $('<p>').addClass('note-content').text(noteContent)
Adding Elements to index.html
Now, we'll add each of these new elements to the thisNote div.
for (var i = 0; i < myNotes.length; i++) {
  var note = myNotes[i]
  var noteTitle = note.title
  var noteDate = note.date
  var noteContent = note.content

  var thisNote = $('<div>').addClass('note')
  var noteTitleDisplay = $('<h2>').addClass('note-title').text(noteTitle)
  var noteDateDisplay = $('<p>').addClass('note-date').text(noteDate)
  var noteContentDisplay = $('<p>').addClass('note-content').text(noteContent)

  thisNote.append(noteTitleDisplay)
  thisNote.append(noteDateDisplay)
  thisNote.append(noteContentDisplay)
}
And lastly we'll add thisNote to the old-notes div that is currently in the body:
for (var i = 0; i < myNotes.length; i++) {
  var note = myNotes[i]
  var noteTitle = note.title
  var noteDate = note.date
  var noteContent = note.content

  var thisNote = $('<div>').addClass('note')
  var noteTitleDisplay = $('<h2>').addClass('note-title').text(noteTitle)
  var noteDateDisplay = $('<p>').addClass('note-date').text(noteDate)
  var noteContentDisplay = $('<p>').addClass('note-content').text(noteContent)

  thisNote.append(noteTitleDisplay)
  thisNote.append(noteDateDisplay)
  thisNote.append(noteContentDisplay)

  $('.old-notes').append(thisNote)
}
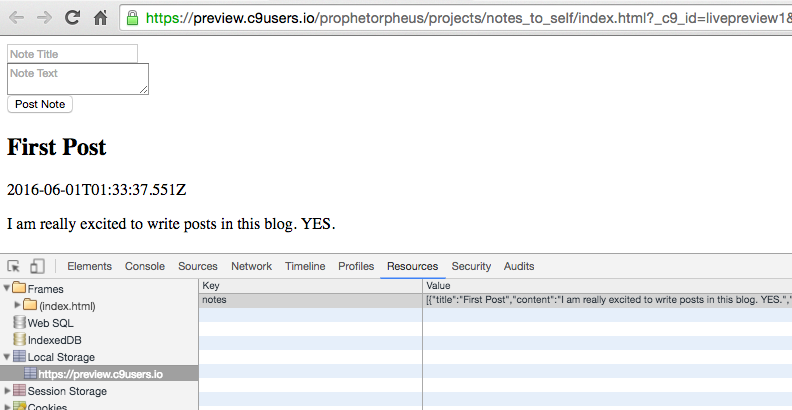
Our displayNotes() function is now complete! All we have to do now is actually call the function. Type this line directly beneath the line that creates myNotes:
displayNotes()
If you save and refresh you should be able to see your note on the page. Yay!
Part V: Odds and Ends
There it is -- the basic notes-to-self application. But there are some things that would make this a bit nicer.
Setting Behavior after Posting
Clearing the Form
I'd like to clear out the New Note form once I've submitted the note. There's no reason to leave this info in the fields.
We can add a few lines to the end of postNewNote() to have this behavior:
titleInput.val('')
contentInput.val('')
Updating the Display
To go with this, I'd also like the note I just created to be displayed with the other notes, without me having to reload the page.
That's simple enough, we'll just call displayNotes() at the end of postNewNote():
displayNotes()
Save and refresh, then create a new note to try it out.
Whoops, what's this? It seems displayNotes() is adding all the notes for a second time beneath the notes already displayed. We can change this easily by first clearing the old-notes div before adding in content.
We'll clear it out by setting the HTML to an empty string (""), similar to how we cleared out those form fields by setting their values to the empty string.
Add the following line to the top of displayNotes(), right after the line function displayNotes() {, before the rest of the function body:
$('.old-notes').html('')
There, that should look much better.
Reverse-Sorting the Notes
It's a little annoying that we have to scroll all the way down to check if our newest note has been added. We should reverse-sort the notes by their date.
Fortunately, we've appended each note to the end of the array, so they're in order by timestamp. We can just modify our for loop to go through the array backwards.
f̶o̶r̶ ̶(̶v̶a̶r̶ ̶i̶ ̶=̶ ̶0̶;̶ ̶i̶ ̶<̶ ̶m̶y̶N̶o̶t̶e̶s̶.̶l̶e̶n̶g̶t̶h̶;̶ ̶i̶+̶+̶)̶ ̶{̶
for (var i = myNotes.length-1; i >= 0; i--) {
Save and refresh, and you should see all of your notes reverse-sorted!
Accepting New Line
If you've tried to write paragraphs by pressing Enter in your notes, you may have noticed that they do not translate to line-breaks when displayed. However, if you look in local storage, you'll see that the line-breaks are there (they are represented by \n). We can replace \n with the HTML element <br>, which creates a line-break.
To replace something in JavaScript, we can use a method called .replace(). Modify the line var noteContent = note.content; within the for-loop in displayNotes() like so:
v̶a̶r̶ ̶n̶o̶t̶e̶C̶o̶n̶t̶e̶n̶t̶ ̶=̶ ̶n̶o̶t̶e̶.̶c̶o̶n̶t̶e̶n̶t̶;̶
var noteContent = note.content.replace(/\n/g,"<br>");
.replace() takes two arguments (as you would expect). The first is the text you would like to replace, and the second is the text you would like to replace it with.
In this case, we are replacing any instances of \n with the characters <br>.
What about the / and /g? What are those? The two / act as quotes around your text. As for the g, .replace() only replaces the first occurrence of the thing you want to replace. Adding g (which stands for global) tells .replace() to replace every occurrence.
Let's save and refresh to see if it worked.
Great, looks like we are successfully replacing new line characters with <br>, but not with the result we want. The issue is that we are adding noteContent as text to the noteContentDisplay in the line var noteContentDisplay = $("<p>").addClass("note-content").text(noteContent);. What we want to do instead is add it as HTML, since we have the <br> tags that we want to turn into horizontal breaks. We'll modify the line so that it uses the jQuery method .html() instead of .text():
v̶a̶r̶ ̶n̶o̶t̶e̶C̶o̶n̶t̶e̶n̶t̶D̶i̶s̶p̶l̶a̶y̶ ̶=̶ ̶$̶(̶"̶<̶p̶>̶"̶)̶.̶a̶d̶d̶C̶l̶a̶s̶s̶(̶"̶n̶o̶t̶e̶-̶c̶o̶n̶t̶e̶n̶t̶"̶)̶.̶t̶e̶x̶t̶(̶n̶o̶t̶e̶C̶o̶n̶t̶e̶n̶t̶)̶;̶ ̶
var noteContentDisplay = $("<p>").addClass("note-content").html(noteContent);
Part VI: Styling the Page
Currently it's a bit hard to differentiate between note titles and note contents, since they are all in the same typeface and style.
I'd like to make my note dates all italicized.
Good thing we put classes on them! Now they are easy to select.
Open up your styles.css file again, and type the following:
.note-date {
  font-style: italic;
}
You can of course do more in terms of styling, but I'll leave it to you.
Part VII: Publishing and Sharing
Huzzah, you've created an application that anyone can use, to write notes to themselves! Let's make sure everything is saved, and then publish, using these familiar commands:
git add --allgit commit -m "Complete the Notes to Self workshop"git push
After entering your username and password (hidden, as always), you'll be able to write your own notes to self at USERNAME.github.io/notes_to_self (replace USERNAME with your own username)!
Though there won't be much to share in this project, post a link to #ship on Slack! Maybe others will use your project to write their own notes to self.
Part VIII: Hacking
- styling
- access local storage to edit or delete your notes
- add more fields to each note (suggestions include "what i was eating today")
- add tags to better organize your notes
What else can you do with local storage? With JSON? With objects?