

Join Hack Club Horizons! Ship your projects and fly to your first hackathon →
You probably must have played Temple Run or the famous 404 Dino game! What if we create our own simple version of that? Well, we are going to do exactly the same in today's workshop! And you know what? It only requires HTML, CSS and JavaScript!
Here's the source code.
This workshop should take 45 minutes to 1 hour to complete.
Part 1: Prerequisites
You should know the basics (and I mean, very basics) of:
- HTML
- CSS
- JavaScript
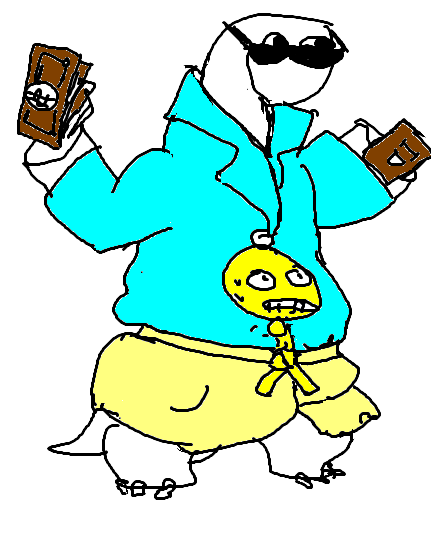
We also require a picture of Orpheus so that we can use it as the game character!
Download it by going here.
Part 2: Setup
For writing our code, we'll be using Replit which is an online code editor!
To start, go to this starter code and Replit will create a starter HTML project for you!
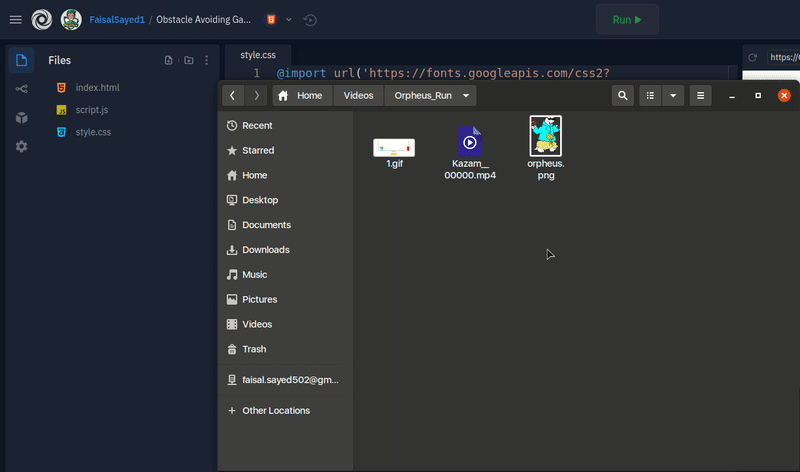
Also import the downloaded Orpheus image into your repl.
Here's how:
Part 3: Building the project
1) HTML
Every web project always begins with an HTML file and so do ours! So let's start writing the HTML code required for our project.
First, we'll create a <div> with the class of game and then add 2 more <div> tags inside it with the class of character and obstacles respectively.
<body>
  <div class="game">
    <div class="character"></div>
    <div class="obstacles"></div>
  </div>
  <script src="script.js"></script>
</body>
NOTE: Make sure that the <script> tag is always at the very last line inside your <body> tag.
Next, outside the <div>, we'll add a <p> tag for displaying score and also a button with the purpose of starting the game.
<body>
  <div class="game">
    <div class="character"></div>
    <div class="obstacles"></div>
  </div>
  <p class="score">Score: 0</p>
  <button>START</button>
  <script src="script.js"></script>
</body>
And lastly, we'll add onclick attributes to the div with the class of game and also to the button so that the functions (which we'll be creating very soon) can be triggered on clicking those DOM elements.
Your HTML code should look something like this!
<body>
  <div onclick="jump()" class="game">
    <div class="character"></div>
    <div class="obstacles"></div>
  </div>
  <p class="score">Score: 0</p>
  <button onclick="start()">START</button>
  <script src="script.js"></script>
</body>
So now the jump() function will be triggered when we click on the div with the class of game and the start() function will be triggered when we click on the start button!
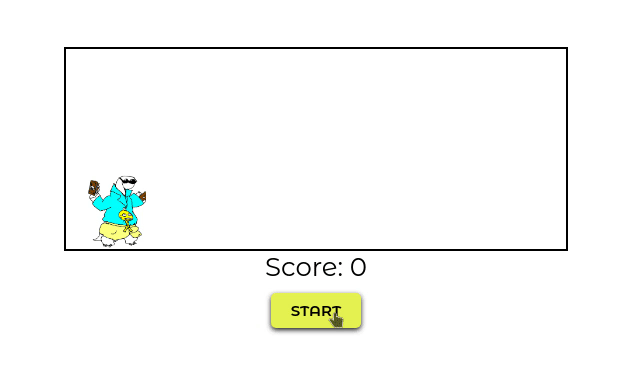
Your preview looks something like this:
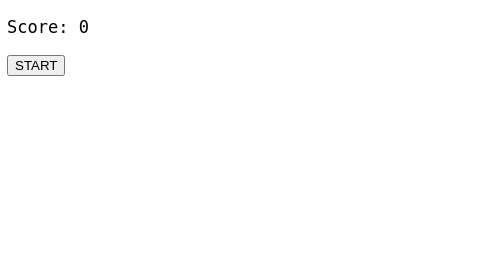
We won't see anything special in our preview window as we haven't added any styles yet. CSS is going to play a very important role in today's workshop, so let's start writing some styles!
2) CSS
It's time to write some styles for our DOM elements so that we can see them on the screen! Head over to the style.css file in your repl and let's start writing.
@import url('https://fonts.googleapis.com/css2?family=Montserrat+Alternates:wght@300;400;500;600&display=swap');

* {
  font-family: 'Montserrat Alternates', sans-serif;
  padding: 0;
  margin: 0;
}

body {
  display: flex;
  align-items: center;
  justify-content: center;
  flex-direction: column;
  min-height: 100vh;
}
Explanation: First, we simply import a font named Montserrat Alternates from Google Fonts. Then, by using * which basically selects all the elements, we give a font family of Montserrat Alternates. We also remove the default margin and padding from all the elements. (Some elements such as divs and headings have a default value for their margin and padding)
Next, we select the body and set its display to flex so that by using the align-items and justify-content properties, we can align our elements to the center of the screen. For this we also require the min-height to be set to 100vh (viewport height), so we exactly do that in the next line.
If you are new to viewport units, learn more about them here.
Next, let's add some more styles, specifically to the <div> tags.
.game {
  width: 500px;
  height: 200px;
  border: 2px solid #000;
  overflow: hidden;
}

.character {
  width: 60px;
  height: 80px;
  background-image: url("orpheus.png");
  background-size: cover;
  position: relative;
  top: 125px;
  left: 20px;
  z-index: 2;
}
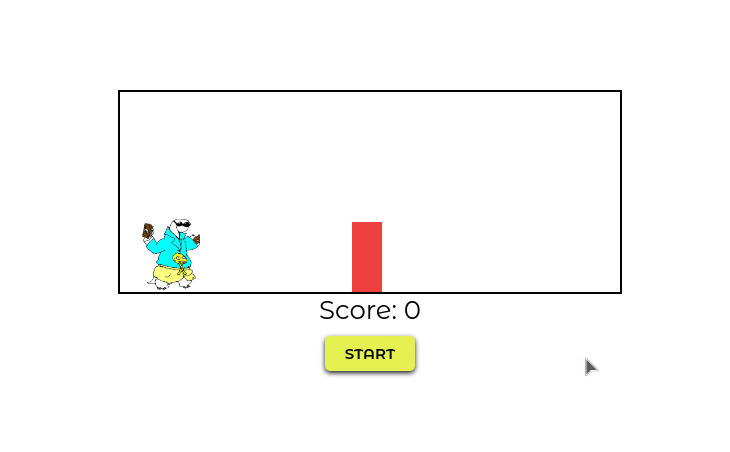
Explanation: The div with the class of game gets a width and a height of 500px and 200px respectively. Then, we also give it a black solid border of 2px. The overflow is set to hidden so that when the game actually works, we won't see overflowing obstacles going out of the div.
Next, the character is given a width and a height of 60px and 80px respectively. The background image is set to the path of image's file name which we downloaded. Make sure with the name of the image, for me it was orpheus.png, it might be different for you. If it is, simply replace the url with your image's name. The background-size property is set to cover so that the image doesn't look buggy.
Next, we set its position to relative so that we can position it properly inside the game div. Then, its top position is set to 125px and left position is set to 20px and we give it a z-index of 2 so it appears above all the other elements.
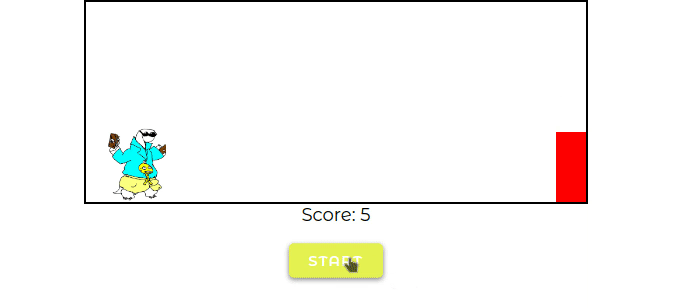
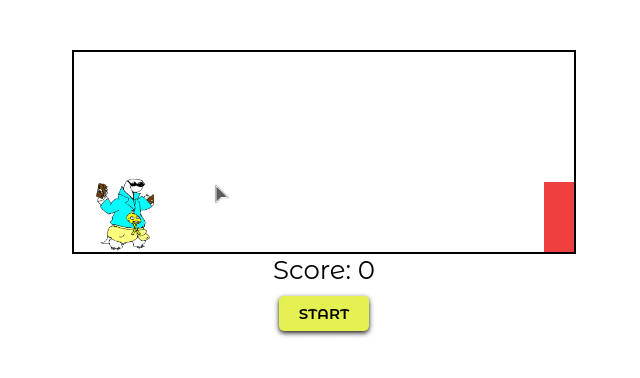
Here's what your game now looks like!

We are getting really close to our desired product!
Next, let's add styles for the score text, the obstacles and the button.
.score {
font-size: 26px;
}
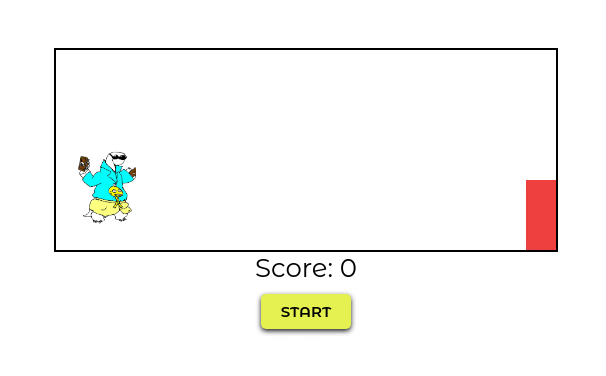
.obstacles {
width: 30px;
height: 70px;
background-color: #ee3f3f;
position: relative;
top: 50px;
left: 470px;
}
button {
background-color: #e6f151;
font-size: 15px;
font-weight: 600;
margin: 10px;
padding: 8px 20px;
outline: none;
border: 0;
border-radius: 5px;
cursor: pointer;
box-shadow: 0px 2px 5px rgba(0,0,0,0.9);
}
Explanation: We simply set the font size of score to 26px. Then, we select the obstacles class. After giving it a specific width and height, we give it a reddish color. Then, just like our character, we also set its position to relative, top position of 50px and left position of 470px.
Then we give some basic styles to the button such as the background color, text's font size, font-weight so that the text looks a bit bolder, a margin of 10px on all the sides, a padding of 8px on top and bottom and 20px on left and right. We remove its default outline and border, we set the cursor property to pointer and lastly, we give it a box shadow.
Now comes the animation part! We will create 2 animations, 1 for jumping of our character and another for the movement of obstacles towards us. Let's first start with the move animation.
@keyframes move {
  0% {
    left: 500px
  }
  100% {
    left: -20px
  }
}
Explanation: If you remember the basics of CSS animations, you'll see that we first write @keyframes and then we write the name of our animation, then by opening curly brackets, we define the animation.
What our animation simply does is changes its left position. At 0% of the animation, its left position will be 500px (it will be on the extreme right of our game div) and at 100% of the animation, its left position will be -20px! This will make it look like the obstacles are moving towards the left and beyond!
Learn more about CSS animations.
Let's test this animation so that if you are confused, you'll get a very clear idea of how it works!
For this, we'll create a new class move and give these animation properties to it.
.move {
  animation: move 1s infinite linear;
}
NOTE: You can name the class anything you want, its not necessary for the name to match the animation name.
Explanation: animation is the shorthand property which is combined of various other animation properties. The first is the animation-name, which in fact, we give it as move, then is the animation-duration which we set it as 1 second.
Then is the animation-iteration-count which we set to infinite so our animation will run infinitely. The next property is known as animation-timing-function which basically defines the way an animation works. We use linear for this animation as it is the most suitable!
Now whichever element has this move class will be animated with our move animation.
Let's go back to our HTML and add this move class to the obstacles div.
<div class="obstacles move"></div> <!-- Just add the move keyword after a space! -->
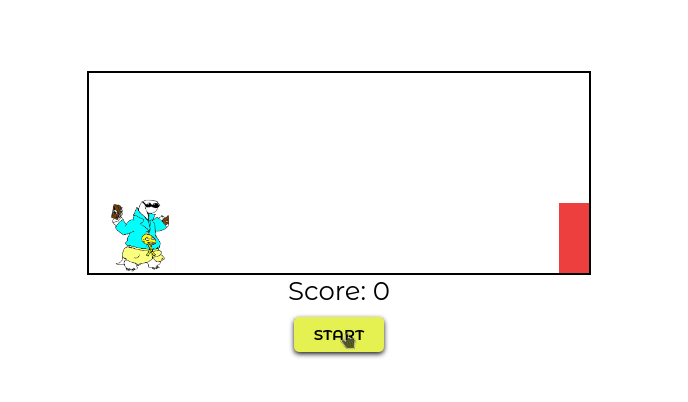
Now if you click RUN you'll be surprised!
NOTE: After we are done testing this animation, remove the move class from the <div> because we don't want the animation to start directly after we RUN our code. We'll use JavaScript later to add the move class back again to the <div> accordingly.
Now, we need to implement the jump animation!
@keyframes jump {
  0% {
    top: 125px;
  }
  30% {
    top: 60px;
  }
  50% {
    top: 30px;
  }
  70% {
    top: 60px;
  }
  100% {
    top: 125px;
  }
}

.jump {
  animation: jump 0.8s linear;
}
Explanation: We create the jump animation similar to the move animation but instead of changing its left position, we change its top position to get that sleek jumping effect! And then, we create a new class jump and apply this animation to that class.
Now, if you want to test this animation, you can simply add this class to the character div and you'll see that your character jumps! As we haven't set it to iterate infinitely, it will only jump once after you RUN the code.
After we have done making our animations, it's time that we implement these animations using JavaScript, implement a scoring system and also a game over system!
3) JavaScript
Let's start writing JavaScript inside the script.js file.
First, let's declare some variables to access the required DOM elements.
const character = document.querySelector(".character")
const obstacles = document.querySelector(".obstacles")
const scoreText = document.querySelector(".score")
let score = 0;
let isStarted = false;
Explanation: We'll create a variable character which will access the DOM element which has the class of character using the querySelector() method. The querySelector() method returns the first element that matches a specified CSS selector(s) in the document. In the same manner, we also access the elements which have the class obstacles and score.
Next, we define a score variable and set it to 0. We also define a boolean isStarted which is set to false. We'll basically use this variable to check each time if the game has started or not. The game doesn't start until the player clicks the start button. So, it's set to false as the default.
Next, let's create a function which will enable us to add the jump animation to the character.
function jump() {
  if (character.classList !== "jump") {
    clearTimeout()
    character.classList.add("jump");
    setTimeout(() => {
      character.classList.remove("jump");
    }, 700);
  }
}
Explanation: Basically, we don't want to add the jump class to our character if it's already jumping. If we don't ensure this, we might face several bugs. So, to be on the safer side, we first check if the character already has the jump class or not (If the character already has it, it means that the character is jumping). So, If it doesn't have the jump class in its classList, we'll add that class to it!
But we also need to remove this class after a specific time. If you remember, the jump animation lasts for 800 miliseconds. So, after we add the class to the character, we set a timeout of 700 miliseconds and immediately after that, we remove the jump class from the character.
Also, to clear all the past unfinished timeouts before we do anything, we call the clearTimeout() function which ensures that we always set a fresh new timeout.
NOTE: Wondering when jump() will be called and executed? If you remember, we passed an onclick attribute to the game div in our HTML. So yeah! that's our answer! Whenever we click on the game div, the character jumps!
Try clicking to test it!
Now, let's create a function which will start the movement of the obstacles.
function startMoving() {
  if (obstacles.classList !== "move") {
    obstacles.classList.add("move")
  }
}
Explanation: Similar to the above function, if the obstacles don't have the move class, we'll simply add it to its classList.
If we RUN the code now, we won't see much JavaScript into action because we haven't called our functions yet except the jump() function.
So let's create a start() function, which will start the game on clicking the start button!
function start() {
  if (!isStarted) {
    isStarted = true;
    startMoving();
  }
}
Explanation: Whenever the start() function is triggered, it will check if the game is already started or not. If isStarted is false, it will start the game by setting isStarted to true and also calling the startMoving() function.
Test your game now by pressing the start button!
const character = document.querySelector(".character")
const obstacles = document.querySelector(".obstacles")
const scoreText = document.querySelector(".score")
let score = 0;
let isStarted = false;

function jump() {
  if (character.classList !== "jump") {
    clearTimeout()
    character.classList.add("jump");
    setTimeout(() => {
      character.classList.remove("jump");
    }, 700);
  }
}

function startMoving() {
  if (obstacles.classList !== "move") {
    obstacles.classList.add("move")
  }
}

function start() {
  if (!isStarted) {
    isStarted = true;
    startMoving();
  }
}
Now, we need to add the two final things to our game: The scoring system and also the Game Over system.
First, let's implement a simpe scoring system!
function scoreCounter() {
  if (!isStarted) {
    return;
  }
  score++;
  scoreText.innerHTML = "Score: " + Math.round(score / 20)
  requestAnimationFrame(scoreCounter)
}
Explanation: As we don't want this function to run if the game is not started, we make use of the isStarted boolean to check that. If the game is not started, we simply don't want to do anything, so we do an early return. If that condition is not passed, it simply means that the game is started. So we keep adding 1 to the score variable and also by using the innerHTML property, we display the score on the browser screen!
Learn more about early returns.
Also, as we want this function to always run, we use the requestAnimationFrame() function calling itself inside it. Now, requestAnimationFrame() usually executes 60 times per second, so the score is going to increase at a very fast speed. So that is why, we use Math.round(score / 20) so that score is not increasing very rapidly.
Learn more about requestAnimationFrame().
Let's call this function inside the start() function we previously created.
function start() {
  if (!isStarted) {
    isStarted = true;
    startMoving();
    scoreCounter();
  }
}
Now we'll see that the score increases as we play the game!
Now, it's time to implement a function which will check if the character collides with any obstacles or not. And if it does, it will simply end the game!
function checkDead() {
  let characterTopPosition = parseInt(window.getComputedStyle(character).getPropertyValue("top"))

  let obstaclesLeftPosition = parseInt(window.getComputedStyle(obstacles).getPropertyValue("left"))

  if (obstaclesLeftPosition <= 80 && obstaclesLeftPosition >= 20 && characterTopPosition >= 60) {
    isStarted = false;
    obstacles.classList.remove("move")
    alert("Game Over!")
    score = 0;
  }

  requestAnimationFrame(checkDead)
}
Explanation: First, we will get the top position of the character and the left position of the obstacles at that specific moment.
The Window.getComputedStyle() method returns an object containing the values of all CSS properties of an element. From this we extract the top position and the left position values. We get these values in the form of a string. So, to convert it into an integer, we use parseInt().
Learn more about Window.getComputedStyle().
Now, the character is already 20px away from the left and character's width is 60px. Adding that, we get 80px. This should be the maximum value of the left position and 20px should be the minimum value. So, if an obstacle is anywhere in between this position, this will mean that an obstacle and the character are overlapping each other.
We also check if the character's top position is greater that 60px or not. Because, if it isn't greater than 60px, then the character is jumping and its top position somewhat less than 60px.
IMPORTANT NOTE: If you happen to change the width/height of the character or the obstacle, make sure you also make changes to these conditions accordingly.
So if all those 3 conditions are fulfilled, we come to a conclusion that the character and the obstacle are colliding each other. So, we change isStarted to false resulting to stop all the other functions. We also stop the movement of the obstacle by removing its animation. Then we prompt the user that it's a GAME OVER! Finally, we reset our score.
As we need this function to be always running, we call the requestAnimationFrame() and pass this function to it.
Now, we'll simply call this function inside the start() function!
function start() {
  if (!isStarted) {
    isStarted = true;
    startMoving();
    scoreCounter();
    checkDead();
  }
}
And that's it! We are done creating our game!
Here's your final code so far:
const character = document.querySelector(".character")
const obstacles = document.querySelector(".obstacles")
const scoreText = document.querySelector(".score")
let score = 0;
let isStarted = false;

function jump() {
  if (character.classList !== "jump") {
    clearTimeout()
    character.classList.add("jump");
    setTimeout(() => {
      character.classList.remove("jump");
    }, 700);
  }
}

function startMoving() {
  if (obstacles.classList !== "move") {
    obstacles.classList.add("move")
  }
}

function start() {
  if (!isStarted) {
    isStarted = true;
    startMoving();
    checkDead();
    scoreCounter()
  }
}

function scoreCounter() {
  if (!isStarted) {
    return;
  }
  score++;
  scoreText.innerHTML = "Score: " + Math.round(score / 20)
  requestAnimationFrame(scoreCounter)
}

function checkDead() {
  let characterTopPosition = parseInt(window.getComputedStyle(character).getPropertyValue("top"))

  let obstaclesLeftPosition = parseInt(window.getComputedStyle(obstacles).getPropertyValue("left"))

  if (obstaclesLeftPosition <= 80 && obstaclesLeftPosition >= 20 && characterTopPosition >= 60) {
    isStarted = false;
    obstacles.classList.remove("move")
    alert("Game Over!")
    score = 0;
  }
  requestAnimationFrame(checkDead)
}
Part 4: The End
Epic! This was really fun, right? Now it is up to you to do crazy things with this project!
Make sure you create an account on Replit to save this wonderful piece of creation or you'll loose it 😧.
Here are some tasks for you:
-
Add a high score functionality.
-
Add more different types of obstacles.
-
Increase the speed of the game as it moves ahead.
Check out these amaaaazing hacks!
Now that you have finished building it, you should share your beautiful creation with other people! (I can't wait to see you ship this!)
You probably know the best ways to get in touch with your friends and family, but if you want to share your project with the worldwide Hack Club community there is no better place to do that than on Slack.
- In a new tab, open and follow these directions to signup for our Slack.
- Then, post the link to the
#shipchannel to share it with everyone and also ping me!
PS. I'm @fayd on slack.