
Join Hack Club Horizons! Ship your projects and fly to your first hackathon →
In this workshop you'll learn how to make a painting application using HTML, CSS & JavaScript. Follow along with me and see how easy it is!
Set Up
This workshop requires some basic knowledge of HTML, CSS, & JavaScript. Don’t worry if you get stuck at some point in the workshop, everything is explained the best way for you to understand!
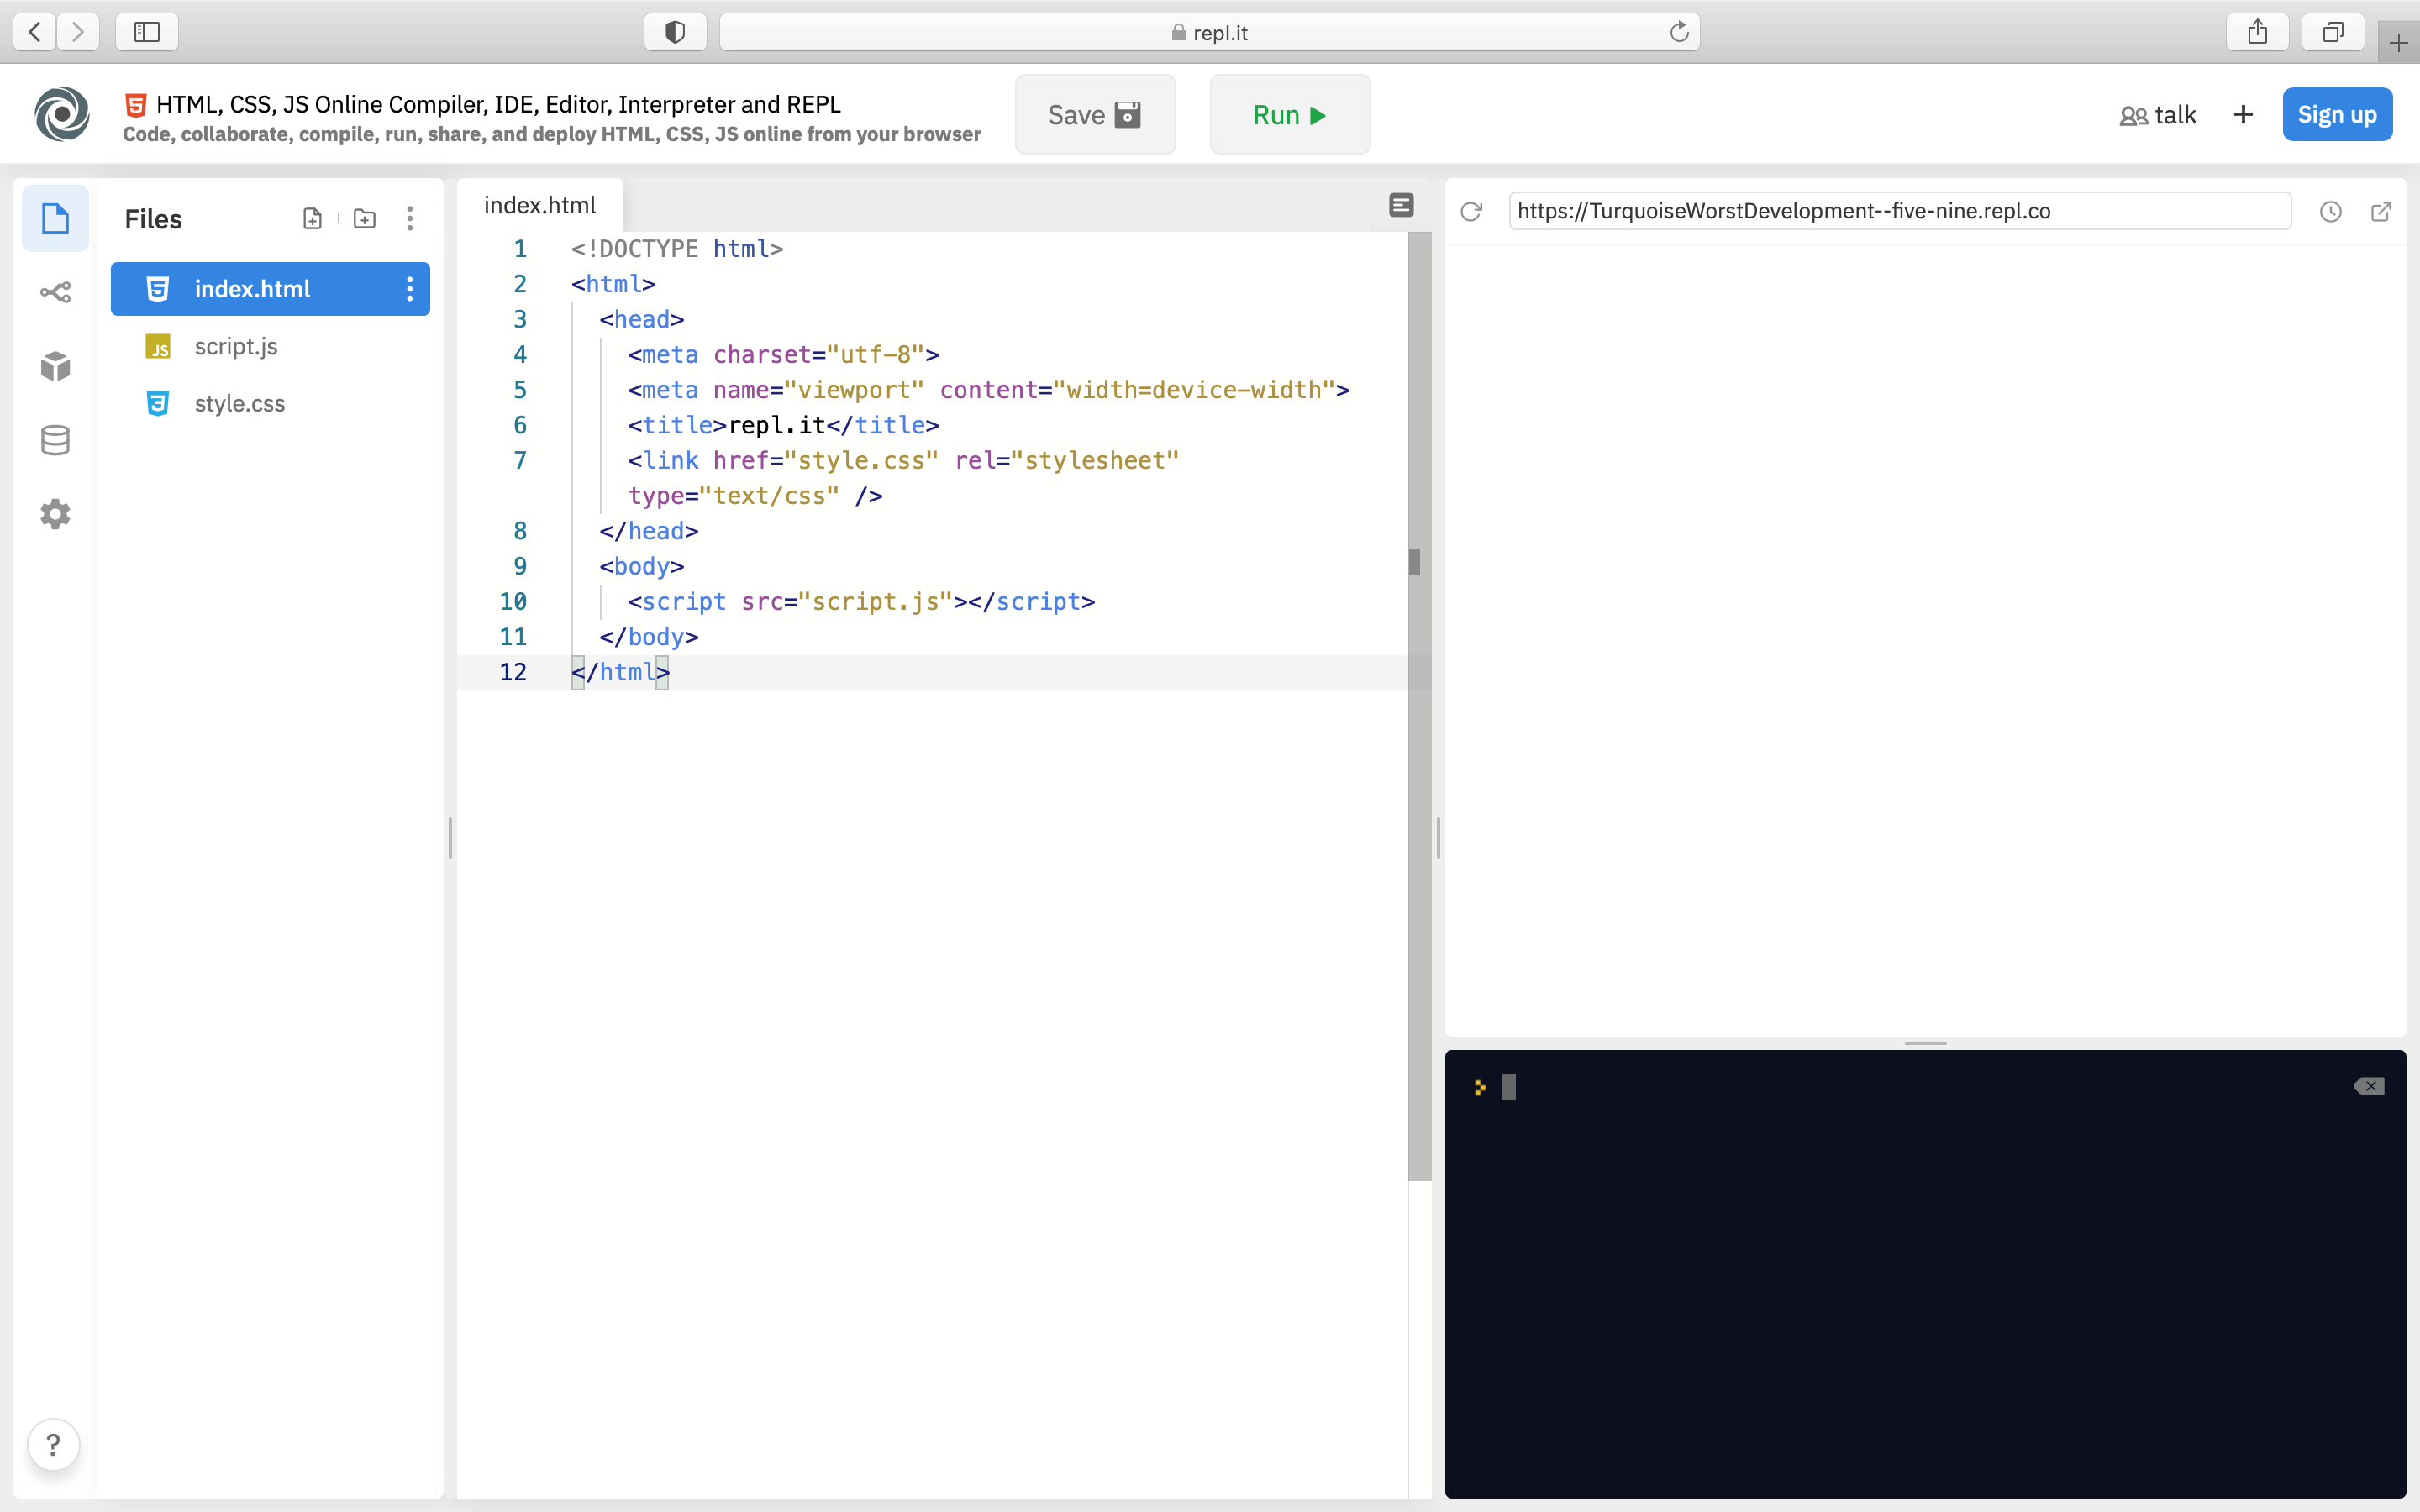
For this workshop we will use Repl.it, a free, online code editor. Click here to create an HTML project on repl.it. Once your coding environment spins up, you should see this:
HTML
In this part of the workshop, we will put all the elements that are part of the application, which are: buttons, inputs, and a canvas.
So let's start by creating a div container with the class main-container inside of our <body> tag. In this container we'll put all of our HTML elements.
<div class="main-container"></div>
Then, we are creating another div container with the class colors. This will hold all of the buttons that the user will use to select a color. Inside of this div container, we'll put 6 button elements, with the following values:
<div class="main-container">
  <div class="colors">
    <button value="#FBFF00"></button>
    <button value="#009fff"></button>
    <button value="#000000"></button>
    <button value="#FF0000"></button>
    <button value="#3EFF00"></button>
    <button value="#FFF"></button>
  </div>
</div>
I've selected a few colors for you, but if you want to choose your own colors, Google "html hex code generator", pick a color, and replace one of the hexademical color values with whichever one you choose!
Finally, right after the div container with the class colors, we'll put 4 elements with the following values:
<div class="main-container">
  <div class="colors">
    <button value="#FBFF00"></button>
    <button value="#009fff"></button>
    <button value="#000000"></button>
    <button value="#FF0000"></button>
    <button value="#3EFF00"></button>
    <button value="#FFF"></button>
  </div>

  <--! Here we put the 4 elements-->

  <input id="brush" type="range" value="1" min="1" max="5" step="1"></input>
  <button id="clear" type="button">Clear</button>
  <button id="save" type="button">Save</button>
  <br>
  <canvas id="paint-canvas" width="640" height="400"></canvas>

</div>
Let's break this down:
- The
inputelement is used to create interactive controls for web-based forms in order to accept data from the user. Since the type of input we are using isrange, it requires you to set the attributesvalue,min,maxandstepwhich basically sets the initial value for the input, the max and min value for it, and the step from a value to other respectively. - The two buttons here will be used to clear and save the canvas data.
- The
canvaselement is used to let the user make drawings through it.
Note: All the attributes and values used for the above elements are mandatory for the app to work
Here's the result of the code above:

JavaScript
Now that we have our HTML document ready to go, we are going to start adding the main functionalities.
So, the first thing we want to do, is to use the onload event, which runs a block of code when a given resource has loaded. In this case, we want our javascript file to run when the HTML document has finished loading.
window.onload() {

}
If we don't do this, the JavaScript code we're about to write, which looks for specific elements in our HTML, may run before all of the HTML elements have loaded, and it won't find them.
Note: from now, all the JavaScript code will go inside of the curly braces
The next thing we are going to do is to define 4 variables:
let canvas = document.getElementById("paint-canvas");
let context = canvas.getContext("2d");
let boundings = canvas.getBoundingClientRect();
let range = document.getElementById("brush").value;
Let's break this down:
- The first variable uses the method
document.getElementByIdto get the element from the HTML document with the specifiedid. - The second variable takes the first variable and gets the canvas context using the method
getContext. The canvas context provides the 2D rendering context for the drawing surface of a<canvas>element. - The third variable takes the first variable and uses the method
getBoundingClientRect(), which returns aDOMRectobject providing information about the size of an element and its position relative to the viewport. - The fourth variable gets the HTML element in the document with the id
brushand gets the element's value using the methodvalue.
We need to create another 4 variables, but this time we will use these to configure some stuff for the canvas.
let mouseX = 0;
let mouseY = 0;
let isDrawing = false;
context.strokeStyle = 'black';
Let's break this down:
- The first two variables set the default position of the mouse with the X and Y coordinates.
- The third variable will be used later to tell the application if the mouse is drawing something on the canvas or not.
- The
context.strokeStyleproperty of the Canvas 2D API specifies the color, gradient, or pattern to use for the strokes (outlines) around shapes.
Now, we'll need to handle the brush's size. In this block of code we’ll make sure the line width changes every time the input's value changes.
//Handle brush size
let brush = document.getElementById('brush');

brush.addEventListener('input', function(brush){
  context.lineWidth = brush.target.value;
});
- First, we are creating a variable that uses the method
getElementByIdto get an element from the document with the specified id. It gets the input element from the document. - The method
addEventListenertakes the brush element, and every time the value of this element changes, a function is called. - This function takes the context of the canvas element and using the property
lineWidth, it sets the thickness of the brush to the value from the range input.
Then, we'll need to handle the colors of the brush, in this block of code we'll make sure that whenever the user clicks on any of the color buttons, the color of the brush changes.
// Handle Colors
let colors = document.getElementsByClassName('colors')[0];

colors.addEventListener('click', function(event) {
  context.strokeStyle = event.target.value || 'black';
});
- First, we are creating a variable that uses the method
getElementByClassNameto get a number of elements from the document with the specified class. It gets thedivelement from the document. This div container acts like an array and every element inside of it is indexed. - Then, we are taking the
colorsvariable (div element), and we are adding an event listener to it. Every time a button gets clicked, the code inside the function will run. - Finally, this function takes the context of the canvas element and using the property
strokeStyle, and it sets the color of the brush to one of the button's value or to black.
Now, we are going to create 3 events that depending on the location of the mouse in the screen, it will draw or not.
// Mouse Down Event
canvas.addEventListener('mousedown', function(event) {
  setMouseCoordinates(event);
  isDrawing = true;

  // Start Drawing
  context.beginPath();
  context.moveTo(mouseX, mouseY);
});

// Mouse Move Event
canvas.addEventListener('mousemove', function(event) {
  setMouseCoordinates(event);

  if(isDrawing) {
    context.lineTo(mouseX, mouseY);
    context.stroke();
  }
});

// Mouse Up Event
canvas.addEventListener('mouseup', function(event) {
  setMouseCoordinates(event);
  isDrawing = false;
});
The code in the mousedown event:
- calls the function
setMouseCoordinates()(I'll explain that function later) - sets the value of the boolean
isDrawingto true - takes the context of the canvas element and uses the
beginPath()method to start a new path - uses the
moveTo()method to start a sub-path in the specified coordinates.
In the mousemove event:
- calls
setMouseCoordinates() - checks if the value of
isDrawingis true.- If it's true, it uses the methods
lineTo()andstroke()to draw a straight line connecting the sub-path's last point to the specified (x, y) coordinates, then creates a stroke with the current stroke style
- If it's true, it uses the methods
The mouseup event:
- calls
setMouseCoordinates() - sets the value of
isDrawingtofalse
Now, we are going to need a function that handles the mouse coordinates.
// Handle Mouse Coordinates
function setMouseCoordinates(event) {
  mouseX = event.clientX - boundings.left;
  mouseY = event.clientY - boundings.top;
}
- First we take the
mouseXvariable (declared earlier), and we use the methodevent.clientXto get the horizontal coordinate within the application's viewport at which the event occurred (as opposed to the coordinate within the page). This given coordinate is subtracted from the left coordinate of theboundings. - We do the same thing but with the variable
mouseYand usingevent.clientY.
The next thing we need to do is to add a clear functionality.
// Handle Clear Button
let clearButton = document.getElementById('clear');

clearButton.addEventListener('click', function() {
  context.clearRect(0, 0, canvas.width, canvas.height);
});
- First we are creating a variable that gets the button with id
clearfrom the HTML, using thegetElementByIdmethod. - Then we take that button and we add an event listener to it. When the button is clicked, the function runs.
- The function inside the event listener takes the context of the canvas element and using the method
clearRect, it clears everything in the entire canvas.
Finally, we'll add a save functionality.
// Handle Save Button
let saveButton = document.getElementById('save');

saveButton.addEventListener('click', function() {
  let imageName = prompt('Please enter image name');
  let canvasDataURL = canvas.toDataURL();
  let a = document.createElement('a');
  a.href = canvasDataURL;
  a.download = imageName || 'drawing';
  a.click();
});
- First we are creating a variable that gets the save button from the document.
- Then we add an event listener and when the button is clicked, the function runs.
- This function declares 3 variables:
- The first one holds what the user writes in the
promptinput. - The second variable takes the canvas and converts it into a data URI containing a representation of the image in the format specified by the type parameter (defaults to PNG).
- The third variable creates a hyperlink element in the document.
- The first one holds what the user writes in the
- Then we take that hyperlink element and set its href attribute to the data url acquired in the variable
canvasDataURL. - Set the download attribute of the hyperlink element to the text gotten from the variable
imageName, ordrawingif the user didn't type anything. - Finally, it triggers a click event on the hyperlink with JavaScript.
CSS
Now that we have our application working, we can style it to make it look good.
First, we are going to start by centering all the elements horizontally and vertically.
.main-container {
  display: flex;
  flex-direction: column;
  justify-content: center;
  align-items: center;
  height: 100vh;
}
Let's break this down:
display: flex: makes the element a flexbox container.flex-direction: column: sets the direction of the main axis as from top to bottom.justify-content: center: sets the alignment over the main axis as centered.align-items: center: sets the alignment over the cross axis as centered.height: 100vh: sets the height of this container as 100% to the viewport.
Now, we are going to style the canvas a little bit:
canvas {
  border: 1px black solid;
  cursor: crosshair;
}
Let's break this down:
- The property
border: 1px black solid;sets the width, color and style of the border. - The property
cursor: crosshair;sets the type of mouse cursor.
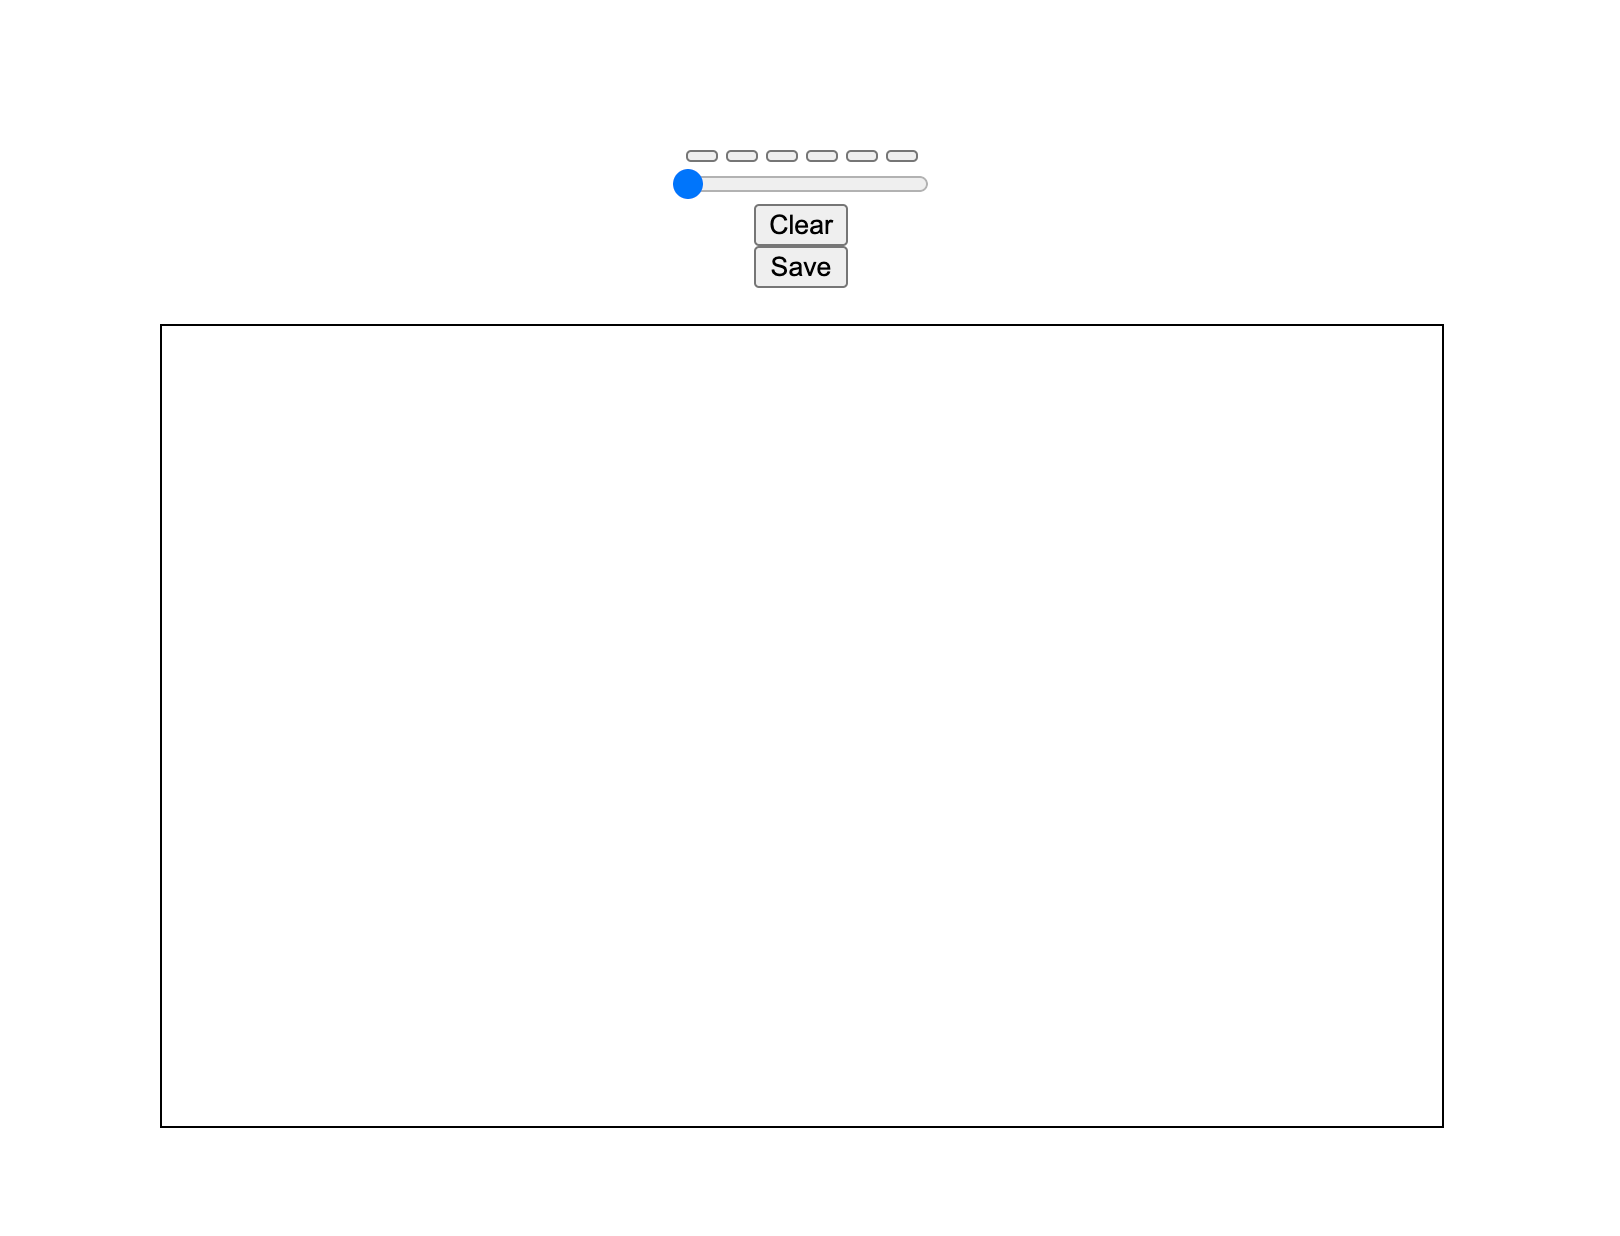
This is how the app looks like now:
Finally, we are going to style all the buttons:
.colors button {
  display: inline-block;
  border: 1px solid #00000026;
  border-radius: 70%;
  outline: none;
  cursor: pointer;
  width: 20px;
  height: 20px;
  margin-bottom: 5px
}
display: inline-block: sets whether an element is treated as a block or inline element and the layout used for its children, such as flow layout, grid or flex.border: 1px solid #00000026: styles the border of the buttonsborder-radius: 70%: rounds the corners of an element's outer border edge.outline: none: we simply set theoutlineof the button tonone.cursor: pointer: sets the type of mouse cursor.width: 20px: gives a width to the buttonsheight: 20px: gives a height to the buttonsmargin-bottom: 5px;: gives to the buttons a margin to the bottom.
Now, we'll give a color to each button:
.colors button:nth-of-type(1) {
  background-color: #FBFF00;
}

.colors button:nth-of-type(2) {
  background-color: #009fff;
}

.colors button:nth-of-type(3) {
  background-color: #000000;
}

.colors button:nth-of-type(4) {
  background-color: #FF0000;
}

.colors button:nth-of-type(5) {
  background-color: #3EFF00;
}

.colors button:nth-of-type(6) {
  background-color: #FFF;
}
The :nth-of-type() CSS pseudo-class matches elements of a given type (tag name), based on their position among a group of siblings. Notice that we have 6 buttons inside of the div container with the class colors. These buttons are indexed just like in an array, so think of the div container as an array, and the buttons as indexed data. Using this, we give a background color to every button accordingly.
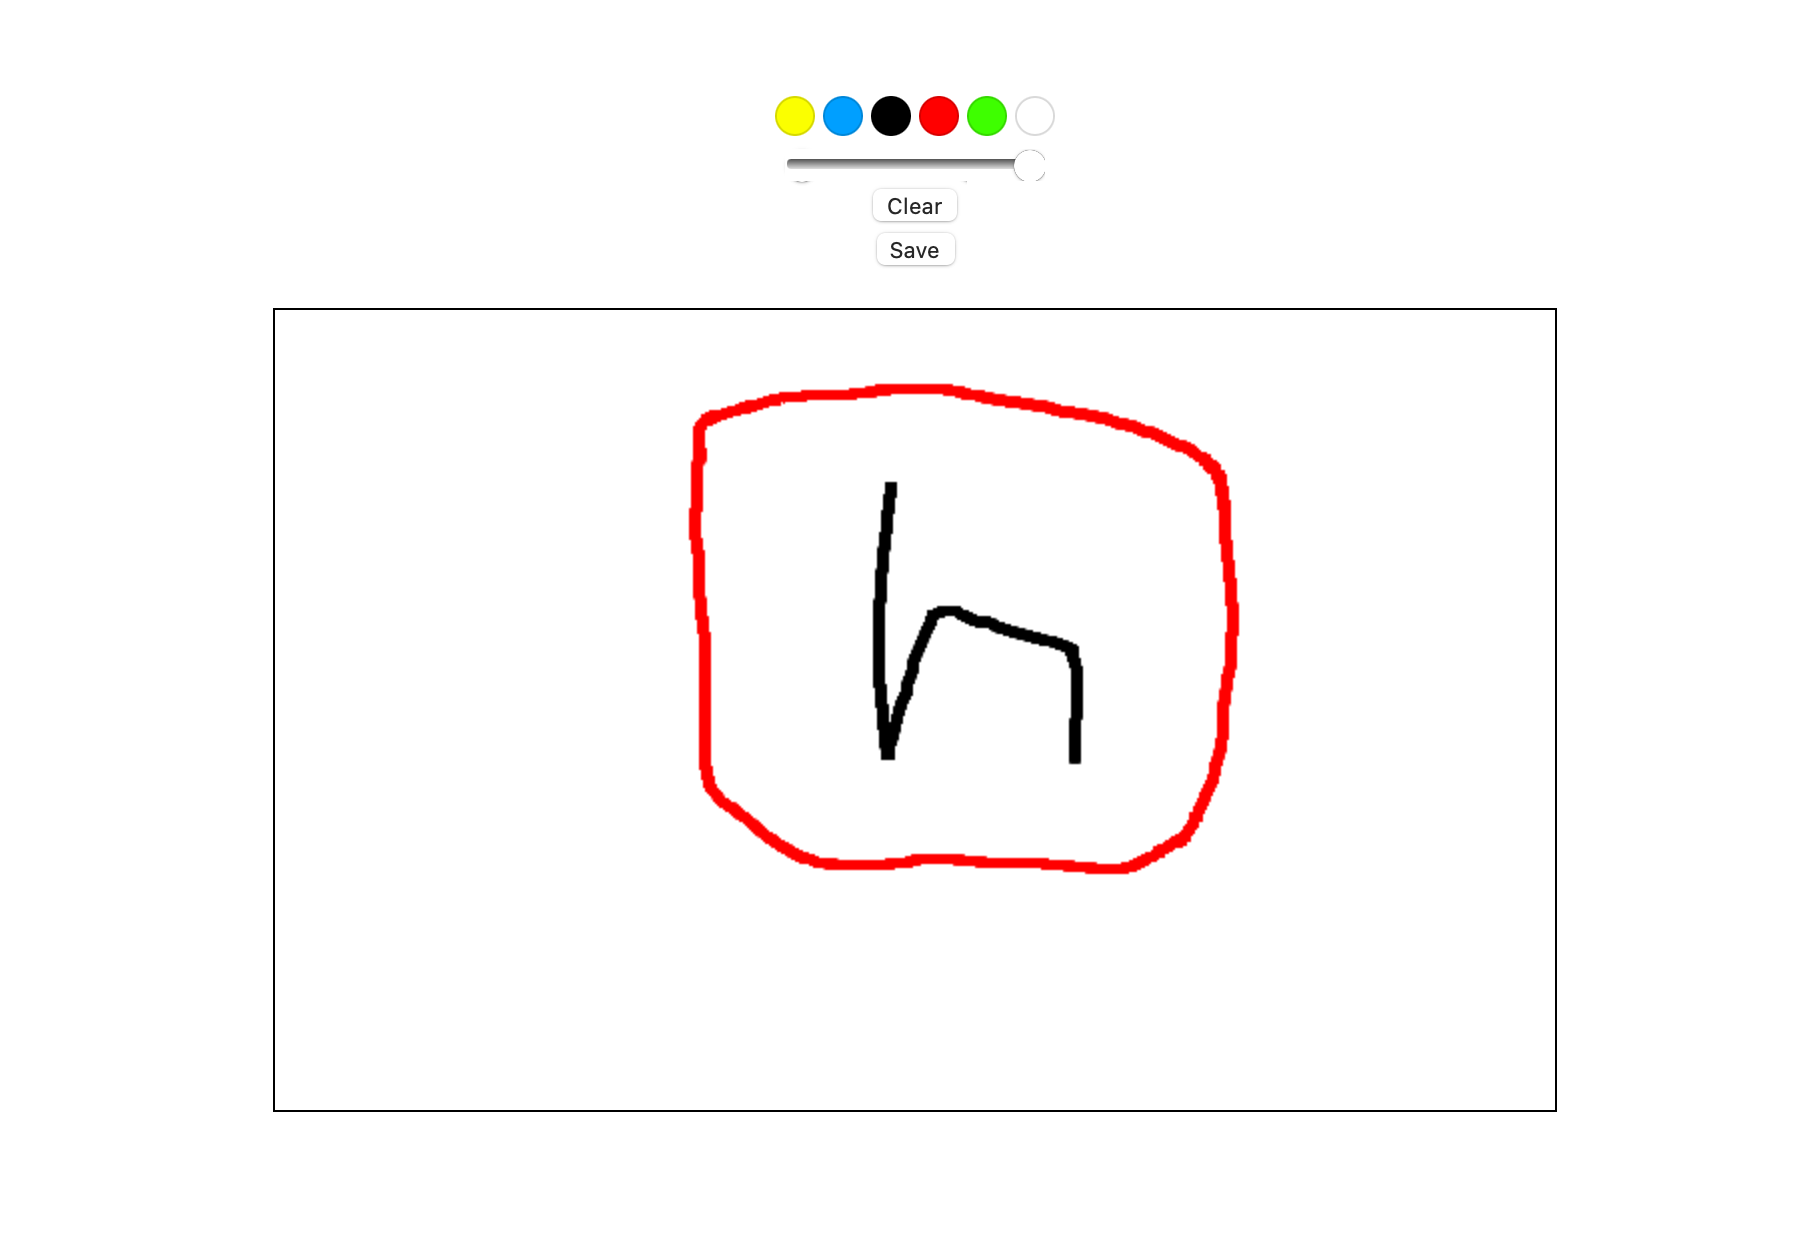
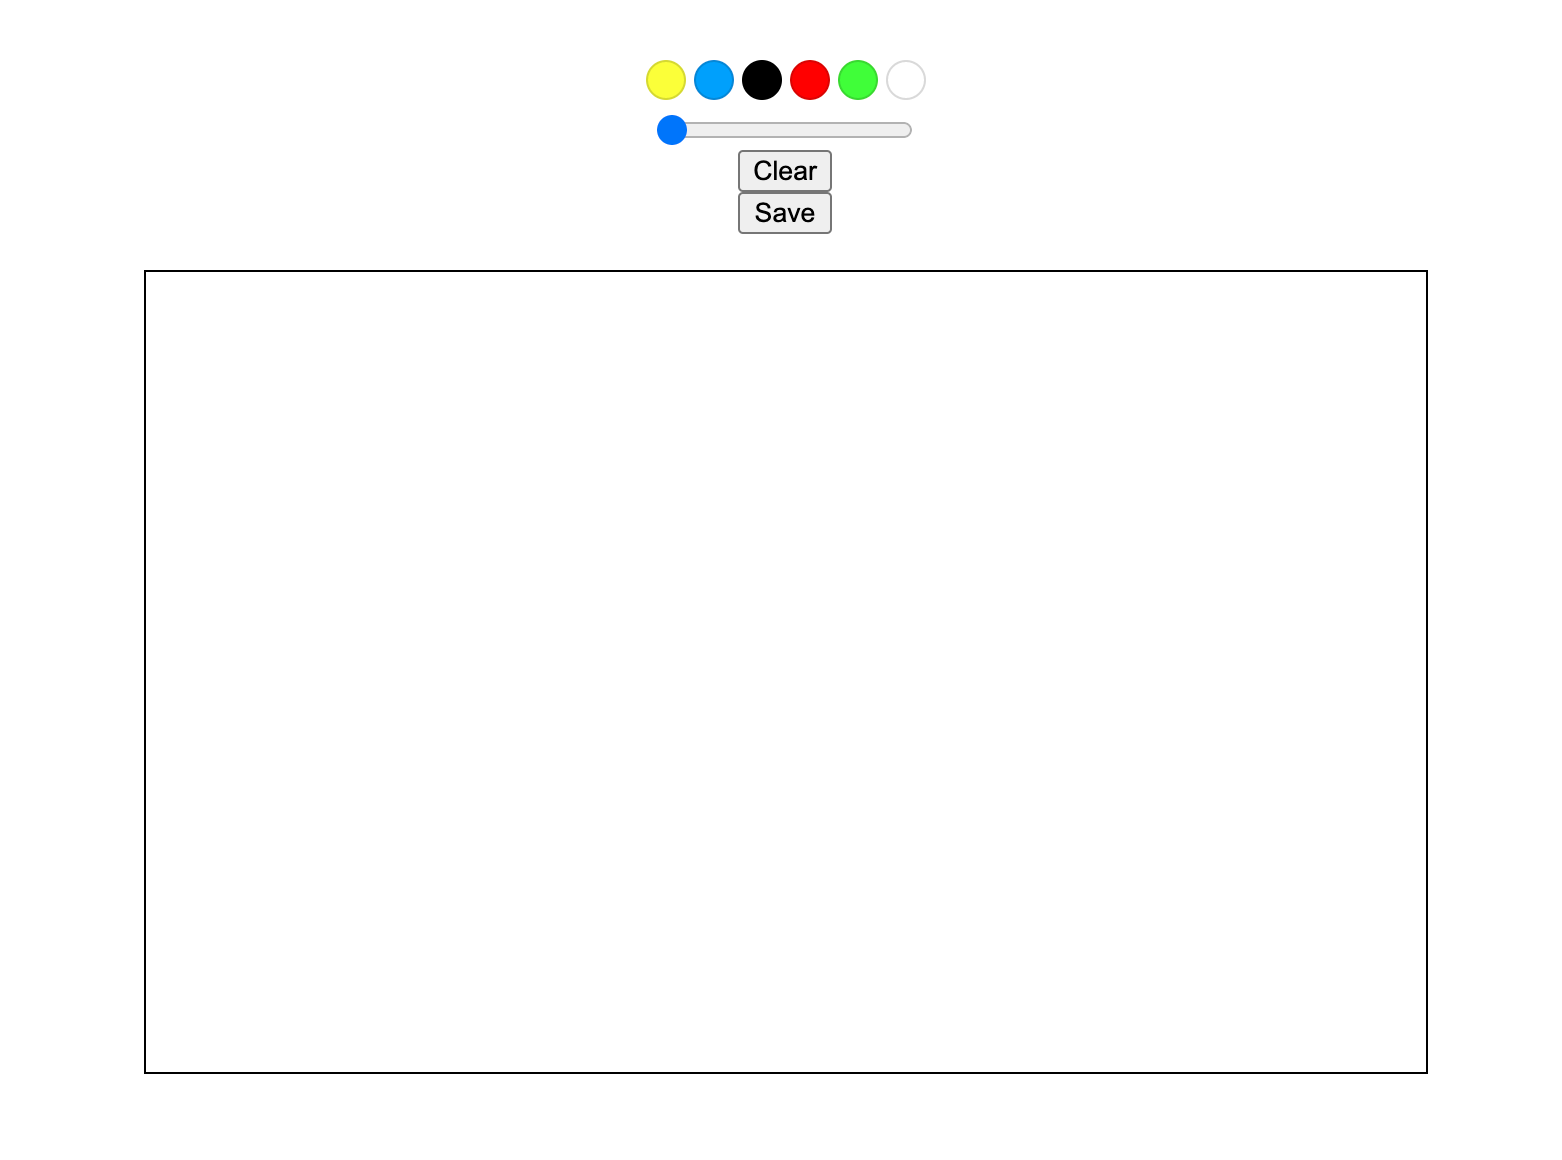
This is how the app looks at the end:
Hack it!
Yay! you made it to the end of this workshop.
You can always hack it and give it your own style.
Live demos
Here are some demos made by other people: