

Join Hack Club Horizons! Ship your projects and fly to your first hackathon →
Have you ever wanted to learn how exactly passwords are generated? In this workshop, we're going to dive deep into cybersecurity, and along the way we'll make a secure password generator with Python.
Setting up
We're going to use repl.it, a free, online code editor, to write the code for this project. Get started by visiting repl.it/languages/python3.
Once your repl spins up, you should be dumped into an empty file called main.py. This is where you'll be writing all of the code for this project. Now we're ready to start coding!
Writing code
Start by importing the hashlib module from the built-in Python library.
import hashlib
This will allow us to hash and salt our passwords using a popular hashing algorithm called SHA256.
Under the import statement, add:
choice = input('Are you\n(1) Signing Up\n(2) Signing In?: ')
This asks the user what they want to do. In Python, input() prompts the user for input and stops until they input something.
After getting the user's choice, ask them for their password:
pwd = input("Password: ")
For now, we're going to store the password in plaintext in a temporary variable. But as you'll find out in a second, we'll need to do a lot more than that if we want our password generator to be secure.
Under the last line you wrote, add this:
pwd = hashlib.pbkdf2_hmac('sha256', pwd.encode('utf-8'), b'salt', 100000)
This creates a SHA256 hash of the password and adds a "salt" at the end.
Note that we are resetting the pwd variable so that the raw string password is deallocated from memory, and is therefore unhackable.
- The
pbkdf2_hmac()function's first parameter is the way we will hash the password. In our case, we use the SHA256 method. - The second parameter is the string we want to hash. In our case, it's the
pwdvariable. We have to encode this to 'utf-8' before passing it into the hash function. - The next parameter is the salt we want. We use the 'b' character before the string to convert it to bytes.
- The final parameter in the hash function is the length of the derived key. This is unimportant for this workshop and a little beyond the scope, so in the interest of keeping this workshop consise, I will not be going into what this derived key parameter does.
Now WHAT the hanky panky is all this????

To understand hashing, you first need to know what encryption is. Every character on your keyboard (yes, look down at your keyboard) is assigned to an integer value, which is called an ASCII value. When someone encrypts a file, they will generally turn the characters held within a file into their ASCII values, and increment them in some way. So basically, if the character 'A' is in an encrypted file, it might look like 'C'. Of course, these files cannot be understood by humans after encryption, so people use decrypters to get encrypted files back into their normal ASCII form.
Simply put, hashing is a form of encryption that involves converting a piece of data to another format that makes it computationally infeasible to decrypt. More broadly, a hashing algorithm is a type of trapdoor function. For passwords specifically, that means that you can super-easily run a password through a hashing algorithm, and if an attacker were to find the password, it would be impossible for them to convert the hashed string back into a password. The cool thing about hashing is that the same string will always result in the same hash—for example, password, when run through the SHA256 hashing algorithm, will always output 5E884898DA28047151D0E56F8DC6292773603D0D6AABBDD62A11EF721D1542D8. This is how websites know if your password is correct or not even if it's stored as a hash in their database. This is also why websites make such a big deal about you choosing a "secure" password and enabling multi-factor authentication—if your password is common or easy to brute-force attack, hashing doesn't make a big difference.
Salting is an extra level of security that adds randomness to each password. It basically adds a unique string to the password that is hashed along with it.

Whew, that was a lot of information to digest. But now that we're past it, let's keep coding!
The pbkdf2_hmac() function returns bytes, so we need to convert these bytes to a string. Under all of the previous code you wrote, add:
pwd = pwd.hex()
The hex() function digests a bunch of bytes and returns a string!
After that, we will check for what to do based on the player's initial input, which we stored in the choice variable. To do so, we will be using the flow control 'if' statement:
if(choice == '1'):
If the player inputted 1 as their choice, we know that they want to sign up. Therefore, we would like to save their hashed password. Inside this if statement, add:
if (choice == '1'):
  results = open('save.dat', 'w')
  results.write(pwd)
  results.close()
- The
open()function opens a file calledsave.dat, and sets the mode tow, or "write". - Then, we write the hashed password to the
save.datfile. - Finally, we close the file to save our changes.
To add a little flair at the end, we will add some colored text to confirm that the user successfully signed up. On the left side of repl.it, create a new file named FColor.py.
The colors we will be using are referred to as ANSI escape sequences. Each sequence represents either a color, background, or style. These codes are used in terminals, including the Windows Command Prompt!
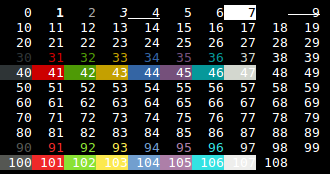
Let's define some constant strings. Each string will represent an ANSI escape sequence for a certain terminal color. It is a convention to capitalize all letters in a constant variable.
Let's define these colors in FColor.py:
RED   = '\u001b[31m'
GREEN = '\u001b[32m'
BLUE  = '\u001b[36m'
The codes in the strings are known as ANSI escape codes, which allow us to bring color to the terminal!
Now, go back to main.py, and add these lines to the end of your if statement:
if (choice == '1'):
  # code we wrote before
  print()
  print(FColor.BLUE + 'Sign Up Complete!')
Printing an ANSI escape code will change the terminal text color to the color we print out.
In order to make this work, we need to import our FColor file. So, at the top of the main.py file, add:
import hashlib
import FColor
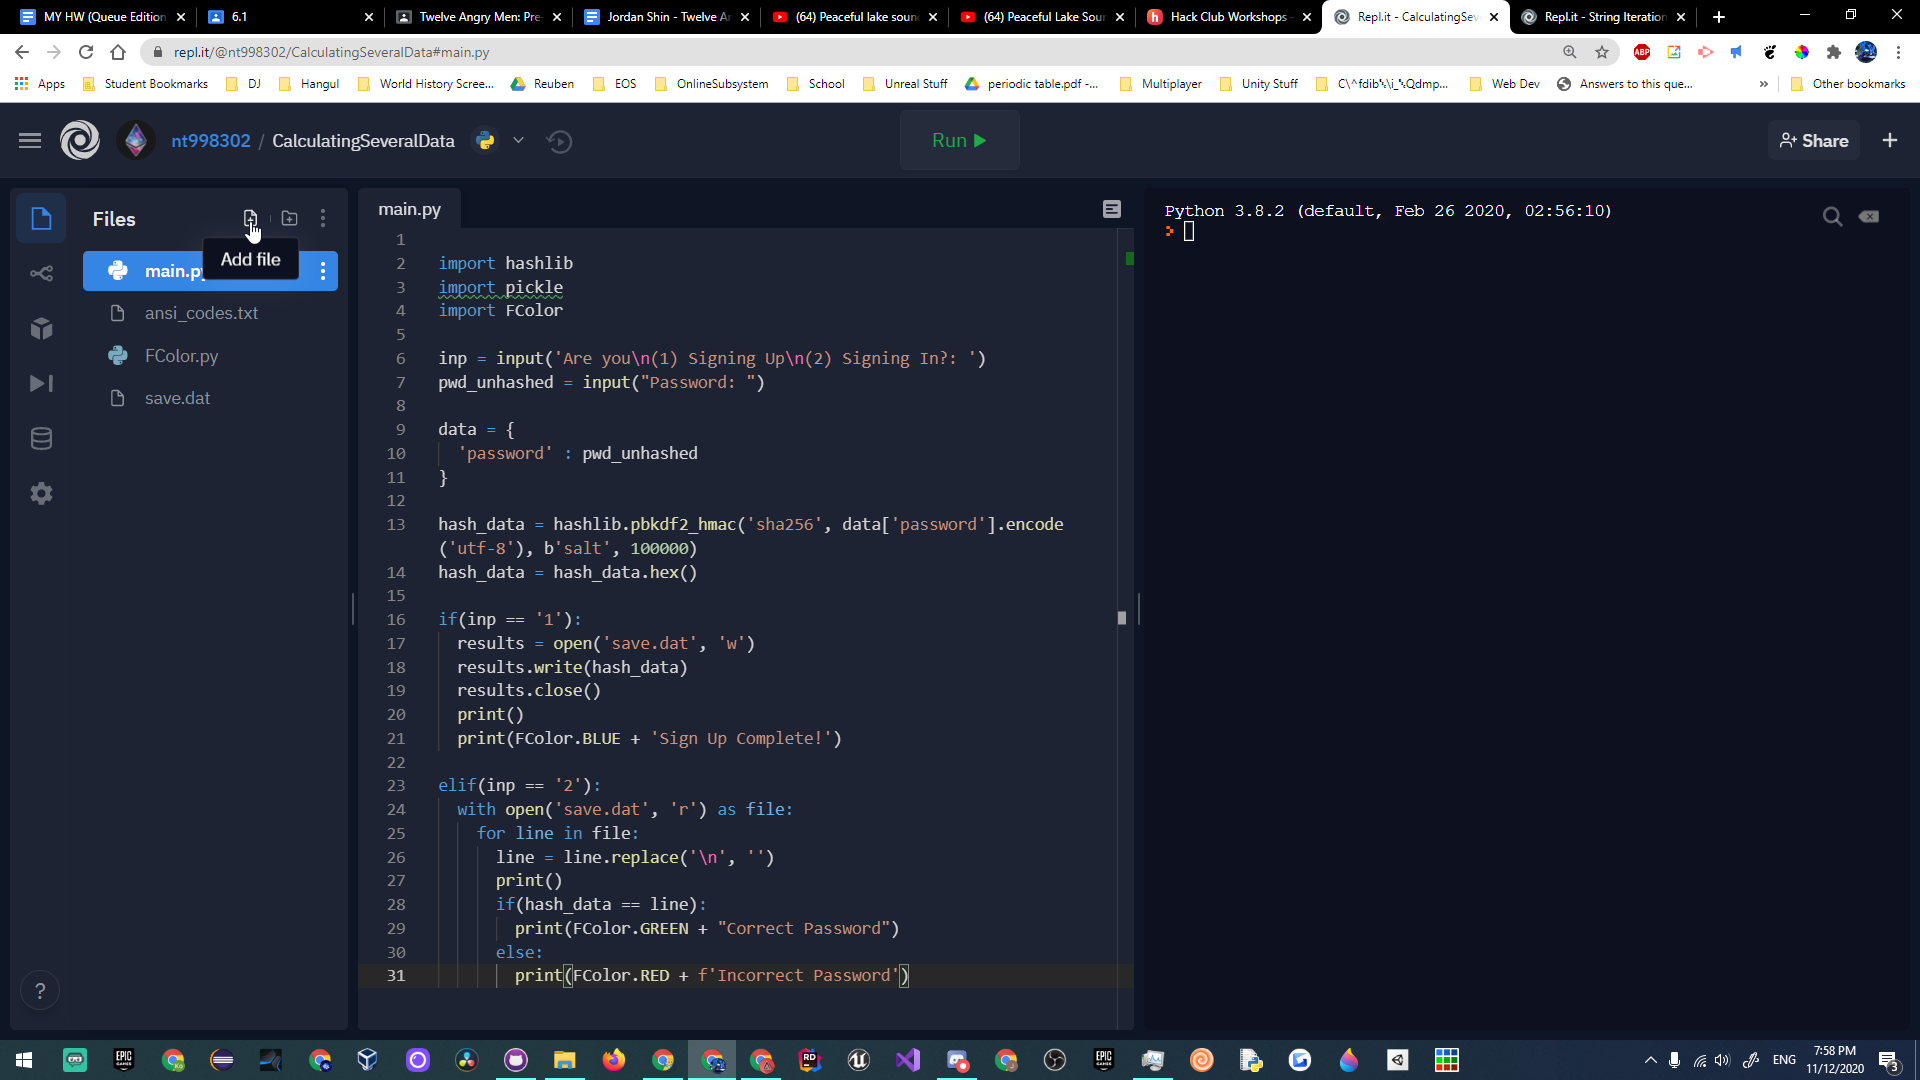
Here's what your main.py file should look like so far:
import hashlib
import FColor

choice = input('Are you\n(1) Signing Up\n(2) Signing In?: ')
pwd = input("Password: ")

pwd = hashlib.pbkdf2_hmac('sha256', pwd.encode('utf-8'), b'salt', 100000)
pwd = pwd.hex()

if(choice == '1'):
  results = open('save.dat', 'w')
  results.write(pwd)
  results.close()
  print()
  print(FColor.BLUE + 'Sign Up Complete!')
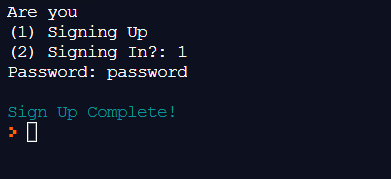
If you click the green "Run" button at the top of your repl, here's what you should see:
Now that we have created a system in which the user can save their hashed password to a file, we will create a system where the user can log in using the password they signed up with. To do so, we will create an elif statement under our if statement. The elif block will only run if the user wants to sign in.
In your main.py file, after the if statement, add:
elif(choice == '2'):
  try:
    with open('save.dat', 'r') as file:
      for line in file:
If the user is signing in, we read the saved password from the save.dat file. Then, we loop through each line in the file.
When the program reads each line, it'll occasionally find \n, which denotes a new character. Let's strip each line of \n to get the pure text. Inside the for loop, add:
line = line.replace('\n', '')
This will replace every \n, or newline, character with a blank character ('').
After this, let's create an empty print statement to format a newline. Still inside the for loop, add:
print()
Now we will check whether or not the password the user initially inputted is the same as the one the user made an account with. To do so, we will compare the two variables with an if statement.
Under the print() statement, still in the for loop, add:
if(pwd == line):
  print(FColor.GREEN + "Correct Password")
else:
  print(FColor.RED + f'Incorrect Password')
We again take advantage of our fancy terminal color setup to print in green if the password is correct and red if it's incorrect.
Then, to finish off our try block, we will make an except block. If you leave a try block open without an except block, your code will error! This will only run if we fail to open up the saved password file.
At the bottom of the file, in the same indentation as the try block, add:
except:
  print(FColor.RED + "Couldn't read file 'save.dat'")
The final code should look like this:
import hashlib
import FColor

choice = input('Are you\n(1) Signing Up\n(2) Signing In?: ')
pwd = input("Password: ")

pwd = hashlib.pbkdf2_hmac('sha256', pwd.encode('utf-8'), b'salt', 100000)
pwd = pwd.hex()

if(choice == '1'):
  results = open('save.dat', 'w')
  results.write(pwd)
  results.close()
  print()
  print(FColor.BLUE + 'Sign Up Complete!')

elif(choice == '2'):
  try:
    with open('save.dat', 'r') as file:
      for line in file:
        line = line.replace('\n', '')
        print()
        if(pwd == line):
          print(FColor.GREEN + "Correct Password")
        else:
          print(FColor.RED + f'Incorrect Password')
  except:
    print(FColor.RED + "Couldn't read file 'save.dat'")
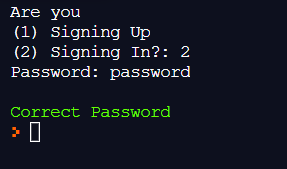
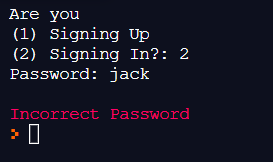
Here's the result of running your code:
Hacking 🚀
Woohoo! You have successfully created a secure password system! You can use this to create secure login pages and sign up pages without ever getting hacked!
If you want to take this project even further, here are a few examples of ways you can do so:
- This example prints out the hashed password in both byte format and string format for you to see and compare!
- This example stores the hashed password using a different hash algorithm (md5) and a custom salt!
- This example takes this workshop to the next level, using repl.it's database system, repldb. It stores the hashed passwords, using the username as a key. Then, a user can sign into their account, but only with the correct password.
Happy hacking!