

Join Hack Club Horizons! Ship your projects and fly to your first hackathon →
Let's make our first game in Sprig!
Sprig is a tool developed by Hack Club to help people quickly get started making interesting tile games. It's a tiny game engine embedded in a web-based editor with integrated art and music tools. If you build a game in Sprig and share it in the community gallery you can get a Sprig Console!
We're going to build a Sokoban game. To get started with Sprig, simply open the Sprig editor.
On the left, we have an editor, and on the right, we have the actual game. We're going to be using the editor to write the code for our game.
You may want to watch this video to get acquainted with the editor:
And this video to get to know the toolkit a bit:
Creating Our Players
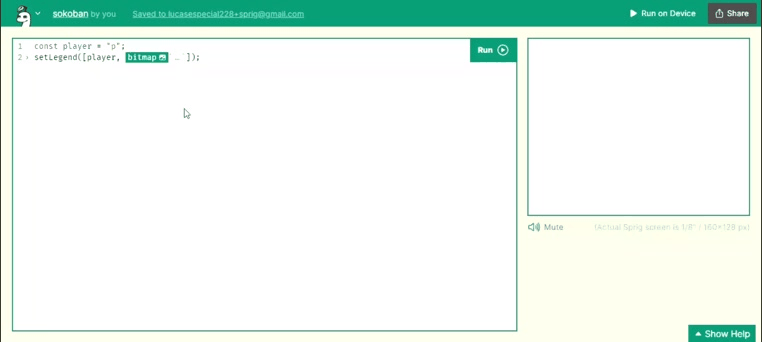
We are going to create 4 variables; a player, a box that you're going to push, the goal of the level, and a wall that'll serve as an obstacle.
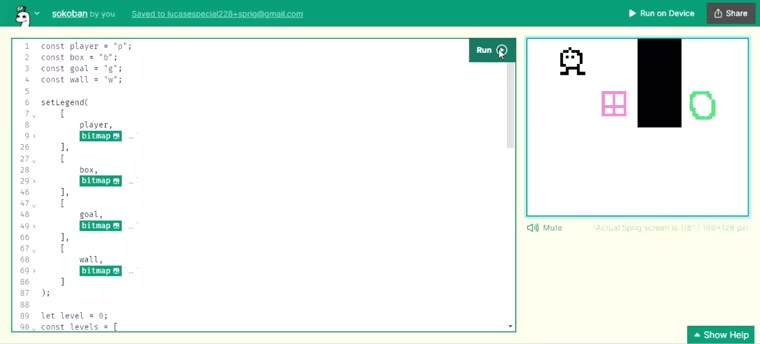
We then use setLegend to create the art (sprite) for each of these. Later you'll be using these variables to build maps.
Let's get rolling!
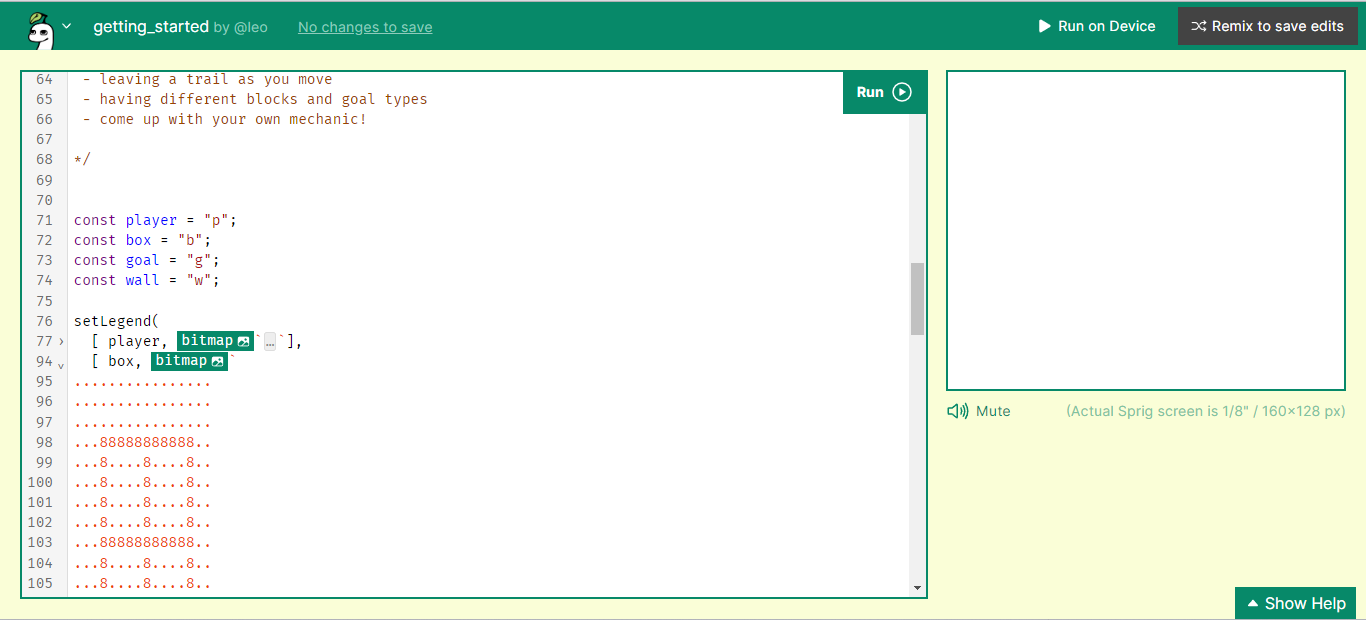
To start, let's assign a single character to a variable.
const player = "p";
We can then set the image we want to use for our player, like so:
const player = "p";

setLegend([player, bitmap`...`]);
setLegend allows us to set up a sprite for our character. We can click on bitmap to open up the pixel editor and draw an image for our sprite.
The bitmap is stored as a string. To take a look at it, click on the little arrow next to the line number. You can minimize it by clicking the area again.
Awesome! Now let's add some obstacles, boxes, and objectives to our game:
const player = "p";
const box = "b";
const goal = "g";
const wall = "w";

setLegend(
    [
        player,
        bitmap`
................
................
................
.......0........
.....00.000.....
....0.....00....
....0.0.0..0....
....0......0....
....0......0....
....00....0.....
......00000.....
......0...0.....
....000...000...
................
................
................`
    ],
    [
        box,
        bitmap`
................
................
................
...888888888....
...8...8...8....
...8...8...8....
...8...8...8....
...8...8...8....
...888888888....
...8...8...8....
...8...8...8....
...888888888....
................
................
................
................`
    ],
    [
        goal,
        bitmap`
................
................
................
....444444......
...44....44.....
...4......4.....
...4.......4....
...4.......4....
...4.......4....
...44......4....
....4......4....
....44....44....
.....444444.....
................
................
................`
    ],
    [
        wall,
        bitmap`
0000000000000000
0000000000000000
0000000000000000
0000000000000000
0000000000000000
0000000000000000
0000000000000000
0000000000000000
0000000000000000
0000000000000000
0000000000000000
0000000000000000
0000000000000000
0000000000000000
0000000000000000
0000000000000000`
    ]
);
Now let's create a level to get this game moving!
Creating a Level
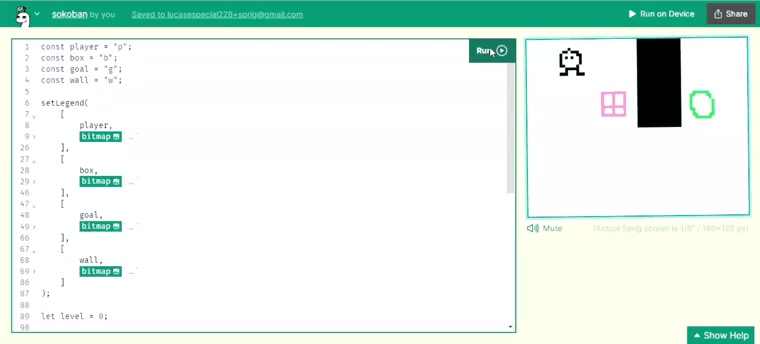
Ultimately, we'll want multiple levels, so let's store our current level in a variable and keep all our levels in a list.
let level = 0;

const levels = [map`.`];
Right now we only have one level, so let's do something with it! Click on map to open up the map editor. Make sure you hit run to load the legend before editing the map.

To set the map so the player can see it, use setMap, another function that's provided by Sprig.
let level = 0;

const levels = [
    map`
      p.w.
      .bwg
      ....
      ....
    `
];

const currentLevel = levels[level];
setMap(currentLevel);
Notice how the map is also represented as a string - p is a reference to our player, which is represented by p, and the same goes for the other characters that we see. . represents a space in our grid where there isn't a sprite.
Adding Controls
Now let's add some controls to our player so we can start playing the game.
Sprig has eight inputs:
up,down,left, andright, which isw,a,s, anddon the keyboard respectively.i,j,k, andl.
You can do something on a button press like so:
onInput("w", () => {
    getFirst(player).y -= 1;
});
We're using getFirst, another function provided by Sprig, to retrieve our player sprite.
Repeating that pattern, we can add up/down/left/right movements to our player.
onInput("w", () => {
    getFirst(player).y -= 1;
});

onInput("s", () => {
    getFirst(player).y += 1;
});

onInput("a", () => {
    getFirst(player).x -= 1;
});

onInput("d", () => {
    getFirst(player).x += 1;
});
Now when you click "Run", you'll be able to move the player around with w, a, s, and d! Right now, the player can move through the wall and box. Let's fix that.
Adding Behaviors
We want our player to push boxes and not be able to move through walls.
Let's make the player, boxes, and walls all solid so they can't move through each other. To do that, we're going to use Sprig's setSolids:
setSolids([player, box, wall]);
Now those sprites won't overlap.
We want the player to push boxes, though, so let's use Sprig's setPushables:
setPushables({
    [player]: [box]
});
The argument passed to setPushables means that every sprite of type player, or in this case, p, can push sprites with type box, or in this case, b.
Let's try it out now!
Win Condition
We have some mechanics - super cool! - but we don't really have a game unless there is an objective. Let's add a win condition. The objective will be to push boxes onto the green goals.
We can check if all of the green goals are covered after every input and if they are, let's move on to the next level. We'll use Sprig's tilesWith function to help with this. We can pass in the sprite types and it will return all tiles which have every sprite type we passed inside.
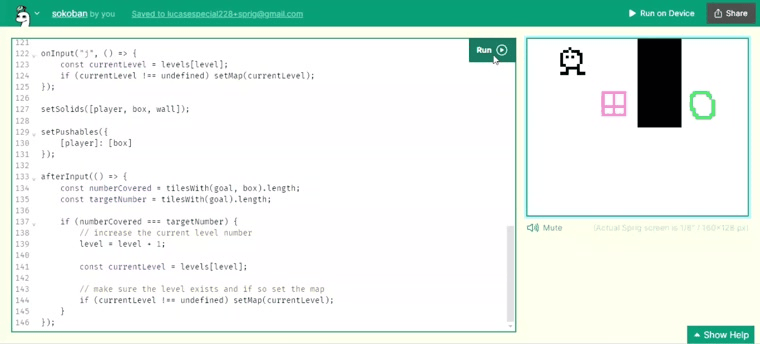
afterInput(() => {
    const numberCovered = tilesWith(goal, box).length;
    const targetNumber = tilesWith(goal).length;

    if (numberCovered === targetNumber) {
        // increase the current level number
        level = level + 1;

        const currentLevel = levels[level];

        // make sure the level exists and if so set the map
        if (currentLevel !== undefined) setMap(currentLevel);
    }
});
Notice how we used afterInput - that's another Sprig function. We pass in a function to be run after the user presses a registered key.
Let's add another level to our game to see this in action.
const levels = [
    map`
p.w.
.bwg
....
....`,
    map`
p.w.
.bwg
....
..bg`
];
Nice!
Polish
Let's add some polish to our game. It's going to be annoying to have to restart the whole game when we get stuck on one level, so let's fix this by adding the ability to restart levels:
onInput("j", () => {
    const currentLevel = levels[level];
    if (currentLevel !== undefined) setMap(currentLevel);
});
When our game is over, let's let the player know they've won by using Sprig's addText. We'll edit the function we wrote before to change the level:
afterInput(() => {
    const numberCovered = tilesWith(goal, box).length;
    const targetNumber = tilesWith(goal).length;

    if (numberCovered === targetNumber) {
        // increase the current level number
        level = level + 1;

        const currentLevel = levels[level];

        // make sure the level exists and if so set the map
        if (currentLevel !== undefined) {
            setMap(currentLevel);
        } else {
            addText("you win!", { y: 4, color: color`3` });
        }
    }
});
Hackin' on it
Make the game your own! You can try:
- Drawing your own character art
- Adding more levels to the game (aim for 10)
- Changing the game mechanics
- What if you could push walls?
- What if you could move left and right two blocks instead of one?
- What if there were laser beams that destroyed the player?
- etc.
For inspiration, check out some of the cool games other Hack Clubbers have made!
Uploading to the Gallery
So you've written a game and want to share it or submit your game to win a Sprig device! It's actually quite easy. First, hit the automatically generated name:
and add a name like so:
my_sprig_game
The next step is to download your game file. To do this, select "Download" in the menu. Your game file should be downloaded to your computer.
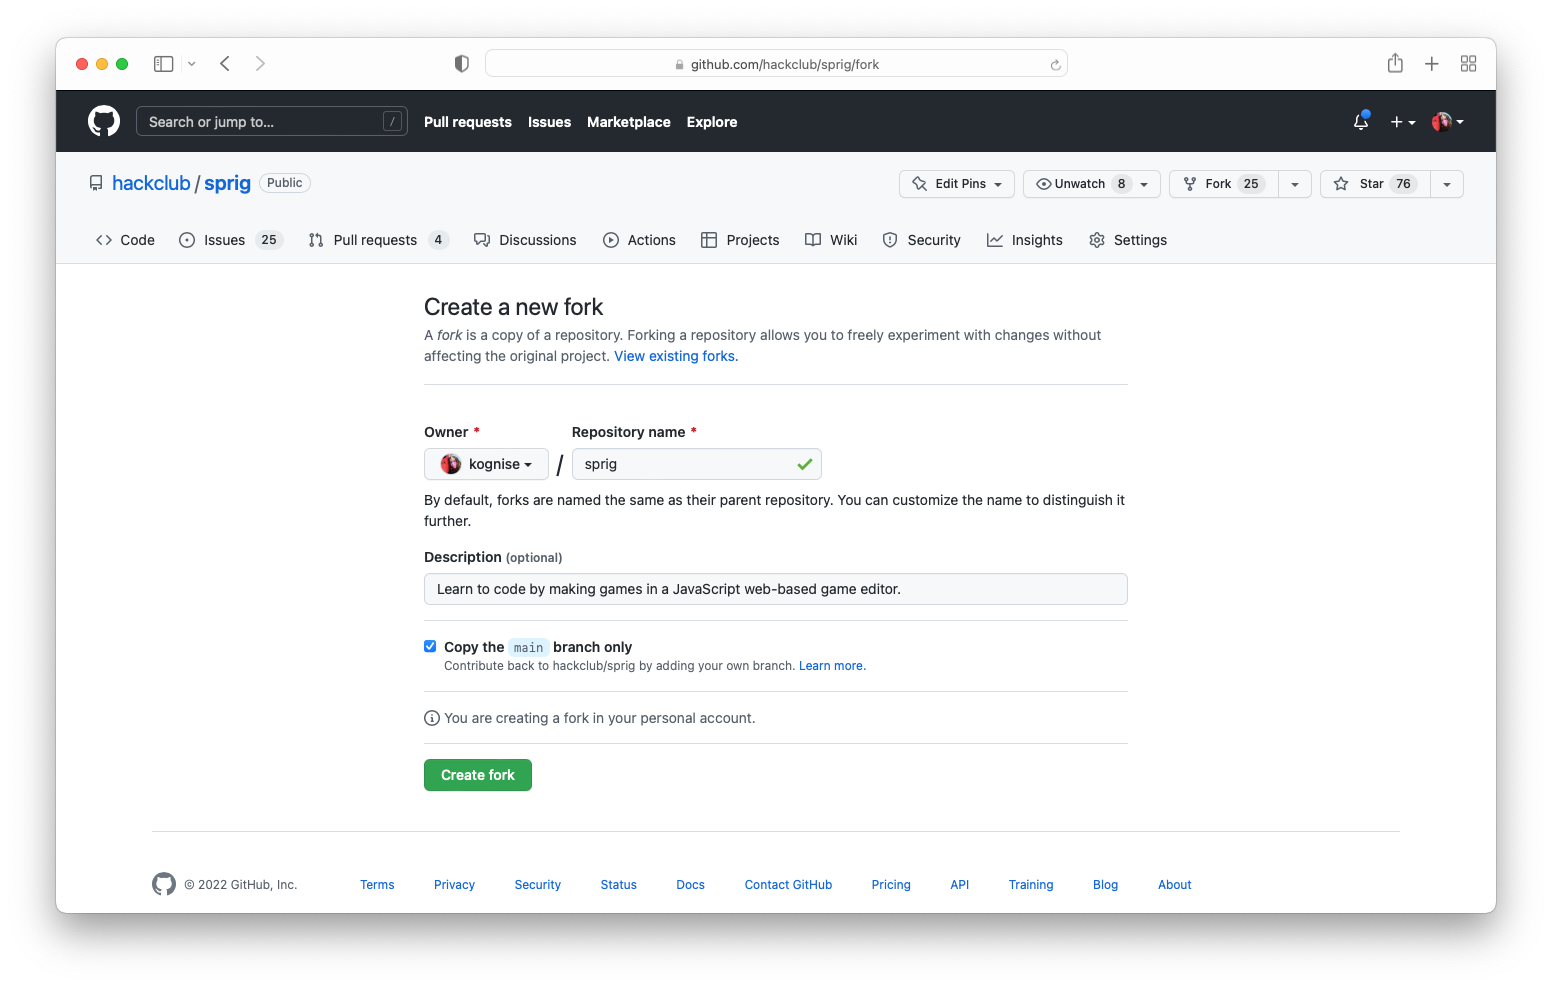
Once you've downloaded the file, you need to upload it to the Sprig gallery for everyone to see. To do this, you need to fork the Sprig repository, which contains all the code for the Sprig editor and gallery.
Start by signing up for a GitHub account. Once you have an account, go to the Sprig repository, and click "Fork" in the upper right corner. You'll be redirected to a page that looks like this:
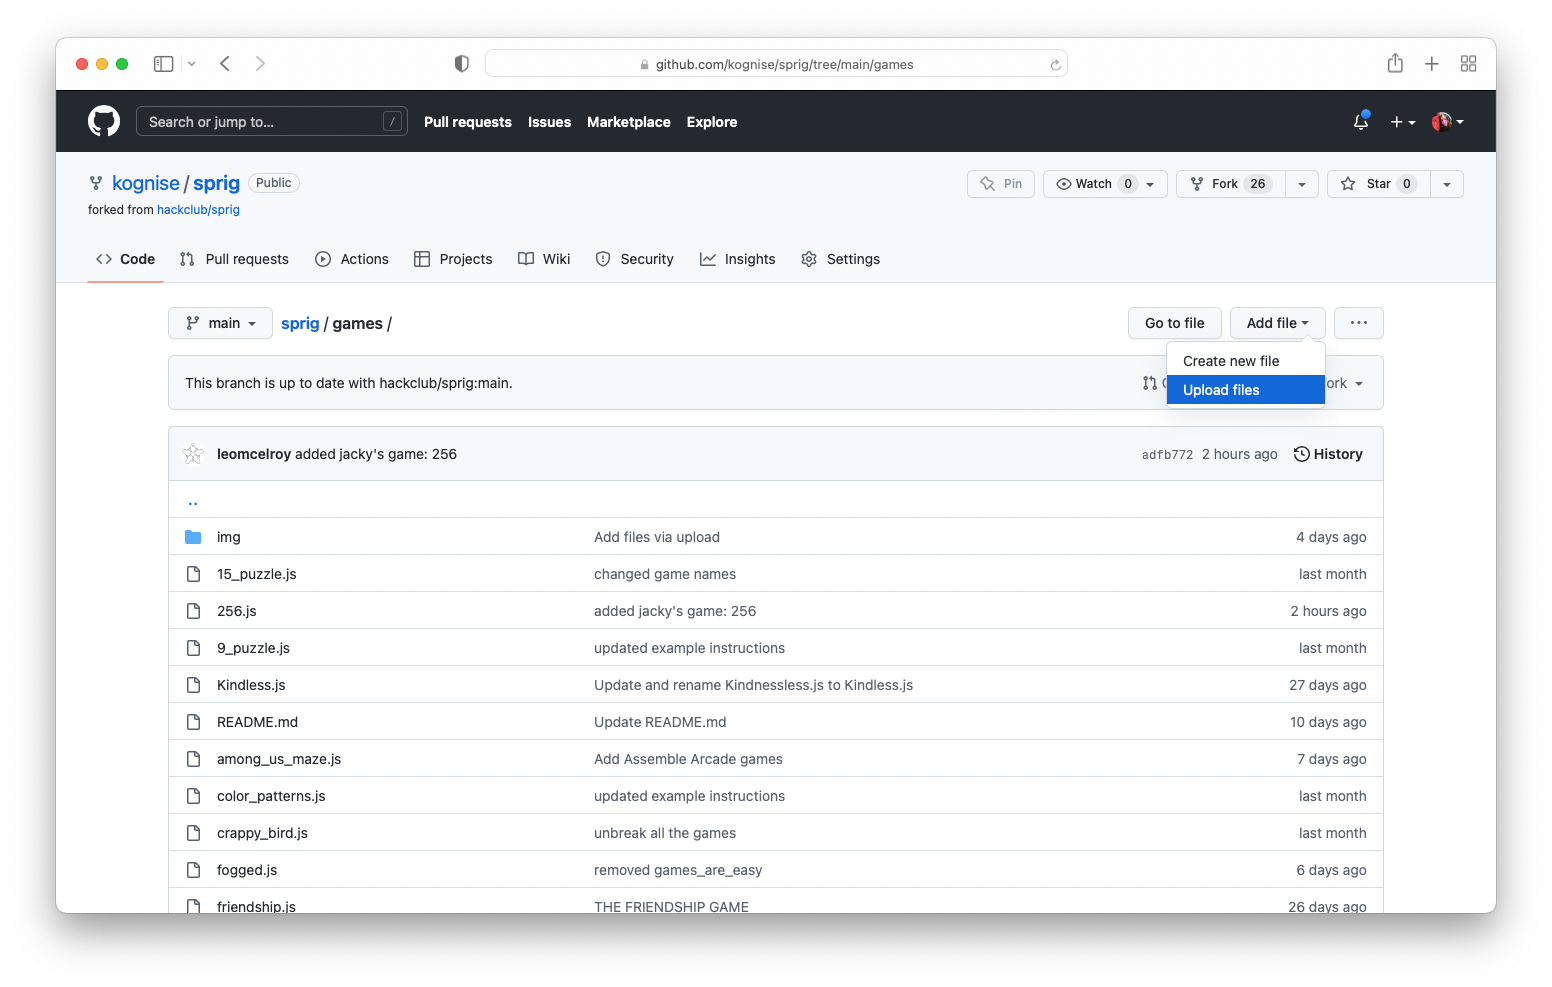
After you've forked the repo, open the games folder inside your fork, and then click on the "Add file" button you'll see in the upper right corner, and then "Upload file":
You can add your game file, and then scroll down to the bottom and click "Commit file".
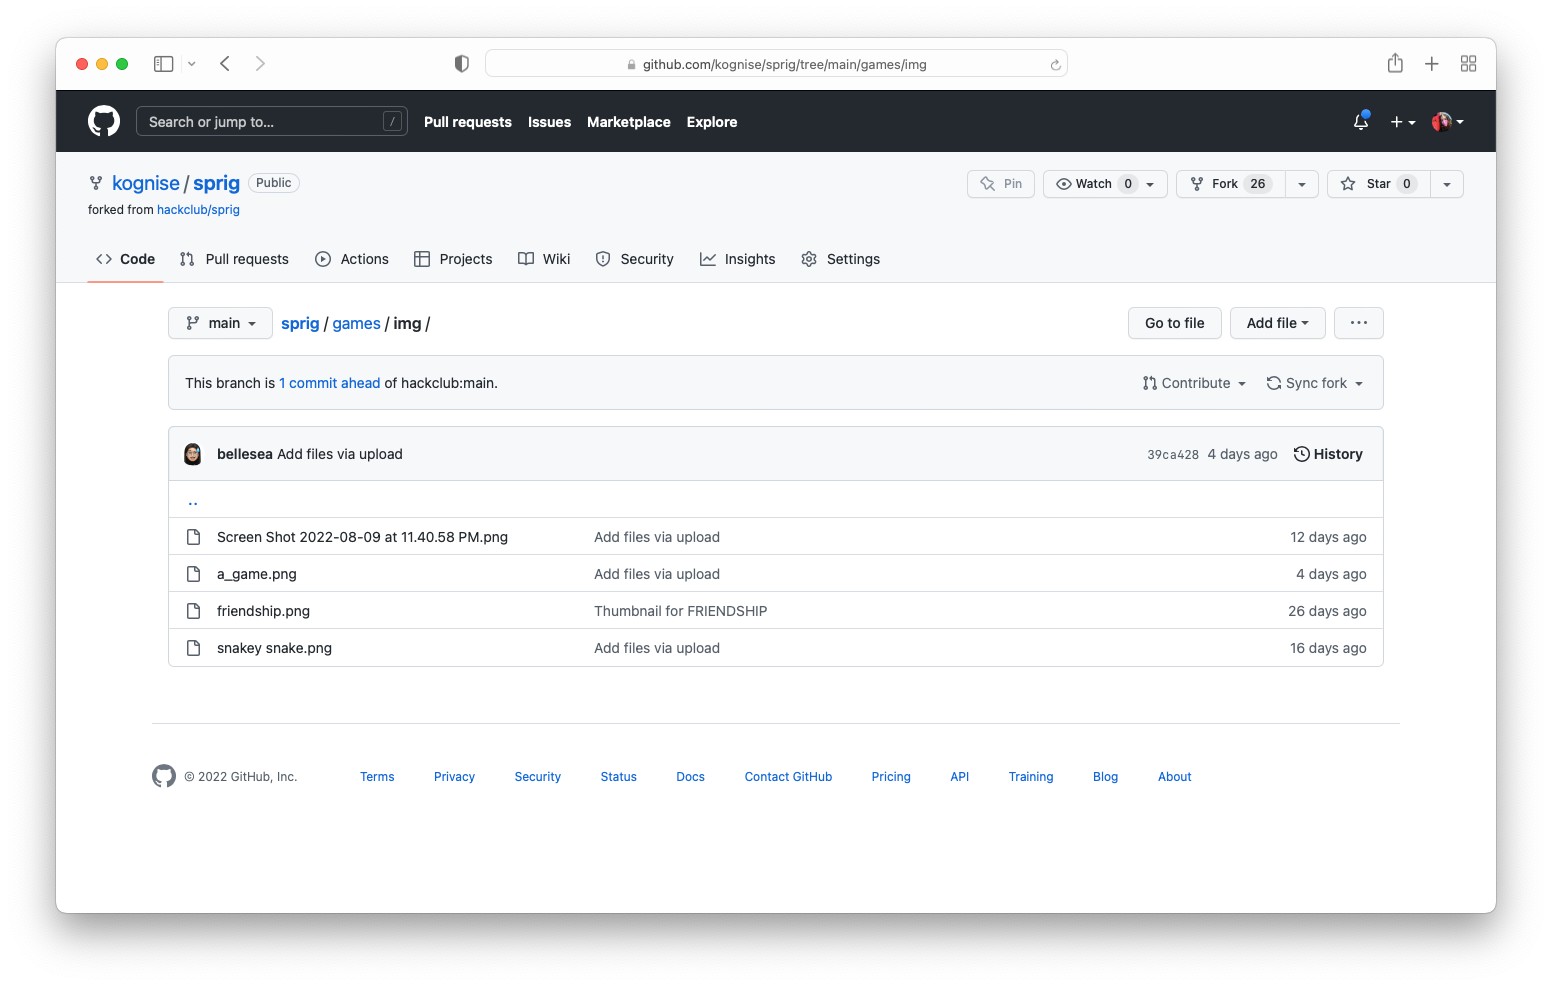
If you want to add a thumbnail to your game in the gallery, you can! By default, it will be the first map of your game. If you want to change this though, you can. Just take a screenshot of your game in PNG format, go to the img folder inside the games folder, and then upload the image there. Make sure to name your image file the filename for your game!
The last thing to do is open a pull request, which will update the official gallery with your game. On your fork's main page, click on "Contribute", then "Open Pull Request" and "Create Pull Request". Name your pull request with the name of your game, and in the description box, write a description of your game and your coding experience.
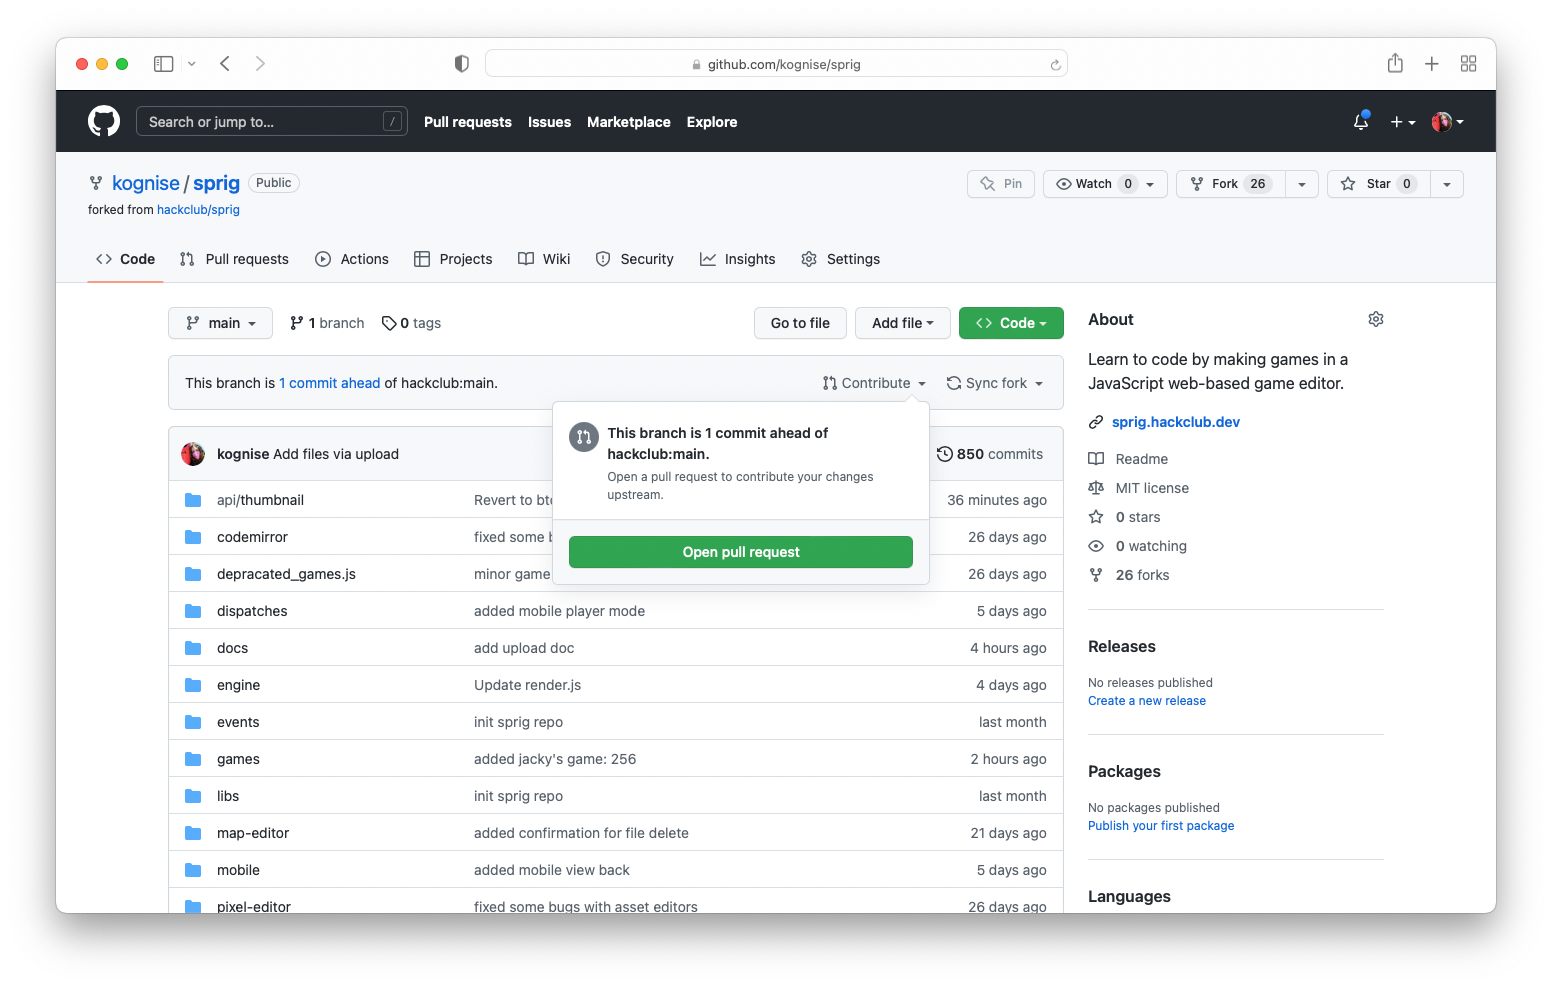
Once you're done, click "Create pull request"! We'll take a look at your game, and once it's approved, your game will appear in the gallery!
Everything Together
Let's look at the final code:
const player = "p";
const box = "b";
const goal = "g";
const wall = "w";

setLegend(
    [
        player,
        bitmap`
................
................
................
.......0........
.....00.000.....
....0.....00....
....0.0.0..0....
....0......0....
....0......0....
....00....0.....
......00000.....
......0...0.....
....000...000...
................
................
................`
    ],
    [
        box,
        bitmap`
................
................
................
...888888888....
...8...8...8....
...8...8...8....
...8...8...8....
...8...8...8....
...888888888....
...8...8...8....
...8...8...8....
...888888888....
................
................
................
................`
    ],
    [
        goal,
        bitmap`
................
................
................
....444444......
...44....44.....
...4......4.....
...4.......4....
...4.......4....
...4.......4....
...44......4....
....4......4....
....44....44....
.....444444.....
................
................
................`
    ],
    [
        wall,
        bitmap`
0000000000000000
0000000000000000
0000000000000000
0000000000000000
0000000000000000
0000000000000000
0000000000000000
0000000000000000
0000000000000000
0000000000000000
0000000000000000
0000000000000000
0000000000000000
0000000000000000
0000000000000000
0000000000000000`
    ]
);

let level = 0;
const levels = [
    map`
p.w.
.bwg
....
....`,
    map`
p.w.
.bwg
....
..bg`
];

const currentLevel = levels[level];
setMap(currentLevel);

onInput("w", () => {
    getFirst(player).y -= 1;
});

onInput("s", () => {
    getFirst(player).y += 1;
});

onInput("a", () => {
    getFirst(player).x -= 1;
});

onInput("d", () => {
    getFirst(player).x += 1;
});

onInput("j", () => {
    const currentLevel = levels[level];
    if (currentLevel !== undefined) setMap(currentLevel);
});

setSolids([player, box, wall]);

setPushables({
    [player]: [box]
});

afterInput(() => {
    const numberCovered = tilesWith(goal, box).length;
    const targetNumber = tilesWith(goal).length;

    if (numberCovered === targetNumber) {
        // increase the current level number
        level = level + 1;

        const currentLevel = levels[level];

        // make sure the level exists and if so set the map
        if (currentLevel !== undefined) {
            setMap(currentLevel);
        } else {
            addText("you win!", { y: 4, color: color`3` });
        }
    }
});