

Join Hack Club Horizons! Ship your projects and fly to your first hackathon →
I bet you have used a stopwatch many times be it racing or just for fun! Have you wondered how cool would it be if we built our own stopwatch? Well today, we will together build a simple but sweet stopwatch!
Here's the source code and the live demo.
Part 1: Prerequisites
You should have a beginner understanding of:
- HTML
- CSS
- JavaScript
Part 2: Setup
Setting up your code environment on Repl.it
Repl.it is an online code editor. You don't have to use Repl.it but I suggest you do as it sets everything up for you and you don't require any installations.
Also, I have prepared a starter code for you to begin with. Just go here and your coding environment will spin up in just a few seconds!
You should see something like the following:
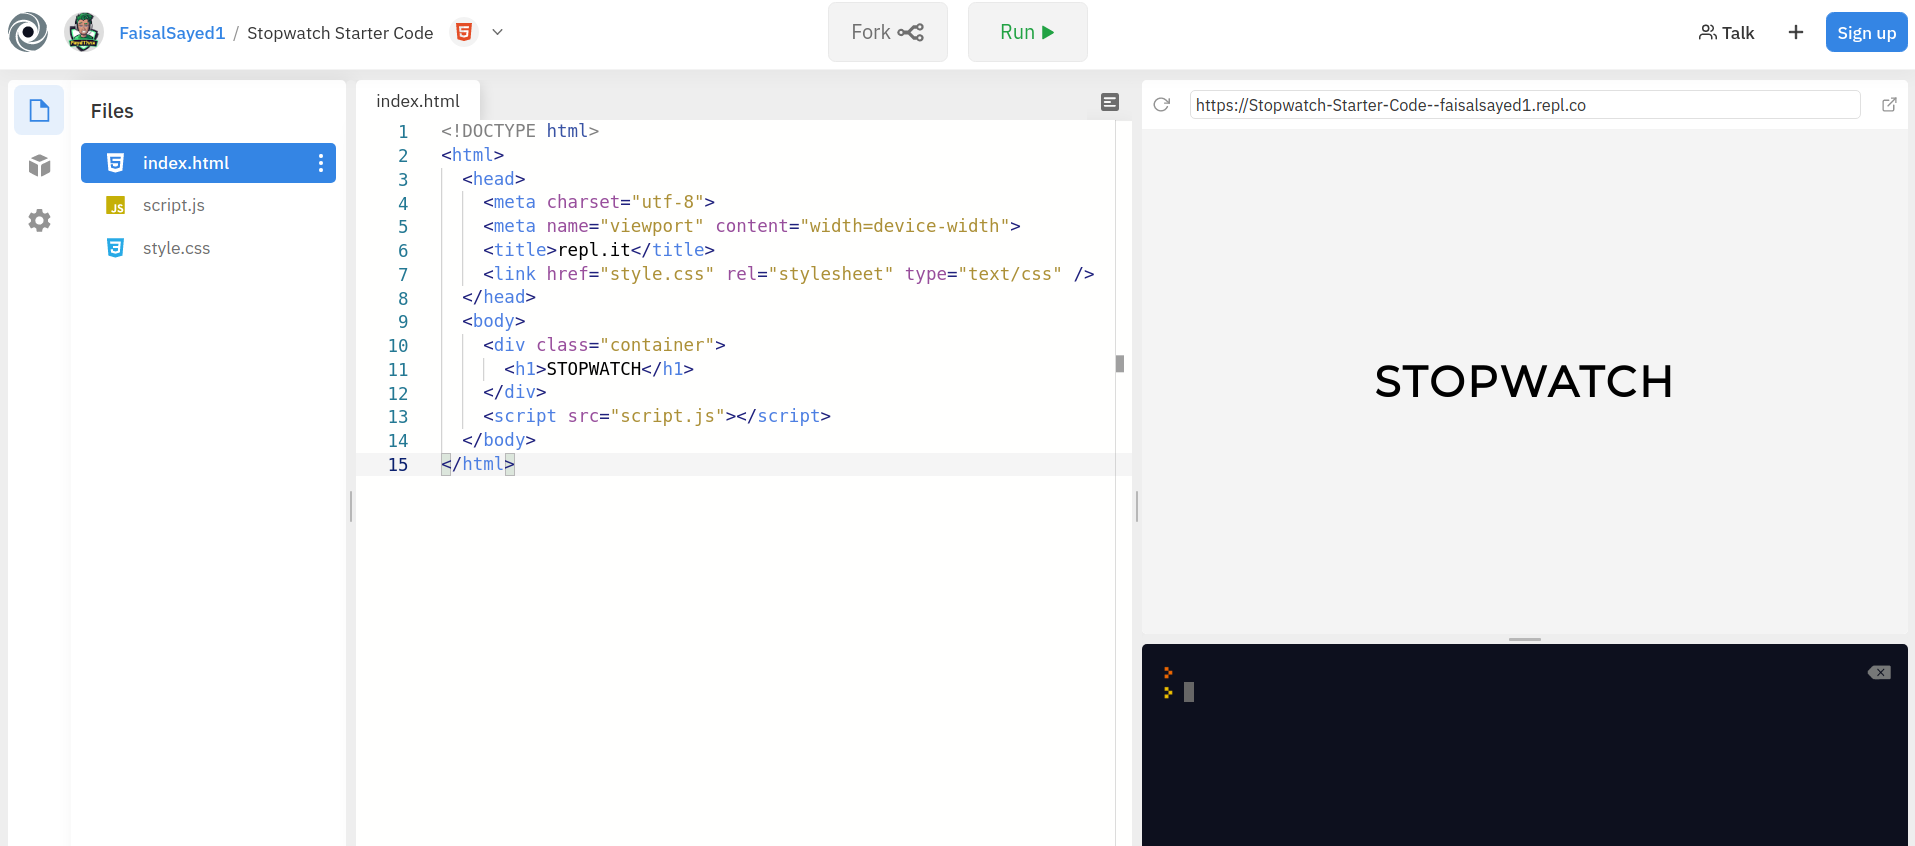
Click on the FORK button on the top and you are good to go!
Part 3: Building the project
1) Starter Code
Let's first have a look at our starter code. In our index.html file, we have a container div and an <h1> tag inside it.
Next if we take a look in our style.css file, all the styles are prewritten for you! But if you want to change any styles, feel free to do it!
2) HTML
We need to add some more HTML lines to build our stopwatch. We will write all our HTML code inside the container div. Define a <div> tag with a class of main below the <h1> tag.
<h1>Stopwatch</h1>
<div class="main"></div>
Inside the main div, we will add a <p> tag with a class of time and seperate <span> tags for minutes, seconds and milliseconds respectively. Confusing? You'll get it in a minute.
<p class="time">
  <span class="minutes">00</span>:<span class="seconds">00</span>:<span class="milliseconds">00</span>
</p>
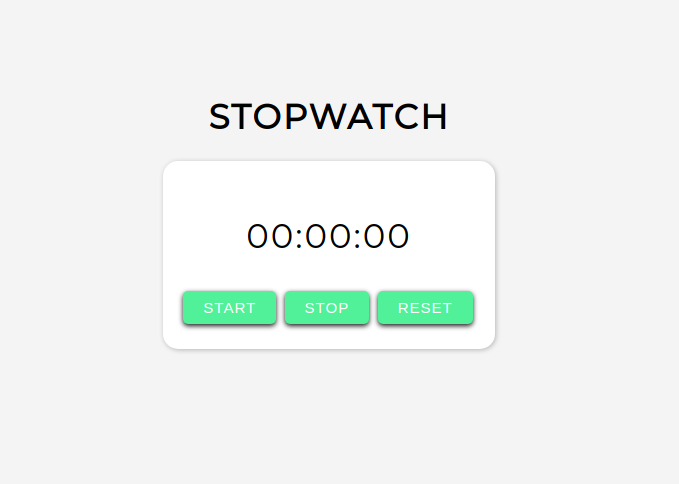
If you click RUN, you'll see that we have built a basic layout for our stopwatch!

Next, we will add some buttons for the functioning of our stopwatch. Create a <div> tag below our <p> tag and add 3 buttons inside it with the text and the class of start, stop and reset respectively.
<div>
  <button class="start">START</button>
  <button class="stop">STOP</button>
  <button class="reset">RESET</button>
</div>
This is our code so far:
<body>
  <div class="container">
    <h1>STOPWATCH</h1>
    <div class="main">
      <p class="time">
        <span class="minutes">00</span>:<span class="seconds">00</span>:<span class="milliseconds">00</span>
      </p>
      <div>
        <button class="start">START</button>
        <button class="stop">STOP</button>
        <button class="reset">RESET</button>
      </div>
    </div>
  </div>
  <script src="script.js"></script>
</body>
And this is what you'll see when you click RUN
Here's a funfact! You just completed writing HTML!
As the style.css file was prewritten for you, we will now directly move on to the JavaScript.
3) JavaScript
Navigate to your script.js file and let's start writing JavaScript!
First we will link the milliseconds, seconds and minutes in our HTML with some JavaScript variables.
const millisec = document.querySelector('.milliseconds')
const sec = document.querySelector('.seconds')
const min = document.querySelector('.minutes')
Explanation: We define 3 variables millisec, sec and min using const and set their value to the first element that matches a specified CSS class(s) in the document. In our case, those CSS selectors are .milliseconds , .seconds , .minutes respectively.
Now, if you are wondering what is a const and what is a querySelector(), let me clear all your doubts!
Mainly, there are 3 ways of defining a variable in JavaScript.
varletconst
We will ignore var for now as we won't use it. If we define a variable using let, then we can change its value anytime in the code afterwards. Meanwhile, a const (“constant”)’s value always remains constant and cannot be changed—if you try to change it, JavaScript will show you an error in the console.
What is querySelector()? The querySelector() method returns the first element that matches a specified CSS class(s) in the document.
Learn more about query selector.
Learn more about the types of variables.
Moving ahead, we'll define 4 more variables but this time, using let
let milliNum = 0
let secNum = 0
let minNum = 0
let INTERVAL
Explanation: We'll increment the milliNum, secNum and minNum variables and display it on the screen when the user starts the stopwatch. The INTERVAL variable will be used to clear or set the intervals.
Next up, we'll define few functions each for incrementing milliseconds, seconds and minutes and we will add them to our HTML.
function milliseconds() {
  milliNum++
  millisec.innerHTML = milliNum
}

function seconds() {
  secNum++
  sec.innerHTML = secNum
}

function minutes() {
  minNum++
  min.innerHTML = minNum
}
Now these functions need to be called when someone presses the START button. For this, we'll also create a start() function.
function start() {
  clearInterval(INTERVAL)
  INTERVAL = setInterval(() => {
    milliseconds()
  }, 10)
}
Explanation: In the start() function, we can use the setInterval and clearInterval properties for the functioning of our stopwatch. But first of all, we'll clear all the intervals, if any, before setting a new interval. We defined the INTERVAL variable for this purpose.
After we clear all the previous intervals, we set a new interval of 0.010 seconds and call the milliseconds() function after every 0.010 seconds.
NOTE: 0.010 seconds = 1 millisecond
Now, the setInterval function's syntax looks a bit weird, right? Let's break it down.
setInterval(func, intervalTime)
The setInterval takes in a function and an interval time in seconds. It will call the function repeatedly after intervalTime seconds. So using that syntax, we pass it an arrow function (=>) which calls the milliseconds() function after every 1 milliseconds.
Learn more about setInterval().
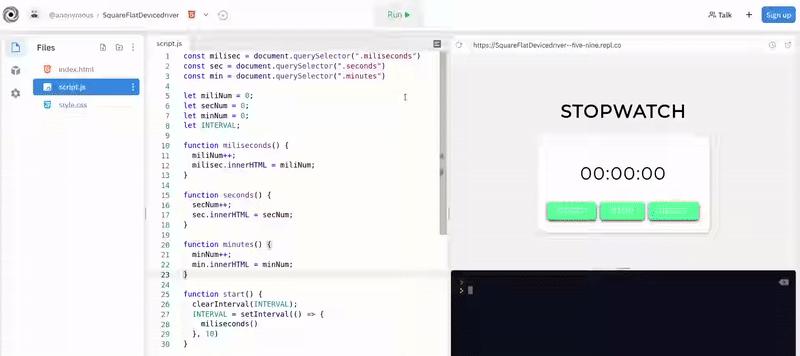
Your code so far:
const millisec = document.querySelector('.milliseconds')
const sec = document.querySelector('.seconds')
const min = document.querySelector('.minutes')

let milliNum = 0
let secNum = 0
let minNum = 0
let INTERVAL

function milliseconds() {
  milliNum++
  millisec.innerHTML = milliNum
}

function seconds() {
  secNum++
  sec.innerHTML = secNum
}

function minutes() {
  minNum++
  min.innerHTML = minNum
}

function start() {
  clearInterval(INTERVAL)
  INTERVAL = setInterval(() => {
    milliseconds()
  }, 10)
}
Now if you click RUN and then if you press the start button, nothing happens because we haven't called that function.
For this, we will go back to our index.html file. We will add an onclick attribute to our buttons and we will call our functions.
<button onclick="start()" class="start">START</button>
<button onclick="stop()" class="stop">STOP</button>
<button onclick="reset()" class="reset">RESET</button>
Explanation: Although we haven't defined the stop() and the reset() function, we will still add them to onclick here and we'll define them later.
Now whenever someone clicks the button, the start() function will be called!
Let's go back to our JavaScript file and test it out!
Hmm... It works, but not as expected. There are 2 flaws.
- If you notice closely, it doesn't show as '01' '02' etc. but it shows as '1' '2' etc. Now this looks really bad.
- Milliseconds keep on increasing and even above 100 but the seconds never increase.
Let's fix them up.
Inside our milliseconds() function, we'll write some if-else statements. So, if milliseconds are less than 10, we'll appends a 0 to it and if the milliseconds are equal to 99, we'll set the milliseconds to 0 again and we'll call the seconds() function.
Your milliseconds() function will look like this:
function milliseconds() {
  milliNum++
  if (milliNum < 10) {
    millisec.innerHTML = '0' + milliNum
  } else {
    millisec.innerHTML = milliNum
  }

  if (milliNum == 99) {
    milliNum = 0
    seconds()
  }
}
Similarly, we'll do this for the seconds and minutes too!
Challenge: Try to implement the if-else statements inside the seconds() and minutes() function.
Hints:
- Seconds should not exceed 60 and should call the
minutes()function. - Minutes don't need to be checked whether they exceed or not because hours are absent in our stopwatch.
Here's the answer:
function milliseconds() {
  milliNum++
  if (milliNum < 10) {
    millisec.innerHTML = '0' + milliNum
  } else {
    millisec.innerHTML = milliNum
  }

  if (milliNum == 99) {
    milliNum = 0
    seconds()
  }
}

function seconds() {
  secNum++
  if (secNum < 10) {
    sec.innerHTML = '0' + secNum
  } else {
    sec.innerHTML = secNum
  }

  if (secNum == 59) {
    secNum = 0
    minutes()
  }
}

function minutes() {
  minNum++
  if (minNum < 10) {
    min.innerHTML = '0' + minNum
  } else {
    min.innerHTML = minNum
  }
}
Now RUN the code, click on the START button and voila! Everything is perfect!
Now, we have only 2 last functions to implement and we are done! They are the stop() function and the reset() function.
The stop() function is pretty much a one-line code. You can write it in 2 different ways as you like.
Either in this way:
function stop() {
  clearInterval(INTERVAL)
}
Or:
const stop = () => clearInterval(INTERVAL)
We just have to clear the interval and our stopwatch will stop! Also both the functions work exactly the same!
NOTE: Only write any 1 of the above 2 functions.
For resetting the stopwatch, we'll implement the reset() function which will:
- Clear all the intervals.
- Set all the variables to 0.
- Set the
innerHTMLto "00".
function reset() {
  clearInterval(INTERVAL)
  milliNum = 0
  secNum = 0
  minNum = 0
  millisec.innerHTML = '00'
  sec.innerHTML = '00'
  min.innerHTML = '00'
}
After we are done implementing these 2 functions, I'm happy to say that you have actually completed building the stopwatch!
Here's the final JavaScript code:
const millisec = document.querySelector('.milliseconds')
const sec = document.querySelector('.seconds')
const min = document.querySelector('.minutes')

let milliNum = 0
let secNum = 0
let minNum = 0
let INTERVAL

function milliseconds() {
  milliNum++
  if (milliNum < 10) {
    millisec.innerHTML = '0' + milliNum
  } else {
    millisec.innerHTML = milliNum
  }

  if (milliNum == 99) {
    milliNum = 0
    seconds()
  }
}

function seconds() {
  secNum++
  if (secNum < 10) {
    sec.innerHTML = '0' + secNum
  } else {
    sec.innerHTML = secNum
  }

  if (secNum == 59) {
    secNum = 0
    minutes()
  }
}

function minutes() {
  minNum++
  if (minNum < 10) {
    min.innerHTML = '0' + minNum
  } else {
    min.innerHTML = minNum
  }
}

function start() {
  clearInterval(INTERVAL)
  INTERVAL = setInterval(() => {
    milliseconds()
  }, 10)
}

function stop() {
  clearInterval(INTERVAL)
}

function reset() {
  clearInterval(INTERVAL)
  milliNum = 0
  secNum = 0
  minNum = 0
  millisec.innerHTML = '00'
  sec.innerHTML = '00'
  min.innerHTML = '00'
}
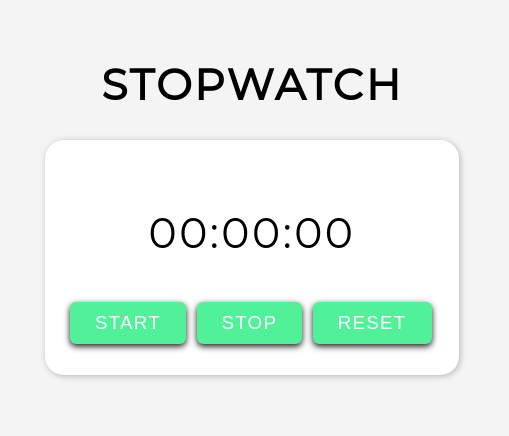
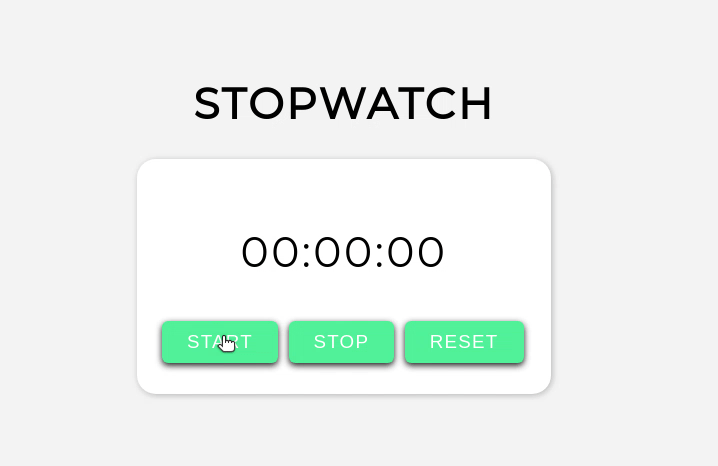
Here's the final output:
Part 4: The End
If you haven't created an account on repl.it, make sure you do so to save this wonderful piece of creation!
Here are some things which you can do:
- Try adding hours in our stopwatch.
- Try to change the START button to display RESUME whenever someone clicks STOP.
- Make the milliseconds as 3 digits instead of 2!
- Try adding laps in our stopwatch which will get displayed when someone clicks STOP.
Here are some more examples for you:
- Stopwatch with hours.
- Stopwatch with 3 digit milliseconds.
- Stopwatch with dynamically changing START button.
Built by Hack Clubbers:
Now that you have finished building this wonderful project, you should share your beautiful creation with other people! Remember, it's as easy as giving them your URL!
You probably know the best ways to get in touch with your friends and family, but if you want to share your project with the worldwide Hack Club community there is no better place to do that than on Slack.
- In a new tab, open and follow these directions to signup for our Slack.
- Then, post the link to the
#scrapbookchannel to share it with everyone! Also ping me with what you've built!
PS: I'm @fayd on Slack!