

Join Hack Club Horizons! Ship your projects and fly to your first hackathon →
Links to a live demo and the final code below. This workshop should take around 1 hour.
Hey there! Today we're gonna build a replica of the Staples Easy Button that'll make sounds when clicked.

Just like in Personal Website, we'll be using HTML to build stuff for your browser.
On top of that, we'll be introducing JavaScript, a new programming language that'll let us do a bunch of neat-o things on the site, like play sounds in your browser. We'll also using a piece of software with JavaScript called jQuery that makes writing JavaScript much easier.
If this feels like an exorbitant amount of new tools -- you're absolutely right. But no need to fret, we'll be biting these off in manageable chunks. And remember, you're not expected to understand everything by the end of this workshop.
Part I: Set-up
Getting ready to repl it on Repl.it
First let's go onto Repl.it and start a new HTML repl
From there, clear the contents of index.html and paste in the following
<!DOCTYPE html>
<html>
  <head>
    <title>That Was Easy</title>
  </head>
  <body></body>
</html>
Similar to our HTML file in the Personal Website workshop, we have a bare template upon which we will build interactions for the user. As you can see, we've named this page "That Was Easy" using the title (<title>) tag.
Go ahead and Run your repl; you should just see a blank page in the preview.
Adding script.js to the HTML File
As you can see in the pane on the left (called a file tree) we have an script.js file. Since HTML depends on JavaScript to make our button play sounds, we must include a reference to the JavaScript file within the HTML file. We can do this by using an HTML tag called the script tag (<script>), which is how JavaScript files are included in HTML files.
The script tag has an attribute called source (src), which is where we will fill in the URL to the JavaScript file we want to include.
Let's write this line of code inside the body of the HTML file, to include our script.js file:
<script src="script.js"></script>
There! Now our HTML file knows that it should grab the script.js file.
For this workshop, we'll be using the handy library called jQuery inside our script.js. jQuery is a collection of functions and JavaScript code written to make writing JavaScript for the browser much easier. It provides a cleaner and simpler way to make things happen, almost like shortcuts.
We'll let the browser know that we'll be using jQuery by once again using a <script> tag. jQuery can be found at this URL, so that's what we will put as the value for src.
Since we will be using jQuery in script.js, script.js will be reliant on jQuery. Thus, we will put the script tag containing jQuery above the one containing script.js in the body of index.html in order to load jQuery before loading script.js like so:
<body>
  <script src="https://code.jquery.com/jquery-3.3.1.min.js"></script>
  <script src="script.js"></script>
</body>
Now we have successfully hooked up the JavaScript to the HTML. Our index.html now looks like this:
<!DOCTYPE html>
<html>
  <head>
    <title>That Was Easy</title>
  </head>
  <body>
    <script src="https://code.jquery.com/jquery-3.3.1.min.js"></script>
    <script src="script.js"></script>
  </body>
</html>
Adding style.css to the HTML File
Lastly, we'll add our style.css to the HTML file. Add it to the head of index.html under the title, like so:
<head>
  <title>That Was Easy</title>
  <link href="style.css" rel="stylesheet" />
</head>
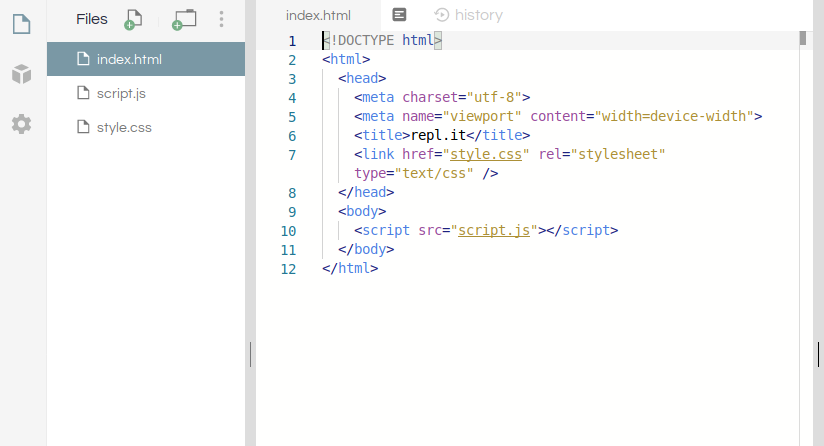
index.html now looks like this:
<!DOCTYPE html>
<html>
  <head>
    <title>That Was Easy</title>
    <link href="style.css" rel="stylesheet" />
  </head>
  <body>
    <script src="https://code.jquery.com/jquery-3.3.1.min.js"></script>
    <script src="script.js"></script>
  </body>
</html>
Part II: The HTML File
Adding the Button
Now that we've set up our HTML file, let's add a button using the <button> element.
We use the button tag by typing the text we want on the button between the start (<button>) and close (</button>) tags. Create a button in the body of index.html, by typing a line above the script tags, like so:
<body>
  <button>Easy</button>

  <script src="https://code.jquery.com/jquery-3.3.1.min.js"></script>
  <script src="script.js"></script>
</body>
This button will say "Easy" on it. Save and refresh live preview to see it.
You can have any text on your button.
Now index.html looks like this:
<!DOCTYPE html>
<html>
  <head>
    <title>That Was Easy</title>
    <link href="style.css" rel="stylesheet" />
  </head>
  <body>
    <button>Easy</button>

    <script src="https://code.jquery.com/jquery-3.3.1.min.js"></script>
    <script src="script.js"></script>
  </body>
</html>
As a user, we can identify this button as the "Easy" button. But how will we identify it in code? One easy way is to supply each with an attribute known as an "id."
Adding an id to the Button
An id is a unique-valued attribute we can add to HTML elements. We'll give our button its own id by modifying the previously added line, which will help us assign the corresponding sound to it.
<button id="easy">Easy</button>
Our HTML now looks like this:
<!DOCTYPE html>
<html>
  <head>
    <title>That Was Easy</title>
    <link href="style.css" rel="stylesheet" />
  </head>
  <body>
    <button id="easy">Easy</button>

    <script src="https://code.jquery.com/jquery-3.3.1.min.js"></script>
    <script src="script.js"></script>
  </body>
</html>
Part III: The JavaScript File
Now it's time to write the functionality behind our sound-playing button. We can separate this into several steps:
- playing a sound
- creating a function that plays the sound
- detecting a click on the button, and executing the function when that happens
Let's open up script.js and start writing JavaScript!
Playing the Sound
JavaScript makes using audio easy with the Audio object. We are going to play audio in our code by creating an Audio object for our .mp3 file.
We'll be storing the Audio object in a variable. A variable in JavaScript is something that stores a value. First, let's declare the existence of our variable by typing the following into script.js:
var thatWasEasy
Go ahead and download our "That was easy" audio from the link below
https://easy--prophetorpheus.repl.co/that_was_easy.mp3
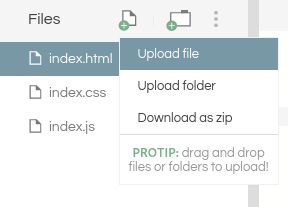
Once you've downloaded the audio file, click on the three dots above the file tree and select the "Upload file" option
Next, we'll make a new Audio object with the that_was_easy.mp3, and assign it to our variable, by modifying the line we just added:
- var thatWasEasy;
+ var thatWasEasy = new Audio("that_was_easy.mp3");
Here, we've created a new Audio object that will have the sound that_was_easy.mp3, and assigned the Audio object to a variable named thatWasEasy which we declared in the same line.
And we'll play the sound by using a built-in method (.play()) included in the Audio object. We'll add this line beneath the creation of thatWasEasy, like so:
var thatWasEasy = new Audio('that_was_easy.mp3')
thatWasEasy.play()
.play() is a function that is a part of the Audio object, and it plays the sound.
Yay! We've added audio to our webpage.
Now if you Run your repl and reload the live preview, you may get to hear your "That was easy!" audio play. If it doesn't play, no need to fret, adding the button click will make it work :)
Creating Functions
Right now the Audio play function gets triggered whenever a user loads the page. But we don't want this. We want the sound to play at our command.
To have a little more control over this, let's create a function that will play the sound only when we call the function. A function in JavaScript stores a set of instructions in a variable. We can call the function to execute these instructions whenever we want.
We can create a function by enclosing the code we've already written in the following way:
- var thatWasEasy = new Audio("that_was_easy.mp3");
- thatWasEasy.play();

+ function sayThatWasEasy() {
+   var thatWasEasy = new Audio("that_was_easy.mp3");
+   thatWasEasy.play();
+ }
Now, if we run our project, we'll find that nothing happens at all. Even when we press the button, no functions get called.
It's time to connect the button to our sound function.
Detecting the Click
In order to connect the button and the function, we must first identify the button in script.js. Conveniently, we've given the button an id attribute in our index.html, making it easy to refer to in script.js.
We can use jQuery to find the button, by using special syntax. We'll type this below our function, in script.js:
$('#easy')
Now that we have selected our button in the JavaScript by its id, we can access the methods attached to the button.
One of the methods is .on(). This method sets the button to execute some instructions when something happens. Things that happen on the page by way of the user doing something are referred to as "events." When we use the .on() method, we pair an event with a function that we want to be called when the event happens.
Here, we will use the method to detect the "click" event, so we'll provide "click" as the first argument to .on():
- $("#easy");
+ $("#easy").on("click");
.on() takes two arguments, the second of which is what you want to happen when the event has occurred. In our case, we want the browser to say "That was easy!", so we add the function sayThatWasEasy which we have already written, as an argument.
- $("#easy").on("click");
+ $("#easy").on("click", sayThatWasEasy);
To reiterate, we are:
- Selecting the "Easy" button, using jQuery and its syntax (i.e., notation) for recognizing elements by
id, and specifying theeasyid. - Calling the method associated with the button called
.on(), which is able to bind a certain function with a certain event and thus dictate that the function be called when the event occurs. - Choosing to detect the "click" event.
- Passing as an argument the function
sayThatWasEasy(), to tell.on()that upon noticing a click, it should execute the function (which in turn plays thethat_was_easy.mp3sound).
Now, save your script.js file and try clicking on the "Easy" button! Congratulations!
Your JavaScript file should now look like this:
function sayThatWasEasy() {
  var thatWasEasy = new Audio('that_was_easy.mp3')
  thatWasEasy.play()
}

$('#easy').on('click', sayThatWasEasy)
Part IV: The CSS File
Our button looks a little pathetic in its small default form. Open up style.css and let's spruce it up with some CSS!
First, let's select it! Using our very handy id:
#easy {
}
And now let's make it bigger. A lot bigger.
#easy {
  width: 300px;
  height: 300px;
}
Looking good so far. Let's change the shape:
#easy {
  width: 300px;
  height: 300px;
  border-radius: 150px;
}
Next, we'll set the border color to be black and the background color to red:
#easy {
  width: 300px;
  height: 300px;
  border-radius: 150px;
  border-color: black;
  background-color: red;
}
Finally, we'll increase the text size and change the text color to white:
#easy {
  width: 300px;
  height: 300px;
  border-radius: 150px;
  border-color: black;
  background-color: red;
  font-size: 50px;
  color: white;
}
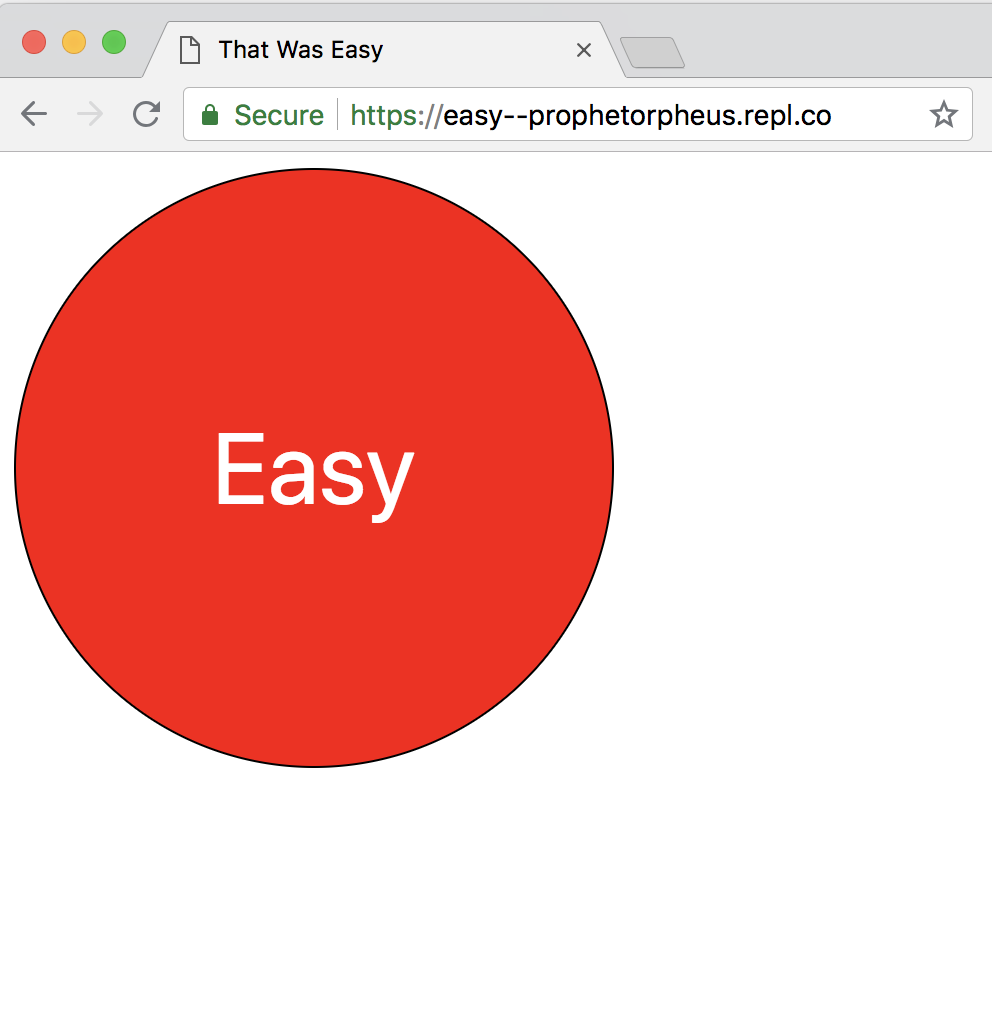
It's beautiful!
Part V: Upgrading
Maybe you'd like to use this button mouse-free. Maybe you prefer using the keyboard to navigate your computer. Well, we can make that happen.
Detecting Keyboard Inputs on the Page
First, we must set up our JavaScript so that the page can detect that we have pressed a key. Thanks to jQuery, we can add this feature easily, with the following line of code, which we will type at the bottom of our script.js:
$(document).keypress()
jQuery has a method called .keypress(), which takes a function as an argument. It then executes this function when a key is pressed. Much like .on(), .keypress() listens for an event; specifically, it listens for the key pressed event. Here, we are specifying that we want to listen for a key press on the entire document, hence $(document). $(document) is how jQuery refers to the whole page.
Now that we have set up the page to react when a key is pressed, we just need to tell it how to react. And we will do this by writing a function that gives instructions on what to do in the event that a key is pressed.
We will declare this function and name it delegateKeypress and pass it as an argument to the method .keypress() like so:
- $(document).keypress();
+ $(document).keypress(delegateKeypress);
+
+ function delegateKeypress(event) {
+
+ }
delegateKeypress() takes an event as an argument, since that is where the information about the event is contained. Information that we need, such as which key was pressed.
Attaching Keyboard Inputs to Sound
Speaking of that, we need to assign keys to our sounds, so let's find the key code for the key you want to use. You can find key codes by putting the line console.log(event.charCode); in your delegateKeypress function, opening up external live preview, and looking at the console in the Inspector while you press a key.
Now that we've gotten the key code, we'll use a conditional in the event of a key press event to check if the key that was pressed was the key that we designated to make the sound.
We'll add this in our delegateKeypress() function:
if (event.charCode == 32) {
}
Here we are saying, if the event's charCode is equal to 32 (that's the character code for the space character), then do something (we haven't yet specified what). event.charCode is an attribute of the event, and it contains the value of the character code of the key that was pressed.
So, if the character code is indeed 32, I would like the browser to tell me "That was easy!". No problem, we are already well-versed in playing sounds:
function delegateKeypress(event) {
  if (event.charCode == 32) {
    var thatWasEasy = new Audio('that_was_easy.mp3')
    thatWasEasy.play()
  }
}
Simple enough, we just repeat the same code we typed earlier. Now if we press the space bar, we will hear "That was easy!".
But wait, we already have preexisting code to play the that_was_easy sound. It's in sayThatWasEasy(), and the sound will be played when the button is clicked (à la $("#easy").on("click", sayThatWasEasy);)! If only we could somehow use that for this key press function.
Well, we can. Everything is set up for the button to play a sound once it gets clicked, so why don't we just click it...with code?
What? We can click things using code? Of course. A click is just an event. We can trigger events with JavaScript by doing just that. jQuery offers a method called .trigger() which takes, you guessed it, a type of event.
That said, we can now replace our repetitive code like so:
function delegateKeypress(event) {
  if (event.charCode == 32) {
-   var thatWasEasy = new Audio("that_was_easy.mp3");
-   thatWasEasy.play();
+   $("#easy").trigger("click");
  }
}
And just like that, we have leveraged jQuery to select the "Easy" button ($("#easy")) and trigger a click event on it (.trigger("click")).
What do you think happens next? Once the click event is triggered on the button, the button detects the click and responds by calling sayThatWasEasy(), thanks to the previously added line $("#easy").on("click", sayThatWasEasy);.
Our JavaScript file now looks like this:
function sayThatWasEasy() {
  var thatWasEasy = new Audio('that_was_easy.mp3')
  thatWasEasy.play()
}

$('#easy').on('click', sayThatWasEasy)

$(document).keypress(delegateKeypress)

function delegateKeypress(event) {
  if (event.charCode == 32) {
    $('#easy').trigger('click')
  }
}
And that's it! Run the repl with your new script.js and try out the key binding!
Part VI: Publishing and Sharing
Post on #ship with the URL, so everyone can see and play with your amazing creation!
Part VII: Hacking
Now that you know how to add sounds to buttons, you can do many things, including but not limited to:
- Customize with more sounds (just add more buttons and sounds) Orpheus Remix
- Use sounds of someone speaking and construct silly sentences
setIntervalfor looping. Tell someone how easy it was, forever.- Change what this button does. Maybe it doesn't play a sound. Maybe it changes the background color! Maybe it trolls the user and closes the tab!
- Bind more actions to keys. Surprise me.
Made by Other Hack Club Hackers:
| That Was Yeezy |
|---|
 |
Made by Professionals: