
Join Hack Club Horizons! Ship your projects and fly to your first hackathon →
In this workshop, you'll learn how to create your own VR World using A-Frame, a web framework for building 3D/AR/VR experiences.
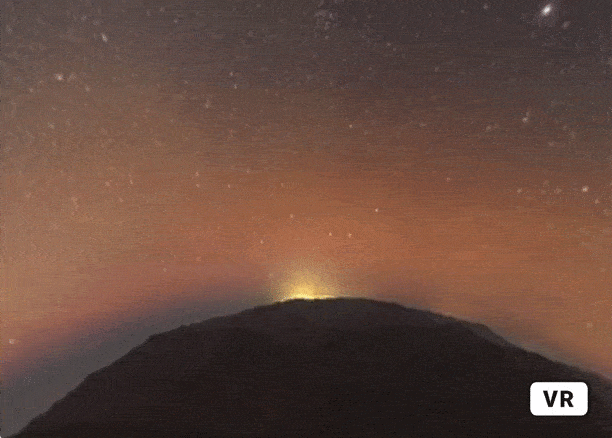
Here is the live demo and the source code of what we are making:
Set-up
This workshop requires a very basic knowledge of HTML. Don’t worry if you get stuck at some point in the workshop, everything is explained the best way for you to understand!
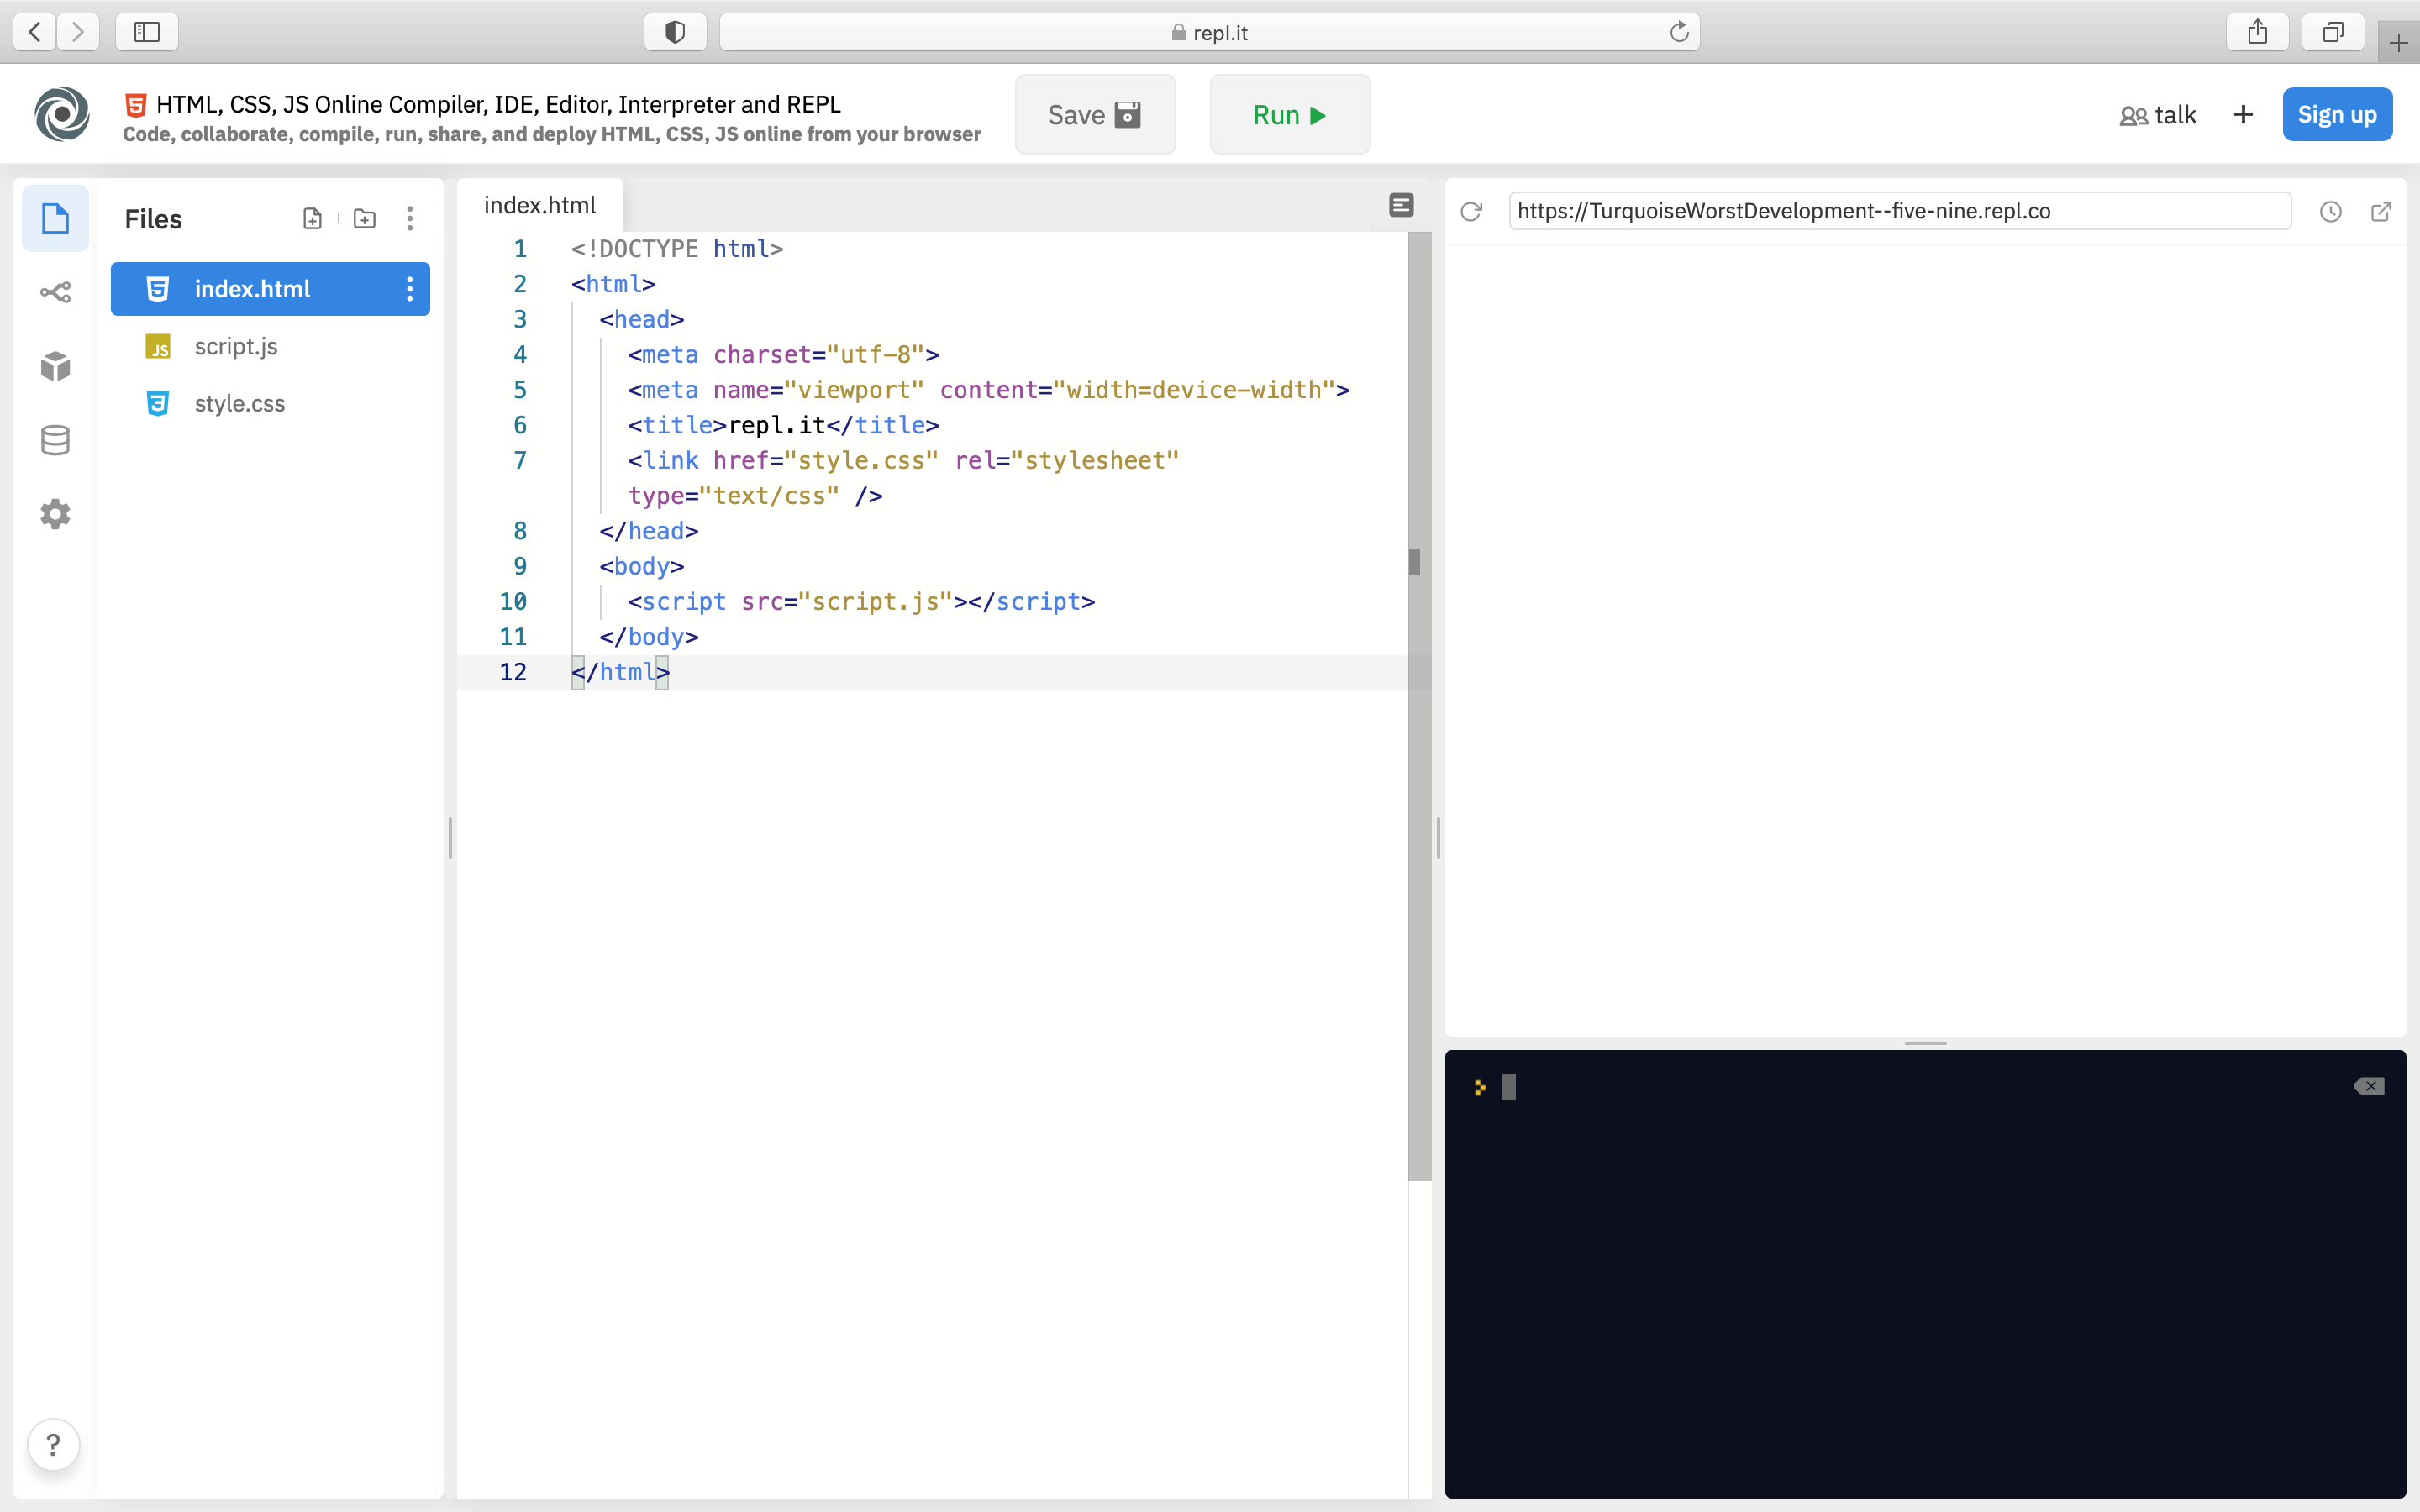
For this workshop we will use Repl.it, a free, online code editor. Click here to get started with a new HTML project on repl.it.
Setting up A-frame
To get started, we'll need to link A-frame with our HTML document, there are multiple ways to do this that you can find here, we'll just need to drop a <script> tag pointing to the CDN build:
<script src="https://aframe.io/releases/1.0.4/aframe.min.js"></script>
Now, we can start creating our virtual world.

A-Scene
In order to start creating our virtual world, we must create a scene. The scene is the main tag, everything that we want to put inside of our world will go inside of this tag, that includes the primitives, the camera, and many more that we will get to know through this workshop.
So go ahead and create an scene inside of the <body> tag:
<body>
    <a-scene>
        <!--Here you put the components-->
    </a-scene>
</body>
Now, we can start putting in whatever we want, but let's start with the basics. Inside of the tag <a-scene> create the component <a-sky>.
<a-scene>
    <a-sky color="#62B1FF"></a-sky>
</a-scene>
This will render a huge sphere with a color or a texture mapped to the inside. There are a bunch of attributes that we can use to modify our sky, feel free to play with them:
- color
- radius
- roughness
- src
- etc
But, you might be wondering how to put a texture inside of that sphere instead of a color, well is very simple... A-Frame has an asset management system that allows us to place our assets in one place and to preload and cache assets for better performance.
<a-scene>
    <a-assets>
        <img id="sky-texture" src="sky.jpg">
    </a-assets>
    <a-sky src="#sky-texture"></a-sky>
</a-scene>
Let's break this down:
- First we created our asset management system using the
<a-assets>tag and then inside of that tag, we created an<img>component with the attributesidandsrc. - Then we replaced the
colorattribute withsrcand pointed it to the id of theimgcomponent.
This will render a beautifully textured sky.
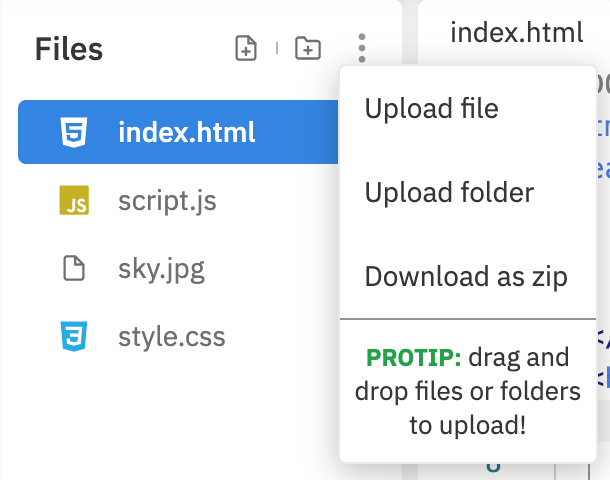
Uploading images to Repl.it is very simple, just go to the navigation bar and click on Upload file:
Now that we have a sky, we'll need a floor too. We can simply do this using the <a-plane> component.
<a-plane src="#ground" height="10" width="10" rotation="-90 0 0"></a-plane>
Breaking down:
- As seen before, I created an
imgcomponent inside of the asset management system and then I used thesrcattribute to point to that asset. - We gave this plane a
heightand awidth, feel free to make it either bigger or smaller. - We had to rotate the plane component because by default it is not parallel to the ground.
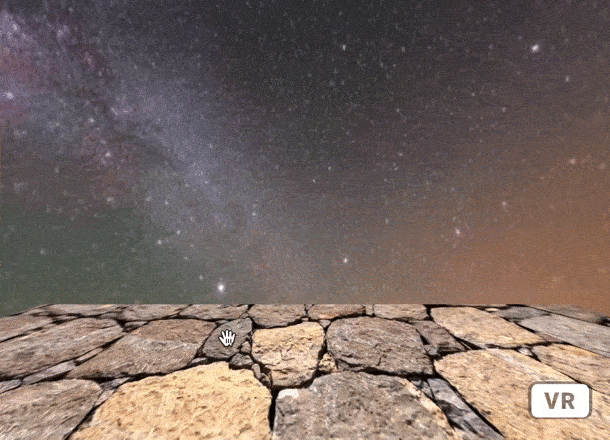
After clicking on run, we'll see a beautiful ground rendered.
But this looks kinda boring, so let's fix this by adding 3d models. There are 2 ways to do this:
- Creating 3D models by ourselves.
- Importing 3D models.
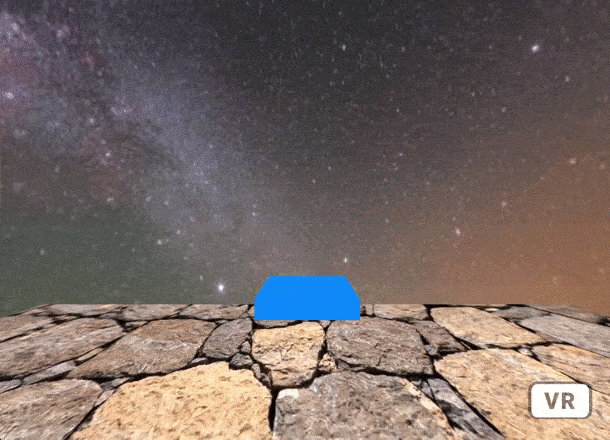
We'll try both methods very quickly. So let's start with the first one... inside of the <a-scene> tag, create the <a-box> primitive and give it these attributes:
<a-box width="1" height="0.2" position="0 0.75 -5" color="#AB8360"></a-box>
Let's break this down:
- The width, height, and depth attributes can either shrink the box or stretch it... Feel free to play around with those.
- We needed to move the cube within the y & z coordinates in order to be able to see the cube. The camera's position is set to
0 0 0by default and also the box's position is set to0 0 0as default, meaning that we can't see the cube unless we move the camera or the cube.
Note: A-frame uses a right-handed coordinate system and uses as distance unit the meter (m)
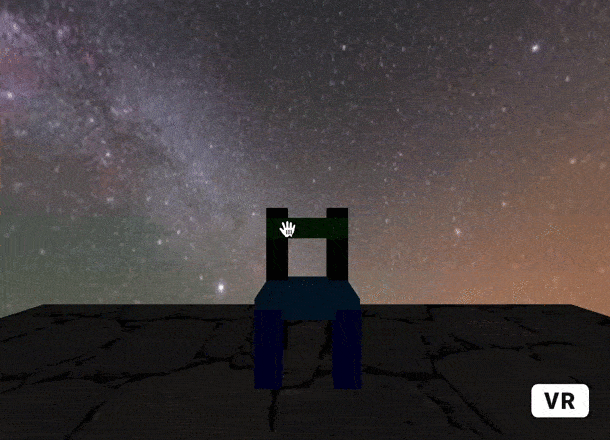
Now, we can use the box we just created as a parent and then create a bunch of child primitives.
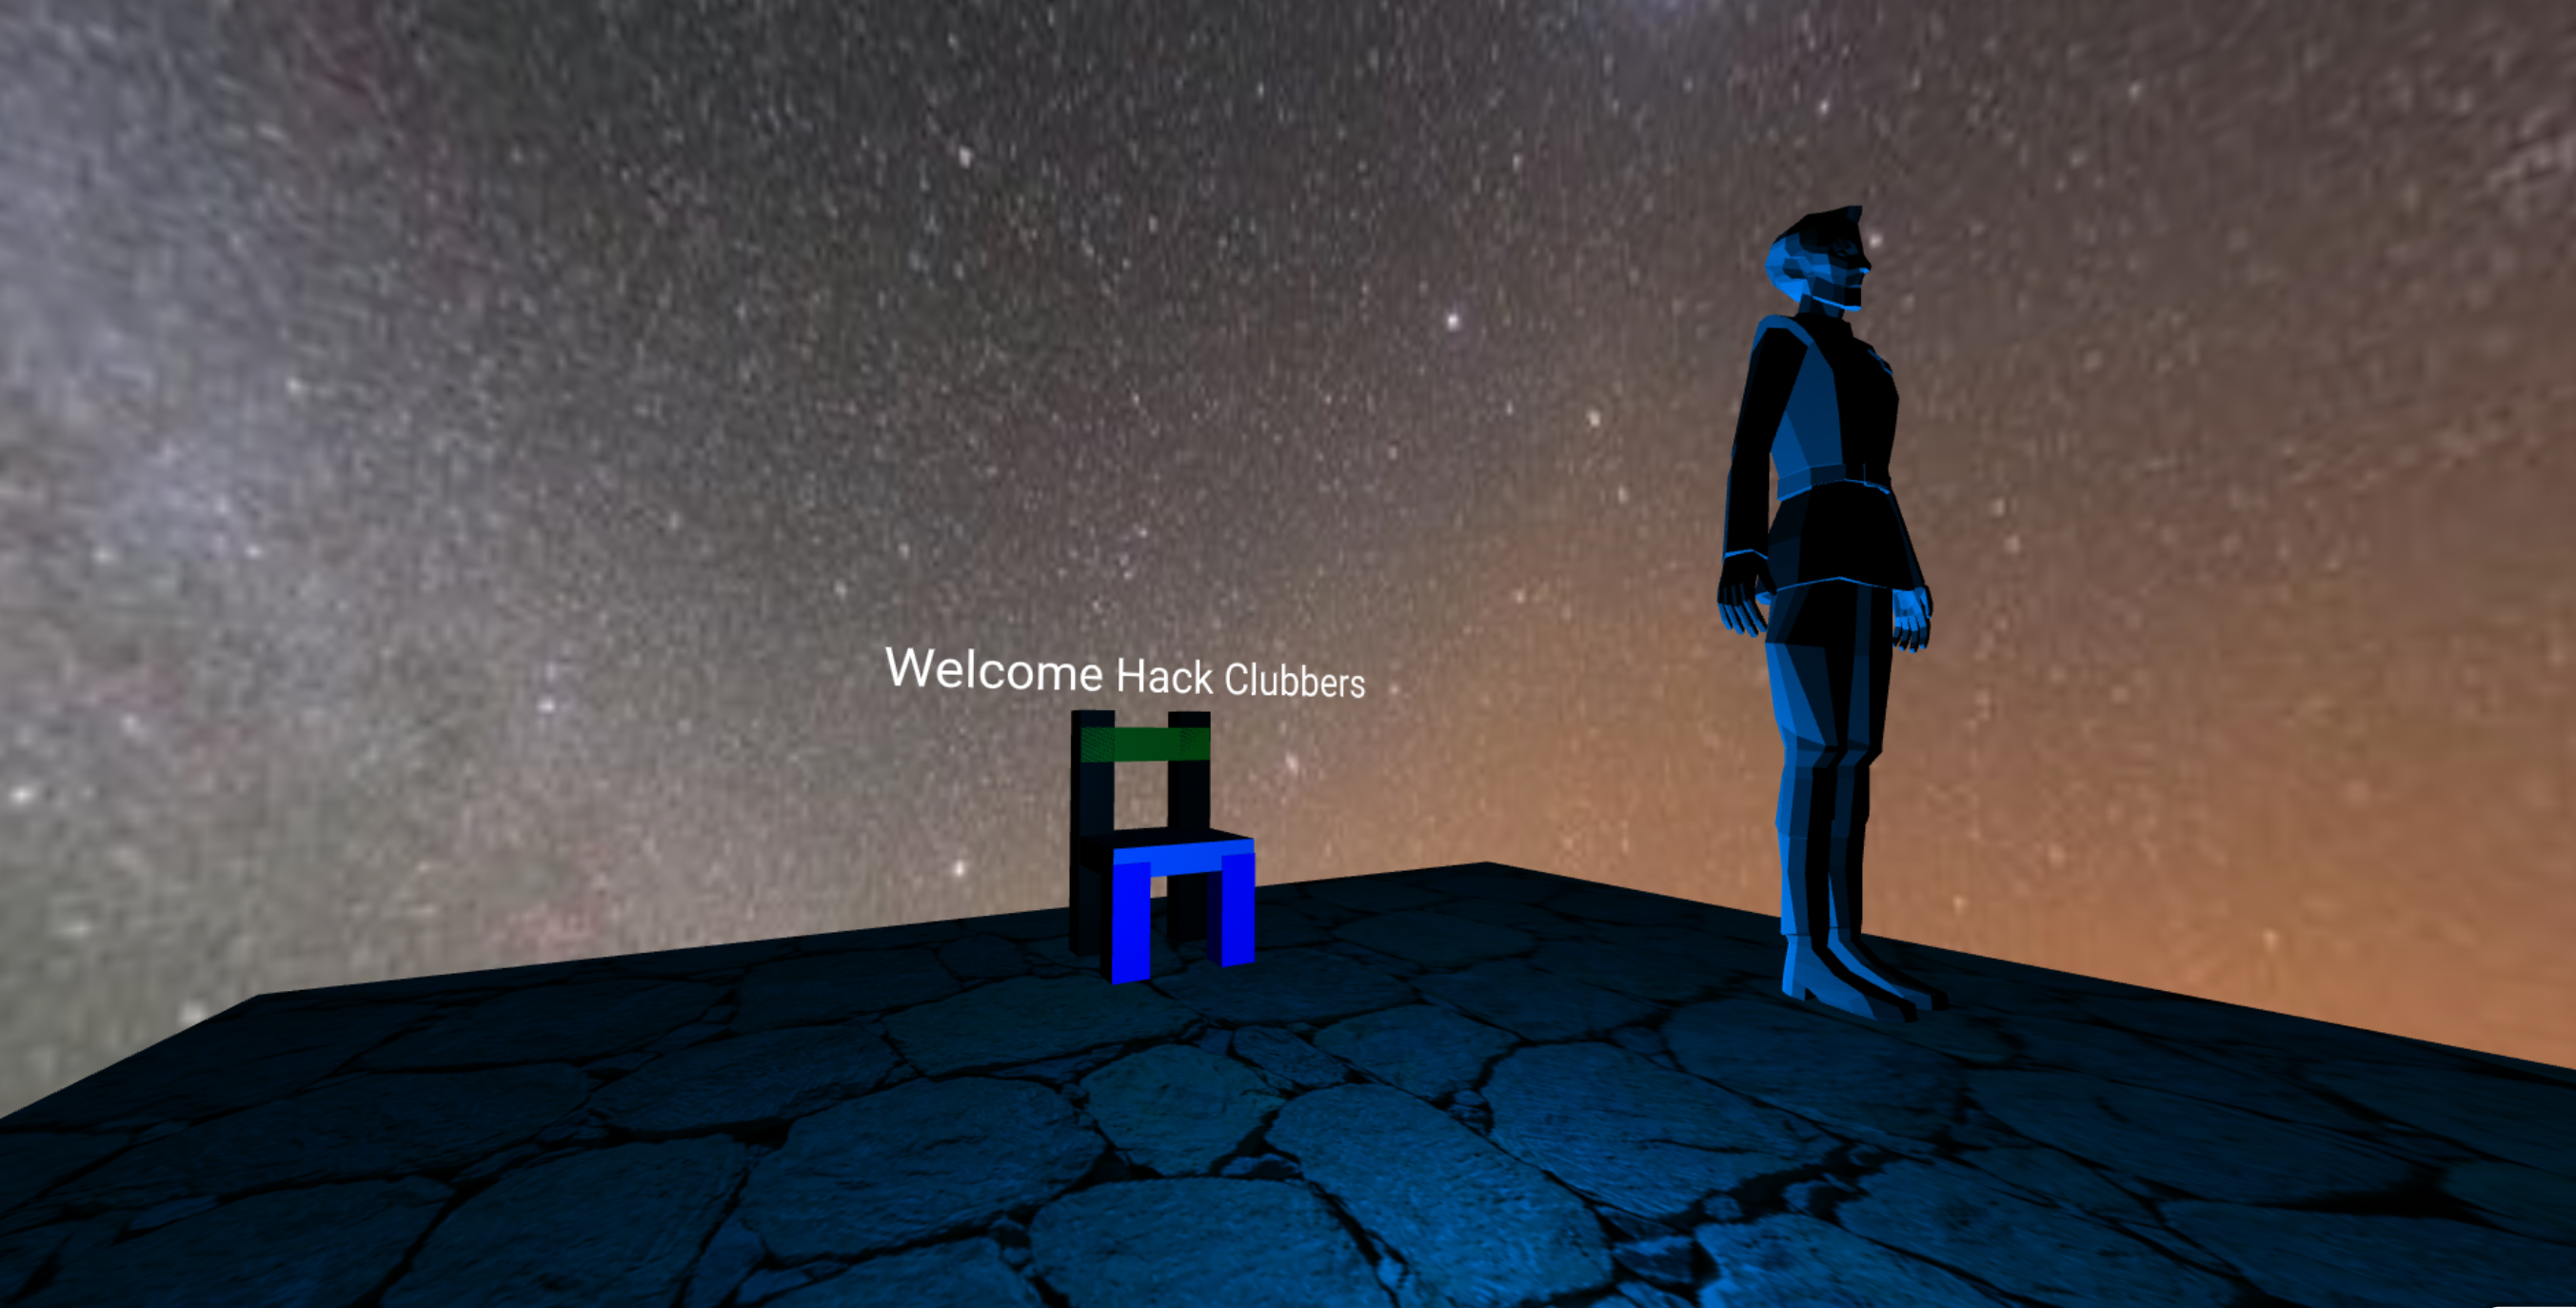
<a-box width="1" height="0.2" position="0 0.75 -5" color="#AB8360">
    <a-box color="black" width="0.25" height="2" depth="0.25" position="-0.38 0 -0.38"></a-box>
    <a-box color="black" width="0.25" height="2" depth="0.25" position="0.38 0 -0.38"></a-box>
    <a-box color="blue" width="0.25" height="1" depth="0.25" position="-0.38 -0.5 0.38"></a-box>
    <a-box color="blue" width="0.25" height="1" depth="0.25" position="0.38 -0.5 0.38"></a-box>
    <a-box color="green" width="1" height="0.25" depth="0.25" position="0 0.75 -0.38"></a-box>
</a-box>
The code above will render a chair. When we use child and parent objects we'll see that our parent object is now the default position 0 0 0 for our child objects, so child objects won't appear where the camera is, but where the parent object is.
Let's break this down:
- We created 2 black stretched boxes and moved them within the x and z coordinates.
- Then we created 2 blue boxes with half of the height of the 2 black boxes, and then we moved these boxes within the y coordinate.
- Finally, we created another box with the width of the parent child and the height of the black boxes, then I moved it within the y and z coordinates.

With this method you can make almost whatever you want, it's just about imagination. Now, I'll show you how to import a 3D Model.
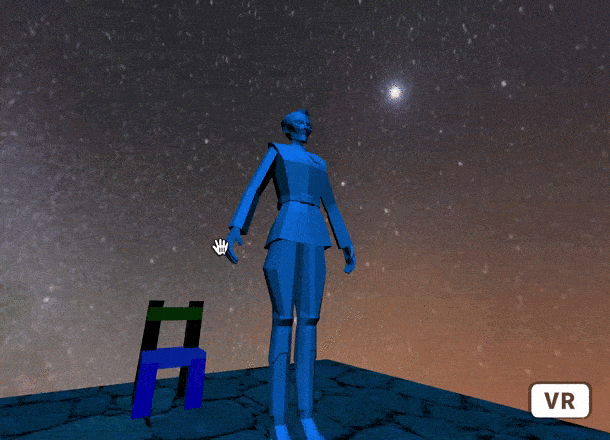
A-Frame provides components for loading glTF and OBJ. But A-frame recommends using glTF if possible as glTF gains adoption as the standard for transmitting 3D models over the Web.
So, all we have to do to import a 3D model is to create an asset item component inside of the asset management system, and then create the <a-entity> primitive inside of our scene pointing to the <a-asset-item> component using the gltf-model attribute.
<a-assets>
    <a-asset-item  id="model"  src="scene.gltf"  ></a-asset-item>
</a-assets>

<a-entity  gltf-model="#model"></a-entity>
Here's what we get:

There are thousands of websites where you can get the 3D models from, here are some of them:
Now, there's something else that we can add to our VR World, sounds. Sounds are very important because they help us to get immersed in our world.
All you have to do is to create an audio component inside of the asset management system and then create a sound primitive inside of the scene pointing to the audio component:
<a-assets>
    <audio id="background" src="background.wav"></audio>
</a-assets>

<a-sound src="#background" autoplay="true"></a-sound>
In the real world sound emits from a source, and the closer you get to that source, the louder you can hear it. We can do the same thing in A-frame using the attribute position. Also, notice that we added the attribute autoplay because we want the sound to start playing when the user joins our world.
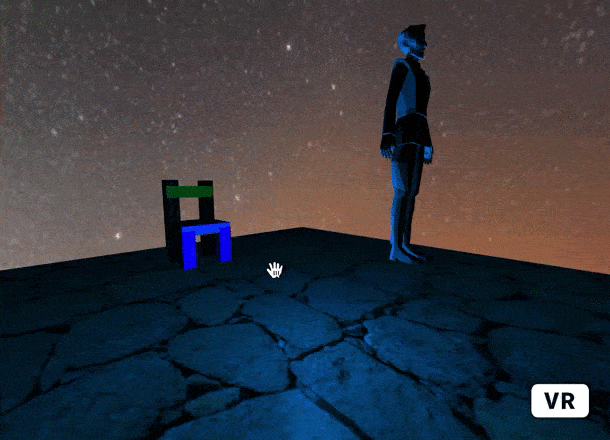
Another thing that is very important when making a world is, lightning. What if we wanted to make a dark and scary world?– well here's where you can play with the lightning.
There are 3 types of lights that we can use, ambient, directional, and point. Check these 3 examples:
Ambient lights
Ambient lights affects all the primitives in the scene, if you chose a dark color then all the elements would look darker, same thing for lighter colors. We can use the `intensity` attribute to change the way this light affects the scene.<a-light type="ambient" color="#43484d" intensity="0.5"></a-light>
This is how ambient lights affect the scene and its components:
Directional lights
Directional lights are like a light source that is infinitely far away, but shining from a specific direction, like the sun. We must specify where the light is pointing to, we do that using the attribute `target`, which points to the position of the child object.<a-light type="directional" target="#childbox" color="#007DF9" intensity="0.5" position="-0.5 1 1">
<a-box id="childbox"></a-box>
</a-light>
You can see here that this type of light acts just like the sun, you can also see how it only affects one side of the objects and the other is completely black.
Point lights
Point lights are like light bulbs; we can position them around the scene, the closer the light bulb gets to an object, the greater the object is lit.<a-light type="point" color="#43484d" position="-0.5 1 1"></a-light>
Here's how point lights interact with the scene and the objects.
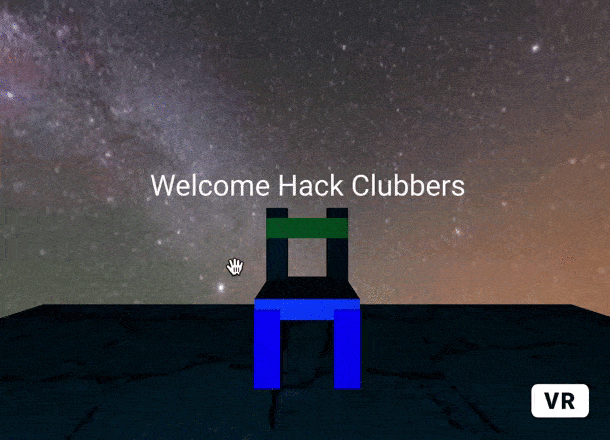
Okay, the last thing but not least we'll add text to our world. We can use texts to do a bunch of things, such as telling users what to do or what something is for.
Here's how it works:
<a-text value="Welcome Hack Clubbers" color="#white" align="center" position="0 2 -3" scale="1.5 1.5 1.5"></a-text>
Let's break this down:
- We can simply add text using the primitive
<a-text>. - The attribute
valueis where we put our text. - The
alignattribute is used to align our text to the center, to the left and to the right. - We can use the
scaleattribute to make the text bigger or smaller, the default size is1 1 1.
This is what the code above renders:
And that's all for today's workshop :)
Hack it
Yay! you made it to the end of this workshop.

Make your own VR World and share it in the Hack Club Slack, I would love to see what you can create using what you've learned in this workshop!
Other examples
Check out these cool VR Worlds made by other people:
Resources
Check out these resources to go further.