
Join Hack Club Horizons! Ship your projects and fly to your first hackathon →
Are you a beginner in JavaScript and don't know where to get started? If yes, you're in the right place! Being a beginner in coding and having to learn the fundamentals can be very painful—but the best way to learn is to make fun, simple projects! In this workshop, you'll build an app that uses web APIs to get the weather for any city.
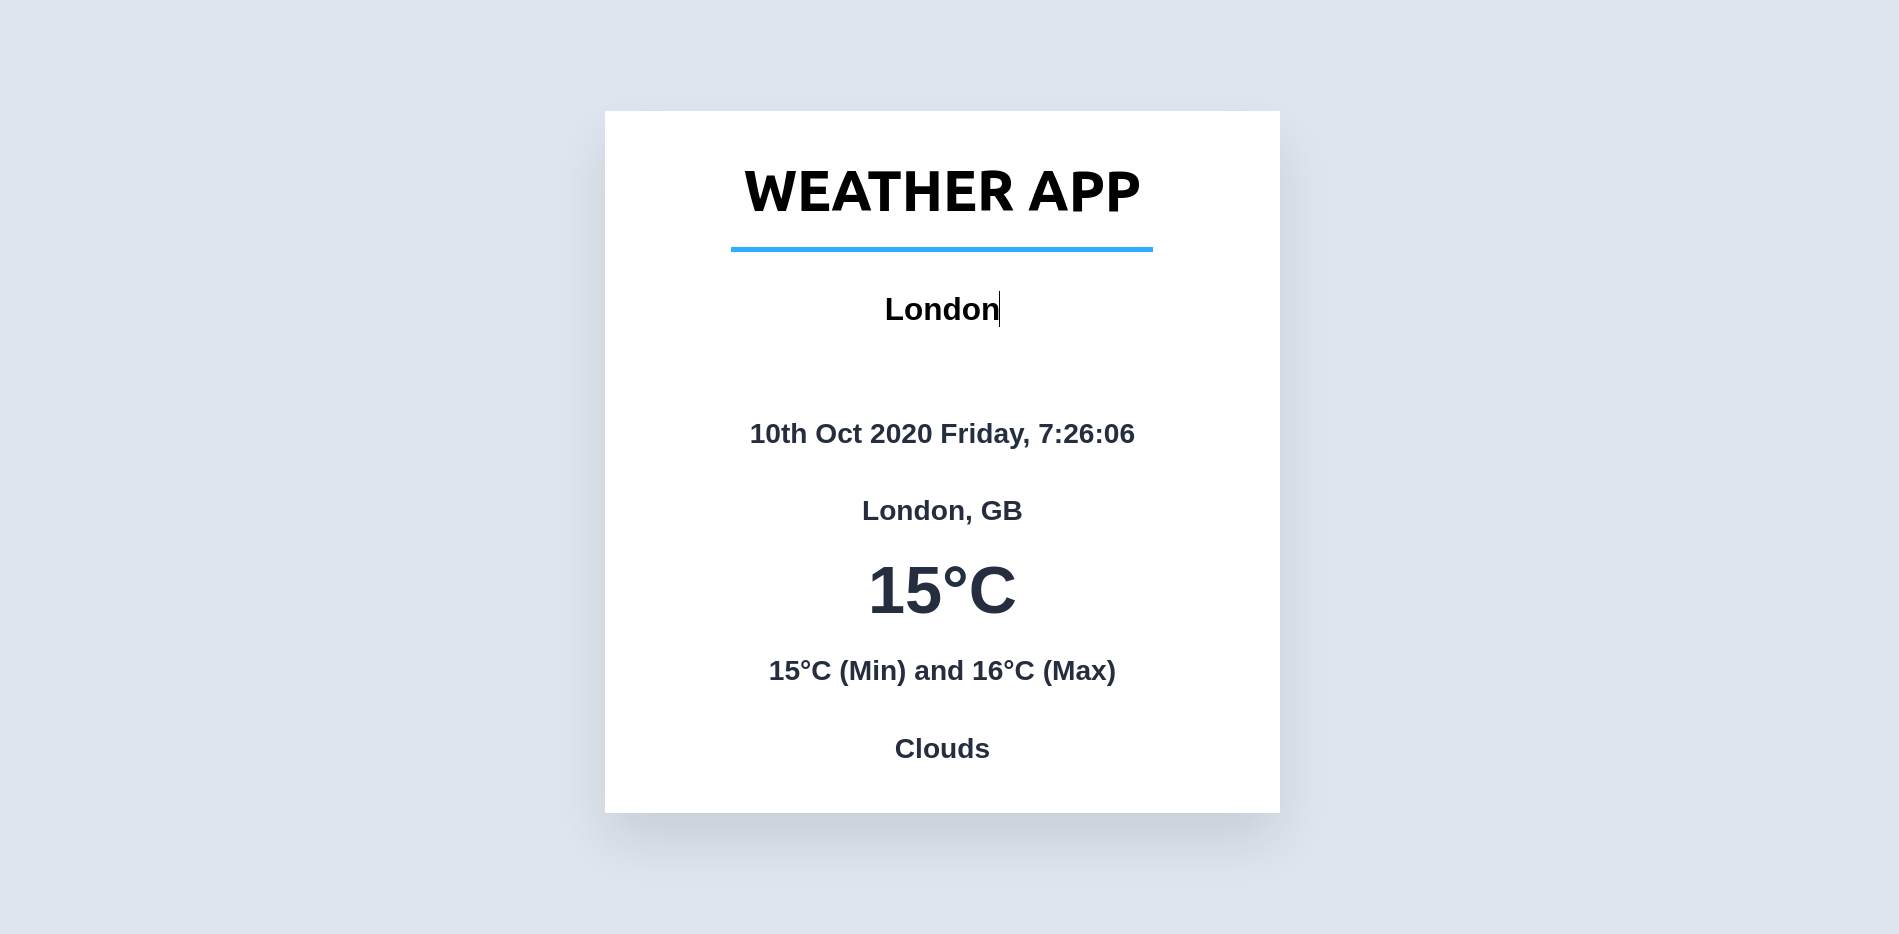
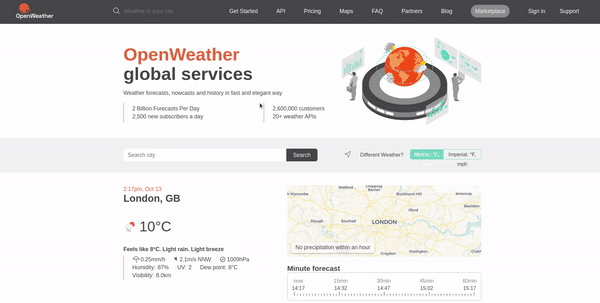
Here's what the final version looks like:
The source code & demo are hyperlinked here.
By the end of this workshop, you'll have learned how to use web APIs, which you could expand to use even more creatively in future projects. You'll also learn some fundamentals of JavaScript, as well as some nice CSS tricks for making beautiful designs.
1. The Prerequisites
Some basic understanding of HTML, CSS and Javascript/JSON.
If you don't know any of the above, don't worry! This workshop will guide you through it.
2. Setting up the project on Repl.it
We're going to be using Repl.it for this workshop. Repl.it is a powerful collaborative online code editor.
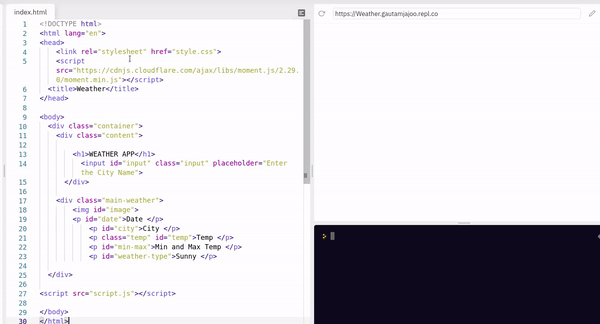
Start by creating a new HTML/CSS repl.it project.
You should see three files: index.html, style.css, and script.js.
3. Making a skeleton of the app
Let's start by adding some code to the index.html file. The basic lines are already added in the file.
At line 1 we have <!DOCTYPE html>. This declares that this file is an HTML file. If we take a look in the <html> tag, we will find a <body> tag. Here's where we will write the code.
If you take a look in the <head> tag in your HTML, you will find a line of code
<link href="style.css" rel="stylesheet" type="text/css" />
This means that your HTML file is linked to your CSS file and if you look at the <body> tag you will find
<script src="script.js"></script>
This means that your HTML file is linked to your JavaScript.
Let us start the project by changing the title of the project. After changing the title, the HTML file will look something like this:
<!DOCTYPE html>
<html>
  <head>
    <meta charset="utf-8" />
    <meta name="viewport" content="width=device-width" />
    <title>Weather App</title>
    <link href="style.css" rel="stylesheet" type="text/css" />
  </head>
  <body>
    <script src="script.js"></script>
  </body>
</html>
Apart from the default script.js file, we will also be using moment.js, a JavaScript library to display the date and time of the user.
To link external file like moment.js we will use CDNJS which is an open-source CDN service powered by Cloudflare.
Add
<script src="https://cdnjs.cloudflare.com/ajax/libs/moment.js/2.29.0/moment.min.js"></script>
inside the <head> tag.
Since we have linked the JS file with the HTML file, now we can start making a card on which we would display the content.
Inside our <body> we will add <div> with class as container which makes our main card and for the content inside the card we will add another
<div> with class as content.
<div class="container">
  <div class="content"></div>
</div>
Make sure you close the </div> tags which have been declared above.
Then add a heading to our app using <h1> inside the content.
<h1>WEATHER APP</h1>
To input the city from the user we use the input tag and declare it with class as input and id as input.
class is used for passing information in CSS and id is used for JavaScript.
Also, add a placeholder which guides the user about the expected value of the input.
<input id="input" class="input" placeholder="Enter the City Name" />
On the next line, close the content <div>:
<div class="content">
  <h1>WEATHER APP</h1>
  <input id="input" class="input" placeholder="Enter the City Name" />
</div>
Lastly, after the content we will add <div> with class as main-weather to display the weather details.
<div class="main-weather"></div>
We will be using <p> for every detail we display. We will assign an id to every weather detail we display. Hence we declare the weather details in the following manner:
<div class="main-weather">
  <p id="date">Date</p>
  <p id="city">City</p>
  <p id="temp">Temp</p>
  <p id="min-max">Min and Max Temp</p>
  <p id="weather-type">Sunny</p>
</div>
Also, add a class as temp to the <p> tag which declares the temperature because we wish to display the temperature of the city with bigger font than the other details.
<div class="main-weather">
  <p id="date">Date</p>
  <p id="city">City</p>
  <p class="temp" id="temp">Temp</p>
  <p id="min-max">Min and Max Temp</p>
  <p id="weather-type">Sunny</p>
</div>
Make sure you close all the </div> tags which have been declared initially.
Our HTML code is done and now we can move to the CSS part. At the end, the HTML code will look like this:
<!DOCTYPE html>
<html>
  <head>
    <meta charset="utf-8" />
    <meta name="viewport" content="width=device-width" />
    <title>Weather App</title>
    <link href="style.css" rel="stylesheet" type="text/css" />
    <script src="https://cdnjs.cloudflare.com/ajax/libs/moment.js/2.29.0/moment.min.js"></script>
  </head>
  <body>
    <div class="container">
      <div class="content">
        <h1>WEATHER APP</h1>
        <input id="input" class="input" placeholder="Enter the City Name" />
      </div>
      <div class="main-weather">
        <p id="date">Date</p>
        <p id="city">City</p>
        <p class="temp" id="temp">Temp</p>
        <p id="min-max">Min and Max Temp</p>
        <p id="weather-type">Sunny</p>
      </div>
    </div>
    <script src="script.js"></script>
  </body>
</html>
4. Improving the design of skeleton using CSS
We will start the CSS code by adding some style to the <body>.
We start by adding a background-color to our website. With CSS, colours can be specified in different ways and one of the ways is using hexadecimal value. In this app we will be using hexadecimal value i.e. #dfe7ee which makes the background colour as bluish-grey.
If you want to customize the color, you can use W3School's HTML Color Picker to get the hexdecimal value of whatever color you want.
We will set the display value as flex because flex enables you to align your items perfectly to the center without using float or positioning.
Also, we will add font-size, line-height and font-family for styling the text inside our body.
Navigate to the style.css file in your repl and add:
body {
  background-color: #dfe7ee;
  line-height: 1.5;
  font-size: 125%;
  display: flex;
  font-family: sans-serif;
}
Now we will start making the Card. As mentioned earlier in the project, we assign a background-color to our container.
Then we will use padding to generate some space around our element inside the defined borders. Similarly, we add margin to create space around elements but outside the defined borders. These properties help us in positioning the card on our webpage.
Padding is the space between the content and the border, whereas margin is the space outside the border.
Next, we will add a shadow behind the card to give it a highlighted effect. For this we will be using the drop-shadow() function which applies a drop shadow effect to the card we have created.
For more information regarding webkit-filter refer to the Mozilla Docs
.container {
  background-color: #fff;
  padding: 0 4.5em 7em;
  margin: 1em auto 0 auto;
  -webkit-filter: drop-shadow(0 1em 1em rgba(0, 0, 0, 0.1));
  filter: drop-shadow(0 1em 1em rgba(0, 0, 0, 0.1));
}
Then, we will add some properties to our heading by adding the following code:
h1 {
  border-bottom: 4px solid deepskyblue;
  padding-bottom: 0.25em;
  margin-bottom: 1em;
  text-align: center;
}
So far, we have designed almost all the elements and we are only left with the input box and the details which we wish to display.
For the input box we add the following code:
.input {
  border: none;
  outline: none;
  font-size: 1.4rem;
  text-align: center;
  font-weight: bold;
  display: flex;
  margin-left: auto;
  margin-right: auto;
}
We will set the border and outline as none which deletes the line displayed around the input box.
And for the weather details, we add the following code:
.main-weather {
  display: none;
  line-height: 2.2rem;
  height: 30vh;
  text-align: center;
  color: #23313e;
  font-weight: bold;
}

.temp {
  margin: 25px;
  font-size: 40pt;
}
Here we will use display: none because we wish to hide everything before any input is taken. Rest all elements are basic CSS properties.
This is how our CSS file should look like:
body {
  background-color: #dfe7ee;
  line-height: 1.5;
  font-size: 125%;
  display: flex;
  font-family: sans-serif;
}

/*--------------------------------------- CARD ------------------------------------------*/

.container {
  background-color: #fff;
  padding: 0 4.5em 7em;
  margin: 1em auto 0 auto;
  -webkit-filter: drop-shadow(0 1em 1em rgba(0, 0, 0, 0.1));
  filter: drop-shadow(0 1em 1em rgba(0, 0, 0, 0.1));
}

/* ------------------------------------------------------------------------------------------*/

h1 {
  border-bottom: 4px solid deepskyblue;
  padding-bottom: 0.25em;
  margin-bottom: 1em;
  text-align: center;
}

/*----------------------------------- INPUT BOX---------------------------------------*/

.input {
  border: none;
  outline: none;
  font-size: 1.4rem;
  text-align: center;
  font-weight: bold;
  display: flex;
  margin-left: auto;
  margin-right: auto;
}

/*------------------------------------DETAILS----------------------------------------- */

.main-weather {
  display: none;
  line-height: 2.2rem;
  height: 30vh;
  text-align: center;
  color: #23313e;
  font-weight: bold;
}

.temp {
  margin: 25px;
  font-size: 40pt;
}
5. Adding JS and learning how to work with APIs
What are APIs and how do they work?
API stands for Application Programming Interface. An API is a messenger that delivers your request to the provider that you’re requesting it from and then delivers the response back to you. In layman terms, an API is like a waiter in a restaurant where you are the customer and the chef is the provider. You order the food to the waiter and the waiter informs the chef and then serves the food back to the customer.
Developers use APIs to make their jobs more efficient by reusing code and only changing the part that is relevant to the process they want to improve.
For this project, we will be using a weather API which is given by OpenWeather.
To start with, you will have to create an account on OpenWeather to generate an API key for yourself.
After you have registered, head over to the API section.
We will be using the Current Weather Data API. Subscribe to the API and after that, you will receive the key in your profile.
After setting up the key we will now read the docs to know in which format does the API responds. The docs contain the format for API call, under By City name tab.
The format of the API looks something like this:
API.openweathermap.org/data/2.5/weather?q={city name}&appid={API key}
Here, we will divide the API into two parts, first will be the base URL and second will be the API key.
Since we have a rough idea about the given API we can now start to code the JS file.
At the start, we define a constant named as api which contains our Baseurl and our key.
Navigate to the script.js file and add:
const api = {
  key: '**************************************',
  base: 'https://api.openweathermap.org/data/2.5/weather?',
};
Replace the key with your API key present in the profile section.
Now we will add a function to take the input city when the user presses enter. Also in the same loop, we will add the function to display the date and time of
the user at that particular time using moment.js.
The format of date and time is:
Mo MMM YYYY dddd, h:mm:ss
Many more formats and information are mentioned in the Moment.js Docs.
After that, add the following code:
const Input = document.getElementById('input');

Input.addEventListener('keypress', (event) => {
  if (event.keyCode == 13) {
    getWeather(Input.value);

    /*-------------------FUNCTION TO DISPLAY DATE AND TIME USING MOMENT.JS-------------------*/

    const date = moment();
    document.getElementById('date').innerHTML = date.format(
      'Mo MMM YYYY dddd, h:mm:ss'
    );

    document.querySelector('.main-weather').style.display = 'block'; //used to show the details as initially the display is set as none
  }
});
In the above function, the input of the user is stored in the const Input by using document.getElementById.The getElementById() method returns the element that has the ID attribute with the specified value.
After the user presses enter (whose keycode is 13) we will send the value to the new function getWeather which we will create to get the weather details from the API. The addEventListener() method attaches an event handler to the specified element.
Also, we will store the date in a const date using the moment.js format mentioned in the docs.
Since we had set the display as none initially in main-weather class in CSS, so for multiple queries to be answered we add
document.querySelector('.main-weather').style.display = 'block';
to set display as block otherwise after one query we won't be able to see further details.
Now we will create the getWeather function to get the details from the API.
function getWeather(city) {
  fetch(`${api.base}q=${city}&appid=${api.key}&units=metric`)
    .then((details) => {
      return details.json();
    })
    .then(showWeather);
}
The input value of the user which is passed through the above function is stored in city. As we know the format of API, we will fetch the weather details from the provider using the API. Here api.base is declared in the first line and api.key in the second line of the JS file and city is the input of the user.
.then() is a method in JS which has been defined in the Promise API and is used to deal with asynchronous tasks such as an API call.
Previously, callback functions were used instead of this function which made the code difficult to maintain.
More information about promises are mentioned in Developer Mozilla Docs.
We will also add units=metric in the end, since the API returns in Fahrenheit and we want the temperature to be in Celsius.
As we fetch the weather details, the parameters are stored in the JSON format of details. These details are then passed to function showWeather so
that we can display it to the user.
Now we are on the last step of creating our app, where we need to create a function showWeather to display the details we have received from the
API.
function showWeather(details) {
  //Taking the received values from API into this function
}
Here we pass the details received from API to the showWeather function.
Before coding further we should try seeing what we obtain from the API using console.log().
function showWeather(details) {
  //Taking the received values from API into this function
  console.log(details);
}
The API should return something like:
base: "stations",
clouds: {
  "all": 20
},
coord: {
  "lon": -0.13,
  "lat": 51.51
},
main {
  "feels_like": 6.93,
  "humidity": 71,
  "pressure": 1022,
  "temp": 11.99,
  "temp_max": 12.22,
  "temp_min": 11.62
},
name: "London",
sys: {
  "type": 1,
  "id": 1424,
  "country": "GB"
}
And we can use these details in our app!
function showWeather(details) {
  //Taking the received values from API into this function

  // console.log(details);
  let city = document.getElementById('city');
  city.innerHTML = `${details.name}, ${details.sys.country}`;

  let temperature = document.getElementById('temp');
  temperature.innerHTML = `${Math.round(details.main.temp)}°C`;

  let minMax = document.getElementById('min-max');
  minMax.innerHTML = `${Math.round(
    details.main.temp_min
  )}°C (Min) and ${Math.round(details.main.temp_max)}°C (Max) `;

  let weatherType = document.getElementById('weather-type');
  weatherType.innerHTML = `${details.weather[0].main}`;
}
Since we are using JSON for accessing the details, the format of getting the details is something like this details.property
where details is our JSON object and property could be any element of that object. For choosing the correct property we have to see
the console log of the details we receive from the API.
The innerHTML property returns the content of the element to the HTML.
To round off the temperature we are using the Math.round() function.
The JS code would look something like this:
/*---------------------------------------API--------------------------------------------*/

const api = {
  key: 'YOUR_API_KEY',
  base: 'https://api.openweathermap.org/data/2.5/weather?',
};

/*-----------------------FUNCTION TO TAKE THE VALUES WHEN ENTERED------------------------*/

const Input = document.getElementById('input');

Input.addEventListener('keypress', (event) => {
  if (event.keyCode == 13) {
    getWeather(Input.value); //passing the input value to getWeather function

    /*-------------------FUNCTION TO DISPLAY DATE AND TIME USING MOMENT.JS-------------------*/

    const date = moment();
    document.getElementById('date').innerHTML = date.format(
      'Mo MMM YYYY dddd, h:mm:ss'
    );

    /*----------------------------------------------------------------------------------------*/

    document.querySelector('.main-weather').style.display = 'block'; //used to show the details as initially the display is set as none
  }
});

/*-------------------------------FUNCTION TO GET WEATHER--------------------------------*/

function getWeather(city) {
  fetch(`${api.base}q=${city}&appid=${api.key}&units=metric`) // format for calling api is given on the web docs
    // units=metric used for Celsius, if you remove it the temperature would be in Fahrenheit
    .then((details) => {
      return details.json(); // Sending all details to showWeather function in form of json
    })
    .then(showWeather);
}

/*-------------------------------FUNCTION TO SHOW WEATHER--------------------------------*/

function showWeather(details) {
  //Taking the received values from API into this function

  console.log(details);

  let city = document.getElementById('city');
  city.innerHTML = `${details.name}, ${details.sys.country}`;

  let temperature = document.getElementById('temp');
  temperature.innerHTML = `${Math.round(details.main.temp)}°C`; //Rounding off the temp using math function

  let minMax = document.getElementById('min-max');
  minMax.innerHTML = `${Math.round(
    details.main.temp_min
  )}°C (Min) and ${Math.round(details.main.temp_max)}°C (Max)`;

  let weatherType = document.getElementById('weather-type');
  weatherType.innerHTML = `${details.weather[0].main}`;
}
Yippee! We have now finished coding our weather app and the App is ready to be used.
To see the result, click the green Run button at the top of your repl.
6. Hacking
Here are some things which you should consider to improve your knowledge of APIs and make some changes in this project as well.
-
You could add different images / icons depending upon the weather type(sunny, rainy etc). The API itself provides you with the information about displaying the icons.
-
Try to make another card besides the weather card where you could display the map of the city entered. (You will get to know about new APIs of Maps)
-
There are many other details which we receive from the API(humidity, pressure etc) that we do not display. To see the full response from the API, type the API call from earlier (the first line in
getWeather()) into your browser's URL bar. Then, do interesting things with the rest of that data! -
Add a
right-arrowfont-awesome icon which when clicked shows the details instead of pressingEnter. (Some basic JS practice)
Examples of Hacked Projects
-
Project including other details from the API like Humidity, Pressure etc.
-
Project with some icons based on the weather type of the place.
Last but not the least, be as creative and dynamic as possible. This is only a headstart and I am sure after this workshop you will create some amazing projects.